On this page
Remix 教程
¥Remix Tutorial
我们将构建一个小型但功能丰富的应用,让你可以跟踪你的联系人。没有数据库或其他 "生产就绪" 的东西,所以我们可以专注于 Remix。如果你一直在阅读,我们预计阅读大约需要 30 分钟,否则可以快速阅读。
¥We'll be building a small, but feature-rich app that lets you keep track of your contacts. There's no database or other "production ready" things, so we can stay focused on Remix. We expect it to take about 30 m if you're following along, otherwise it's a quick read.
👉 每次看到此消息,都意味着你需要在应用中执行某些操作!
¥👉 Every time you see this, it means you need to do something in the app!
其余部分仅供参考并加深理解。开始吧。
¥The rest is just there for your information and deeper understanding. Let's get to it.
设置
¥Setup
👉 生成基本模板
¥👉 Generate a basic template
npx create-remix@latest --template remix-run/remix/templates/remix-tutorial
它使用了一个非常简单的模板,但包含了我们的 CSS 和数据模型,因此我们可以专注于 Remix。如果你想了解更多信息,快速入门 可以帮助你熟悉 Remix 项目的基本设置。
¥This uses a pretty bare-bones template but includes our CSS and data model, so we can focus on Remix. The Quick Start can familiarize you with the basic setup of a Remix project if you'd like to learn more.
👉 启动应用
¥👉 Start the app
# cd into the app directory
cd {wherever you put the app}

# install dependencies if you haven't already
npm install

# start the server
npm run dev
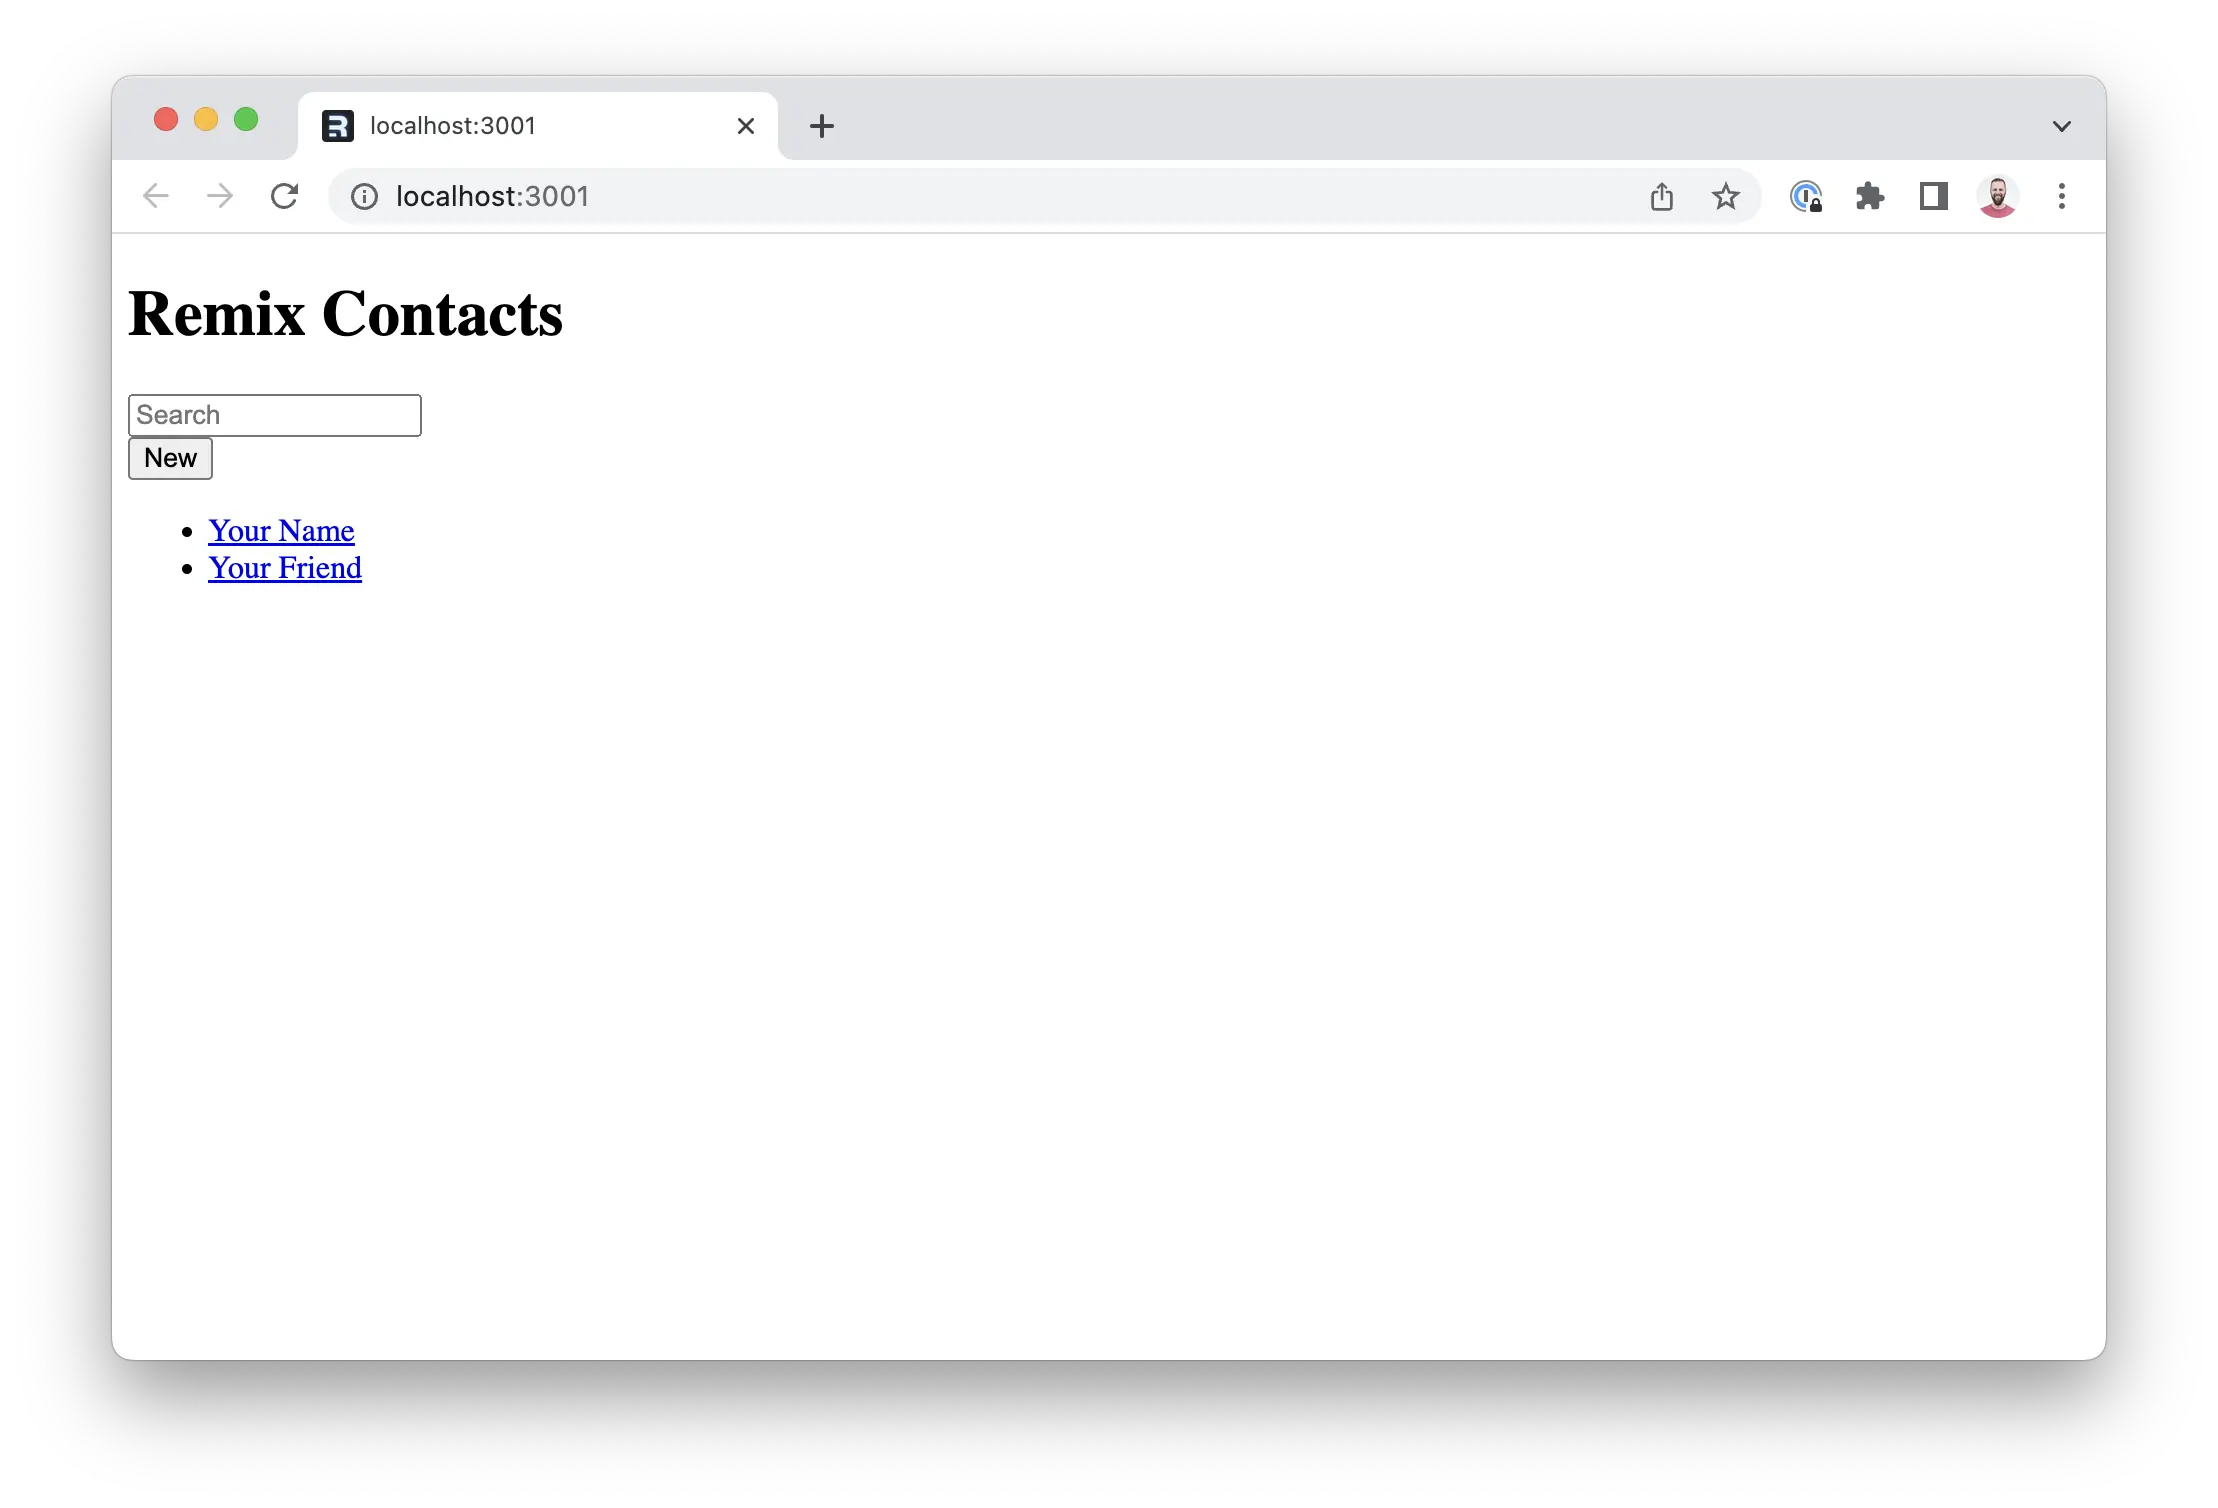
你应该能够打开 [http://localhost:5173]http-localhost-5173 并看到如下所示的无样式屏幕:
¥You should be able to open up http://localhost:5173 and see an unstyled screen that looks like this:
根路由
¥The Root Route
请注意 app/root.tsx 处的文件。这就是我们所说的 "根路由"。它是 UI 中第一个渲染的组件,因此通常包含页面的全局布局。
¥Note the file at app/root.tsx. This is what we call the "Root Route". It's the first component in the UI that renders, so it typically contains the global layout for the page.
Expand here to see the root component code
import {
  Form,
  Links,
  Meta,
  Scripts,
  ScrollRestoration,
} from "@remix-run/react";

export default function App() {
  return (
    <html lang="en">
      <head>
        <meta charSet="utf-8" />
        <meta
          name="viewport"
          content="width=device-width, initial-scale=1"
        />
        <Meta />
        <Links />
      </head>
      <body>
        <div id="sidebar">
          <h1>Remix Contacts</h1>
          <div>
            <Form id="search-form" role="search">
              <input
                aria-label="Search contacts"
                id="q"
                name="q"
                placeholder="Search"
                type="search"
              />
              <div
                aria-hidden
                hidden={true}
                id="search-spinner"
              />
            </Form>
            <Form method="post">
              <button type="submit">New</button>
            </Form>
          </div>
          <nav>
            <ul>
              <li>
                <a href={`/contacts/1`}>Your Name</a>
              </li>
              <li>
                <a href={`/contacts/2`}>Your Friend</a>
              </li>
            </ul>
          </nav>
        </div>

        <ScrollRestoration />
        <Scripts />
      </body>
    </html>
  );
}
使用 links 添加样式表
¥Adding Stylesheets with links
虽然有多种方法可以设计你的 Remix 应用,但为了专注于 Remix,我们将使用一个已经写好的简单样式表。
¥While there are multiple ways to style your Remix app, we're going to use a plain stylesheet that's already been written to keep things focused on Remix.
你可以将 CSS 文件直接导入 JavaScript 模块。Vite 会对资源进行指纹识别,将其保存到构建的客户端目录中,并为模块提供可公开访问的 href。
¥You can import CSS files directly into JavaScript modules. Vite will fingerprint the asset, save it to your build's client directory, and provide your module with the publicly accessible href.
👉 导入应用样式
¥👉 Import the app styles
import type { LinksFunction } from "@remix-run/node";
// existing imports

import appStylesHref from "./app.css?url";

export const links: LinksFunction = () => [
  { rel: "stylesheet", href: appStylesHref },
];
每个路由都可以导出一个 links 函数。它们将被收集并渲染到我们在 app/root.tsx 中渲染的 <Links /> 组件中。
¥Every route can export a links function. They will be collected and rendered into the <Links /> component we rendered in app/root.tsx.
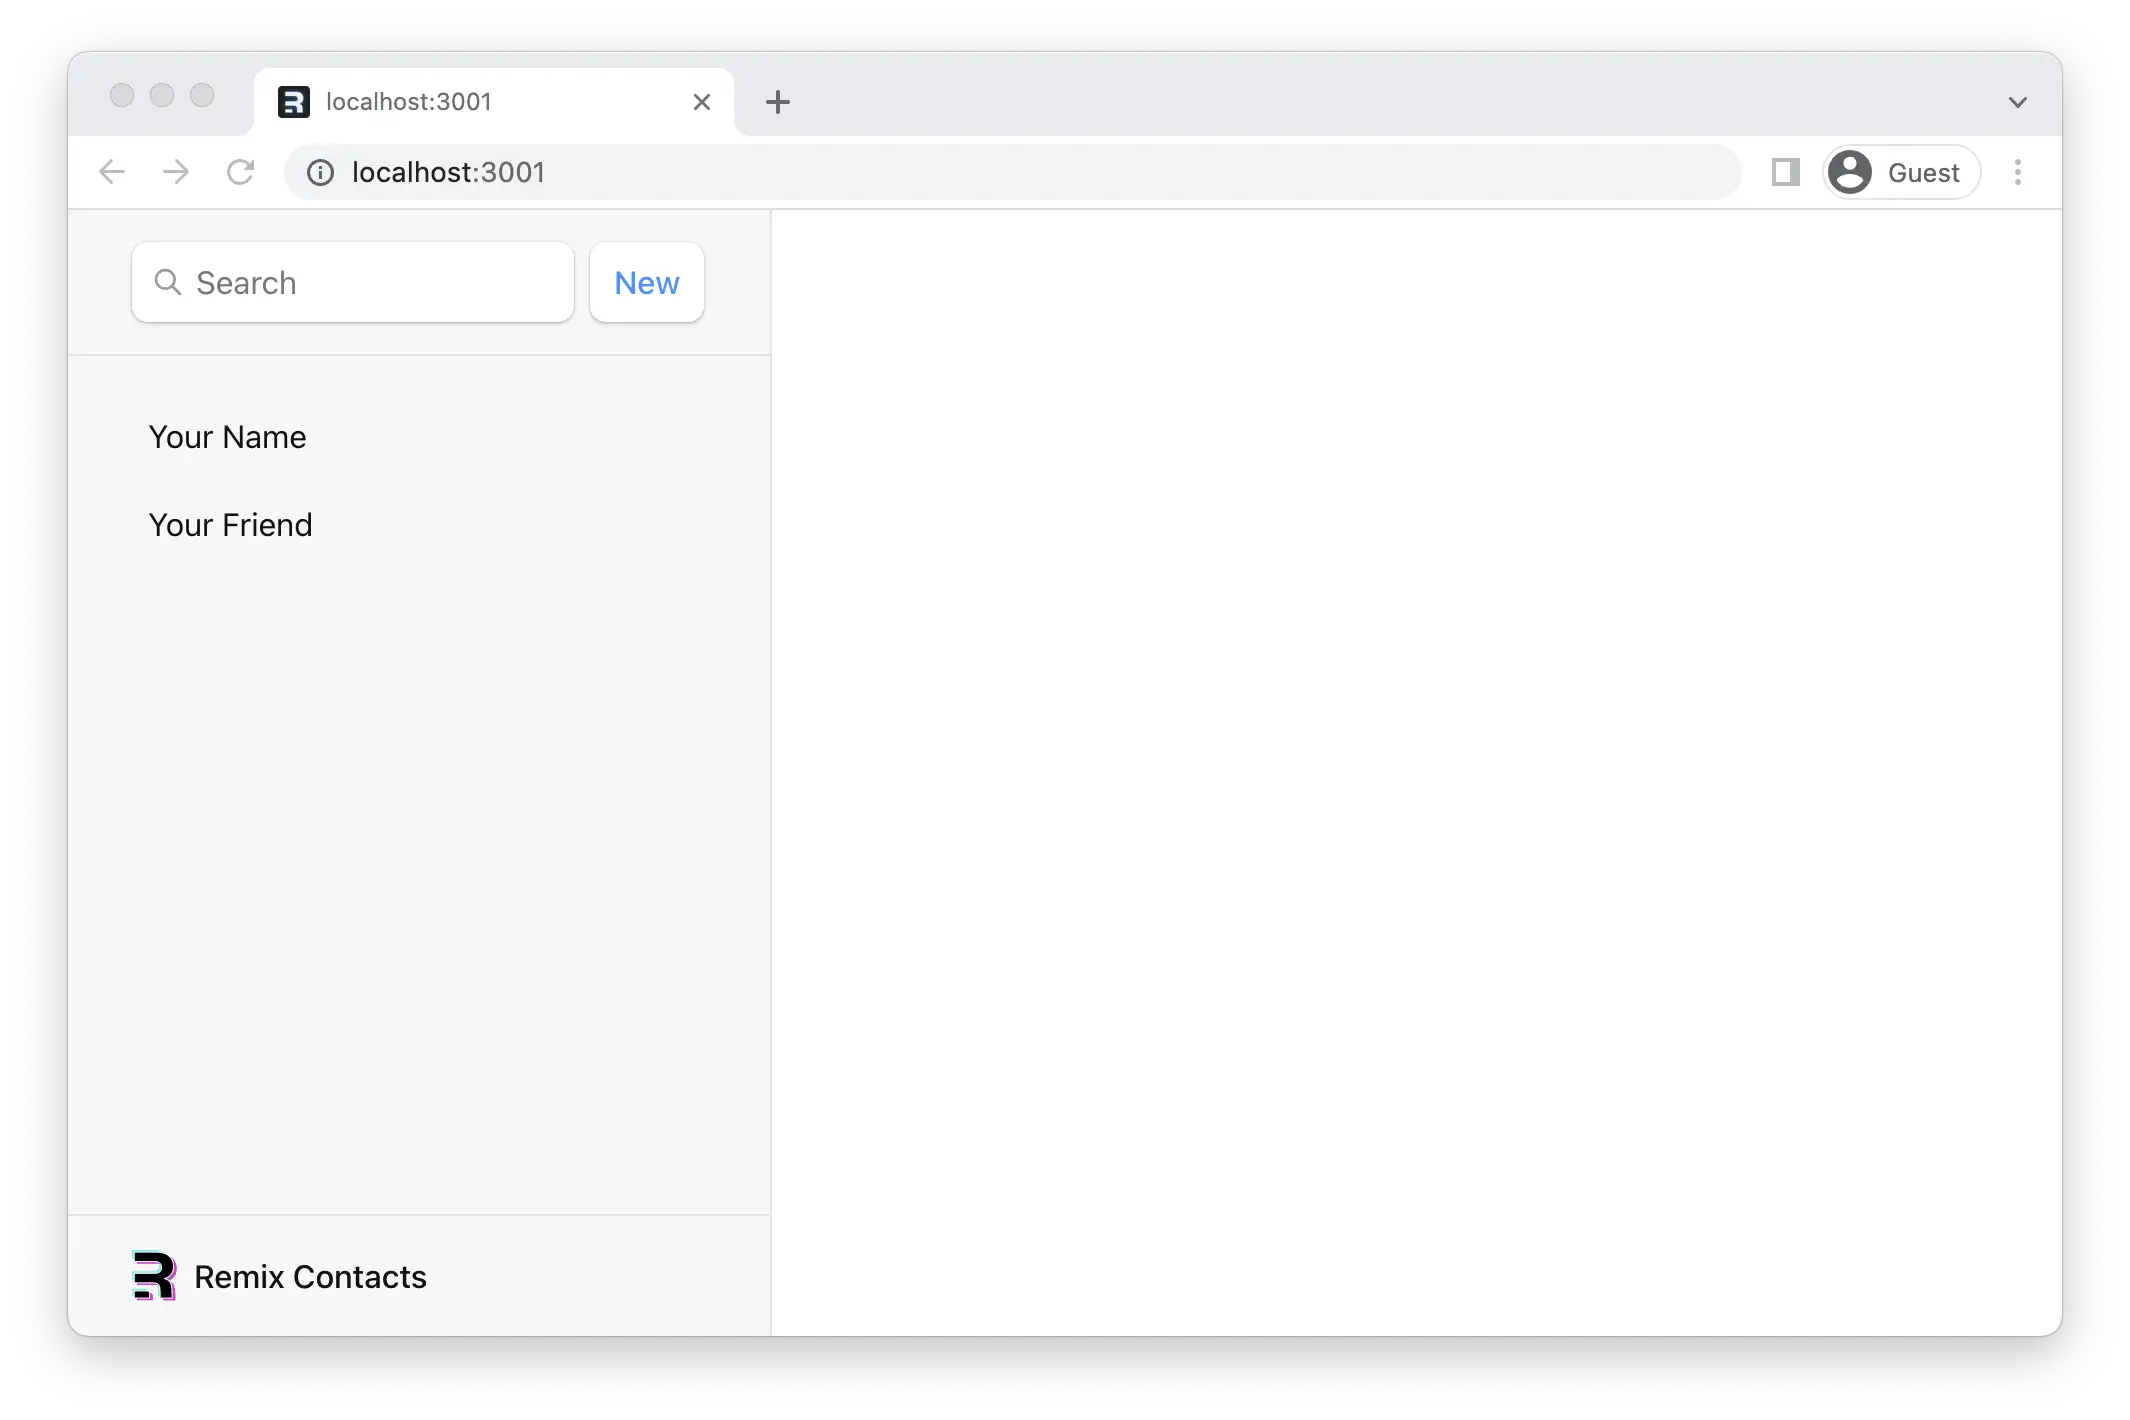
该应用现在应该看起来像这样。拥有一个能够编写 CSS 的设计师真是太好了,不是吗?(谢谢,Jim 🙏)。
¥The app should look something like this now. It sure is nice having a designer who can also write the CSS, isn't it? (Thank you, Jim 🙏).
联系路由 UI
¥The Contact Route UI
如果你点击侧边栏中的某个项目,你将看到默认的 404 页面。让我们创建一个与 /contacts/1 的 URL 匹配的路由。
¥If you click on one of the sidebar items, you'll get the default 404 page. Let's create a route that matches the url /contacts/1.
👉 创建 app/routes 目录和联系人路由模块
¥👉 Create the app/routes directory and contact route module
mkdir app/routes
touch app/routes/contacts.\$contactId.tsx
在 Remix 路由文件约定 中,. 会在 URL 中创建 /,而 $ 会使片段动态化。我们刚刚创建了一个路由,它将匹配如下所示的 URL:
¥In the Remix route file convention, . will create a / in the URL and $ makes a segment dynamic. We just created a route that will match URLs that look like this:
-
/contacts/123 -
/contacts/abc
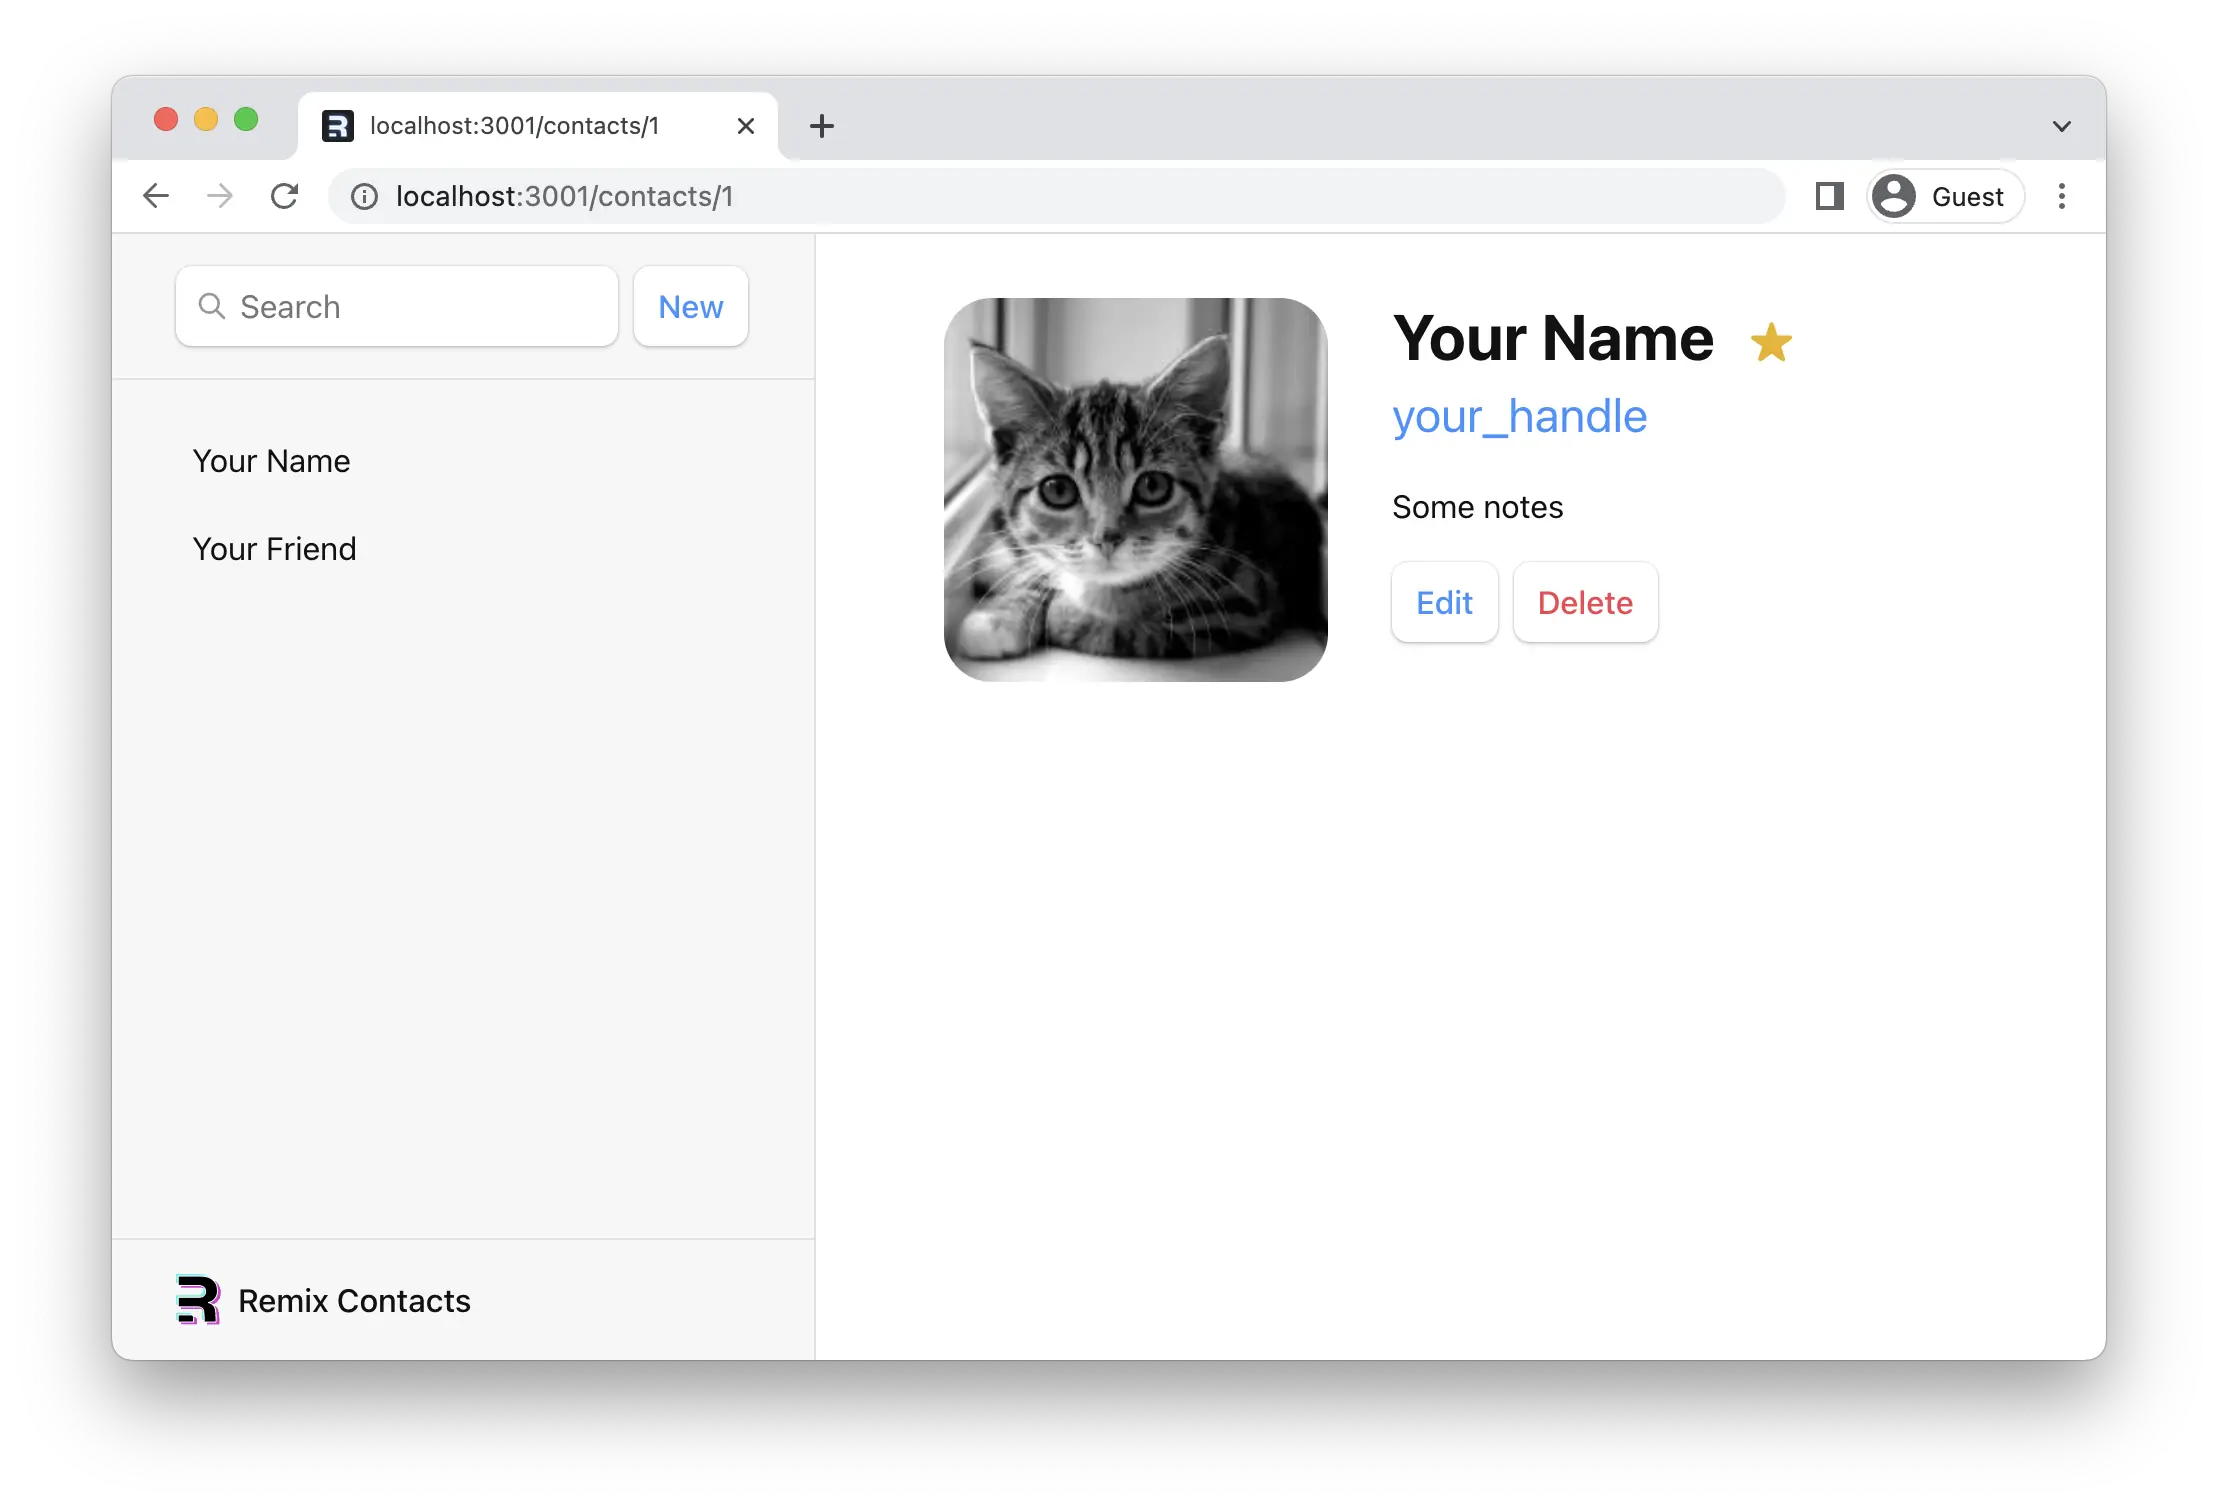
👉 添加联系人组件 UI。
¥👉 Add the contact component UI
它只是一堆元素,你可以随意复制/粘贴。
¥It's just a bunch of elements, feel free to copy/paste.
import { Form } from "@remix-run/react";
import type { FunctionComponent } from "react";

import type { ContactRecord } from "../data";

export default function Contact() {
  const contact = {
    first: "Your",
    last: "Name",
    avatar: "https://placecats.com/200/200",
    twitter: "your_handle",
    notes: "Some notes",
    favorite: true,
  };

  return (
    <div id="contact">
      <div>
        <img
          alt={`${contact.first} ${contact.last} avatar`}
          key={contact.avatar}
          src={contact.avatar}
        />
      </div>

      <div>
        <h1>
          {contact.first || contact.last ? (
            <>
              {contact.first} {contact.last}
            </>
          ) : (
            <i>No Name</i>
          )}{" "}
          <Favorite contact={contact} />
        </h1>

        {contact.twitter ? (
          <p>
            <a
              href={`https://twitter.com/${contact.twitter}`}
            >
              {contact.twitter}
            </a>
          </p>
        ) : null}

        {contact.notes ? <p>{contact.notes}</p> : null}

        <div>
          <Form action="edit">
            <button type="submit">Edit</button>
          </Form>

          <Form
            action="destroy"
            method="post"
            onSubmit={(event) => {
              const response = confirm(
                "Please confirm you want to delete this record."
              );
              if (!response) {
                event.preventDefault();
              }
            }}
          >
            <button type="submit">Delete</button>
          </Form>
        </div>
      </div>
    </div>
  );
}

const Favorite: FunctionComponent<{
  contact: Pick<ContactRecord, "favorite">;
}> = ({ contact }) => {
  const favorite = contact.favorite;

  return (
    <Form method="post">
      <button
        aria-label={
          favorite
            ? "Remove from favorites"
            : "Add to favorites"
        }
        name="favorite"
        value={favorite ? "false" : "true"}
      >
        {favorite ? "★" : "☆"}
      </button>
    </Form>
  );
};
现在,如果我们点击其中一个链接或访问 /contacts/1,我们会得到……没什么新东西?
¥Now if we click one of the links or visit /contacts/1 we get ... nothing new?
嵌套路由和出口
¥Nested Routes and Outlets
由于 Remix 构建于 React Router 之上,因此它支持嵌套路由。为了让子路由能够在父级布局中渲染,我们需要在父级中渲染一个 Outlet 函数。让我们修复它,打开 app/root.tsx 并在其中渲染一个出口。
¥Since Remix is built on top of React Router, it supports nested routing. In order for child routes to render inside parent layouts, we need to render an Outlet in the parent. Let's fix it, open up app/root.tsx and render an outlet inside.
👉 渲染 <Outlet />
¥👉 Render an <Outlet />
// existing imports
import {
  Form,
  Links,
  Meta,
  Outlet,
  Scripts,
  ScrollRestoration,
} from "@remix-run/react";

// existing imports & code

export default function App() {
  return (
    <html lang="en">
      {/* other elements */}
      <body>
        <div id="sidebar">{/* other elements */}</div>
        <div id="detail">
          <Outlet />
        </div>
        {/* other elements */}
      </body>
    </html>
  );
}
现在子路由应该通过出口进行渲染了。
¥Now the child route should be rendered through the outlet.
客户端路由
¥Client Side Routing
你可能注意到了,也可能没注意到,当我们点击侧边栏中的链接时,浏览器会执行完整的文档请求来获取下一个 URL,而不是客户端路由。
¥You may or may not have noticed, but when we click the links in the sidebar, the browser is doing a full document request for the next URL instead of client side routing.
客户端路由允许我们的应用更新 URL,而无需从服务器请求其他文档。应用可以立即渲染新的 UI。让我们使用 <Link> 来实现它。
¥Client side routing allows our app to update the URL without requesting another document from the server. Instead, the app can immediately render a new UI. Let's make it happen with <Link>.
👉 将侧边栏 <a href> 更改为 <Link to>
¥👉 Change the sidebar <a href> to <Link to>
// existing imports
import {
  Form,
  Link,
  Links,
  Meta,
  Outlet,
  Scripts,
  ScrollRestoration,
} from "@remix-run/react";

// existing imports and exports

export default function App() {
  return (
    <html lang="en">
      {/* other elements */}
      <body>
        <div id="sidebar">
          {/* other elements */}
          <nav>
            <ul>
              <li>
                <Link to={`/contacts/1`}>Your Name</Link>
              </li>
              <li>
                <Link to={`/contacts/2`}>Your Friend</Link>
              </li>
            </ul>
          </nav>
        </div>
        {/* other elements */}
      </body>
    </html>
  );
}
你可以在浏览器开发者工具中打开“网络”选项卡,查看它是否不再请求文档。
¥You can open the network tab in the browser devtools to see that it's not requesting documents anymore.
加载数据
¥Loading Data
URL 段、布局和数据通常耦合在一起(或者说是三重耦合?)。我们已经可以在这个应用中看到它了:
¥URL segments, layouts, and data are more often than not coupled (tripled?) together. We can see it in this app already:
| URL 段 | 组件 | 数据 |
|---|---|---|
| / | <Root> |
联系人列表 |
| contacts/:contactId | <Contact> |
单个联系人 |
由于这种自然耦合,Remix 拥有数据约定,可以轻松地将数据导入路由组件。
¥Because of this natural coupling, Remix has data conventions to get data into your route components easily.
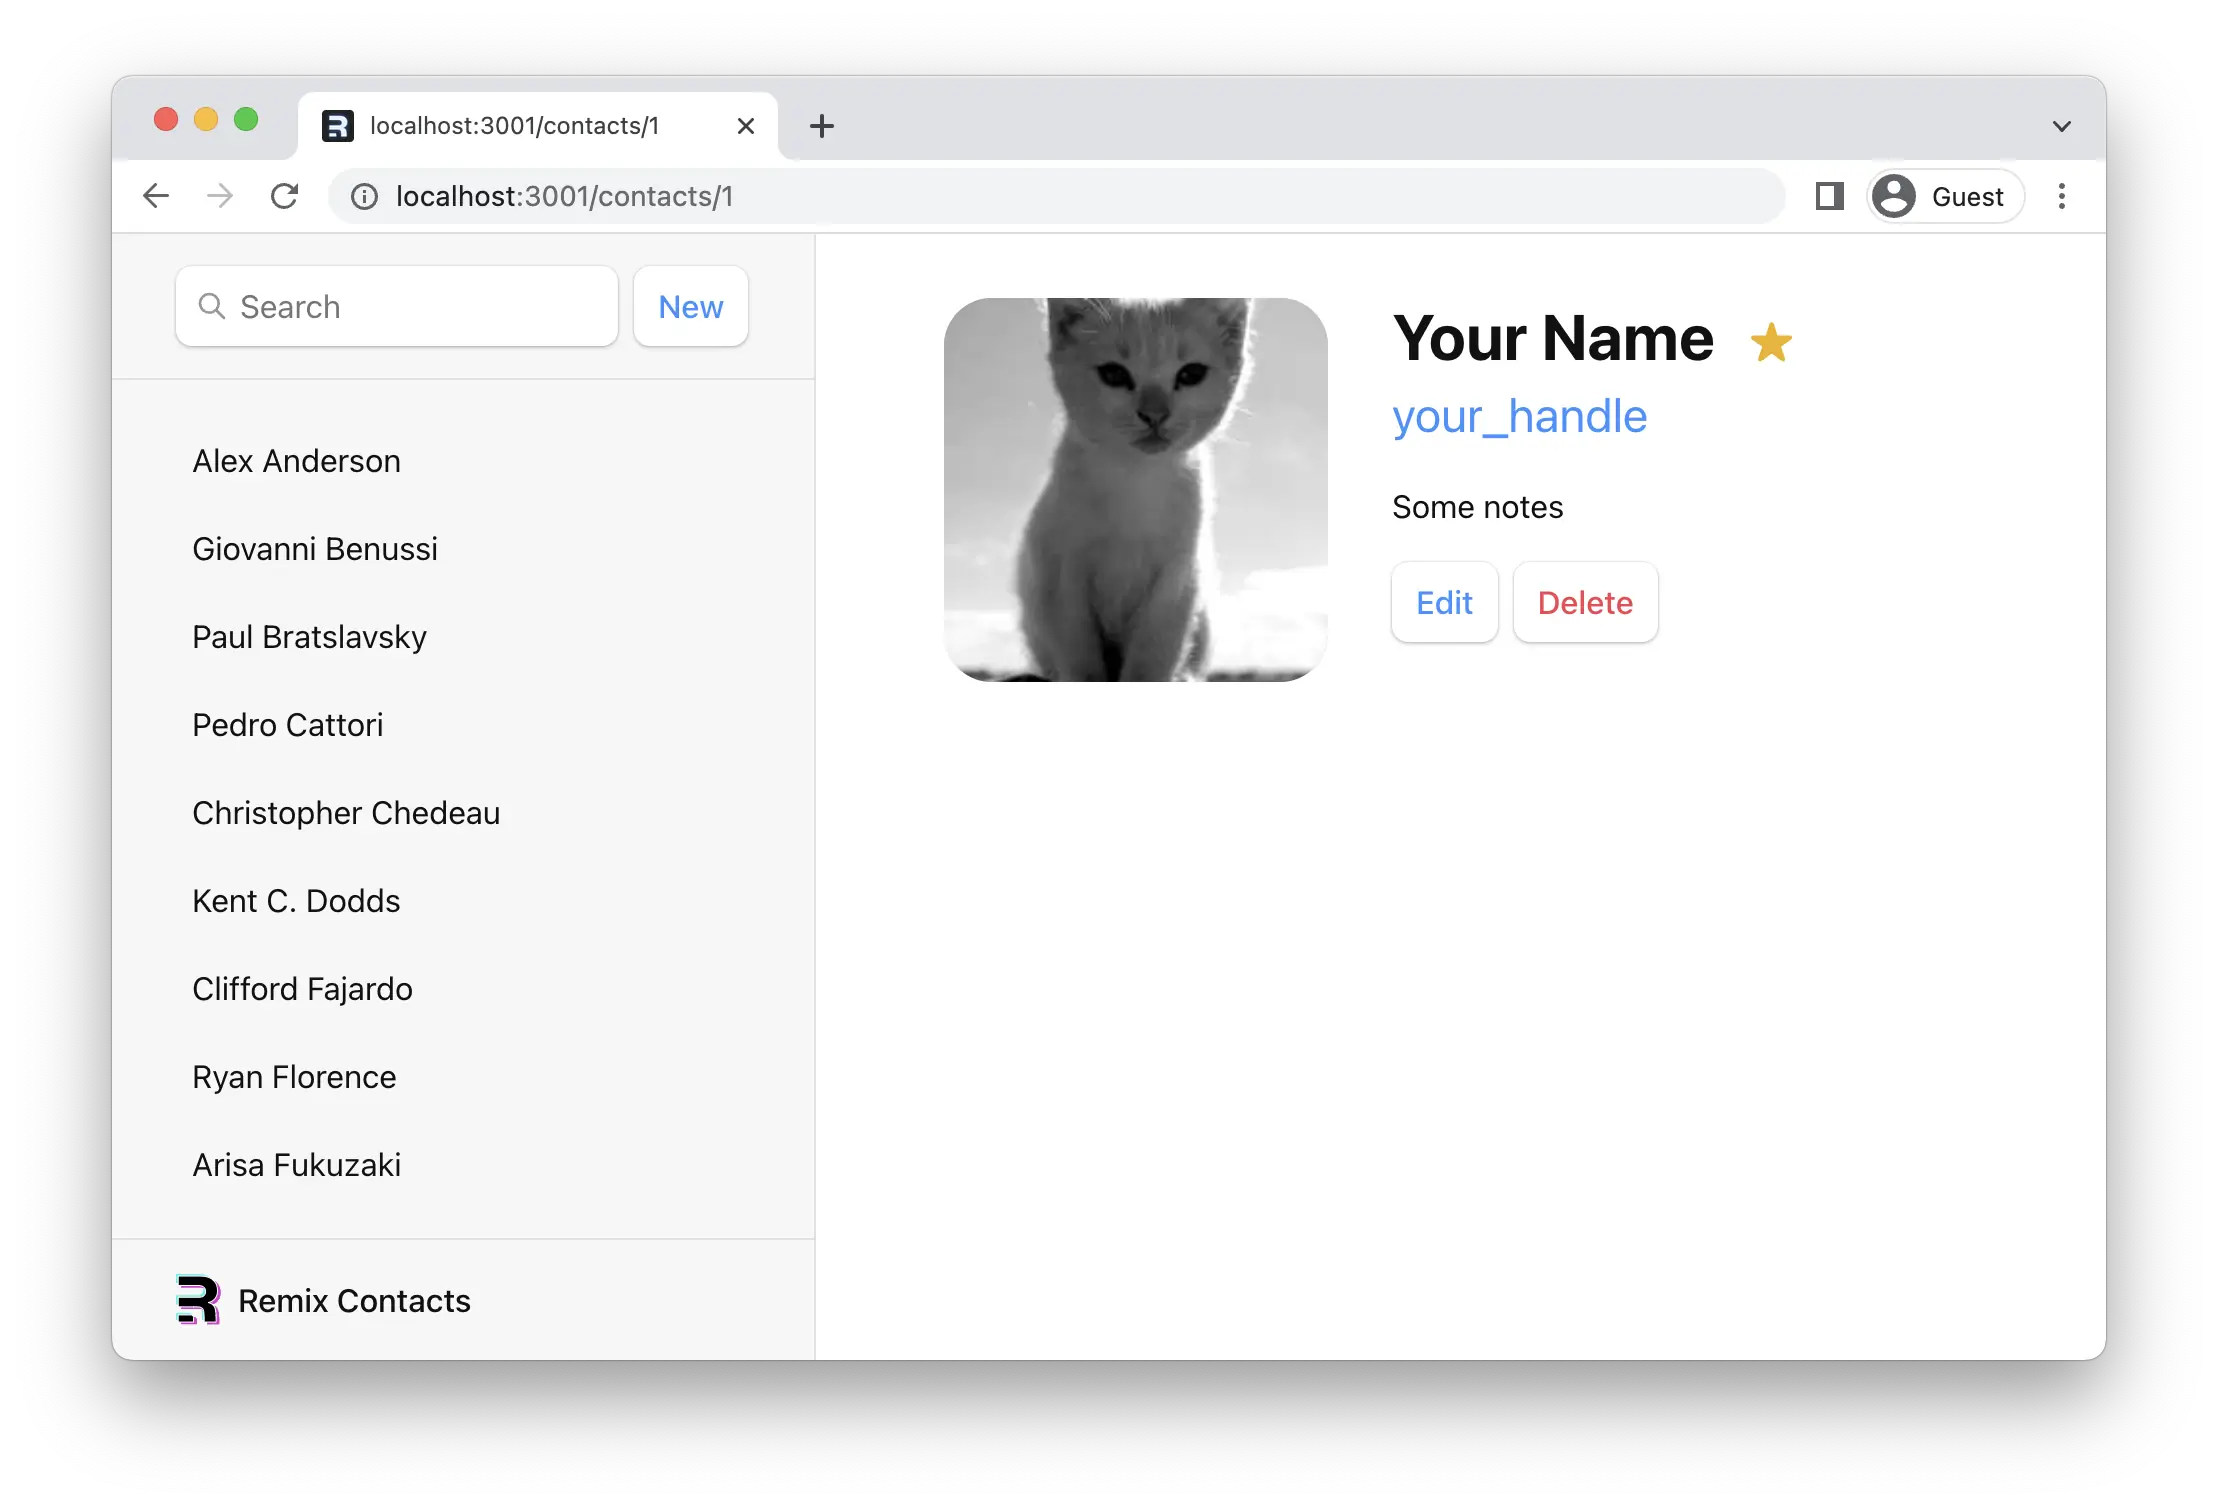
我们将使用两个 API 来加载数据:loader 和 useLoaderData。首先,我们将在根路由中创建并导出一个 loader 函数,然后渲染数据。
¥There are two APIs we'll be using to load data, loader and useLoaderData. First we'll create and export a loader function in the root route and then render the data.
👉 从 app/root.tsx 导出 loader 函数并渲染数据
¥👉 Export a loader function from app/root.tsx and render the data
// existing imports
import {
  Form,
  Link,
  Links,
  Meta,
  Outlet,
  Scripts,
  ScrollRestoration,
  useLoaderData,
} from "@remix-run/react";

// existing imports
import { getContacts } from "./data";

// existing exports

export const loader = async () => {
  const contacts = await getContacts();
  return { contacts };
};

export default function App() {
  const { contacts } = useLoaderData();

  return (
    <html lang="en">
      {/* other elements */}
      <body>
        <div id="sidebar">
          {/* other elements */}
          <nav>
            {contacts.length ? (
              <ul>
                {contacts.map((contact) => (
                  <li key={contact.id}>
                    <Link to={`contacts/${contact.id}`}>
                      {contact.first || contact.last ? (
                        <>
                          {contact.first} {contact.last}
                        </>
                      ) : (
                        <i>No Name</i>
                      )}{" "}
                      {contact.favorite ? (
                        <span>★</span>
                      ) : null}
                    </Link>
                  </li>
                ))}
              </ul>
            ) : (
              <p>
                <i>No contacts</i>
              </p>
            )}
          </nav>
        </div>
        {/* other elements */}
      </body>
    </html>
  );
}
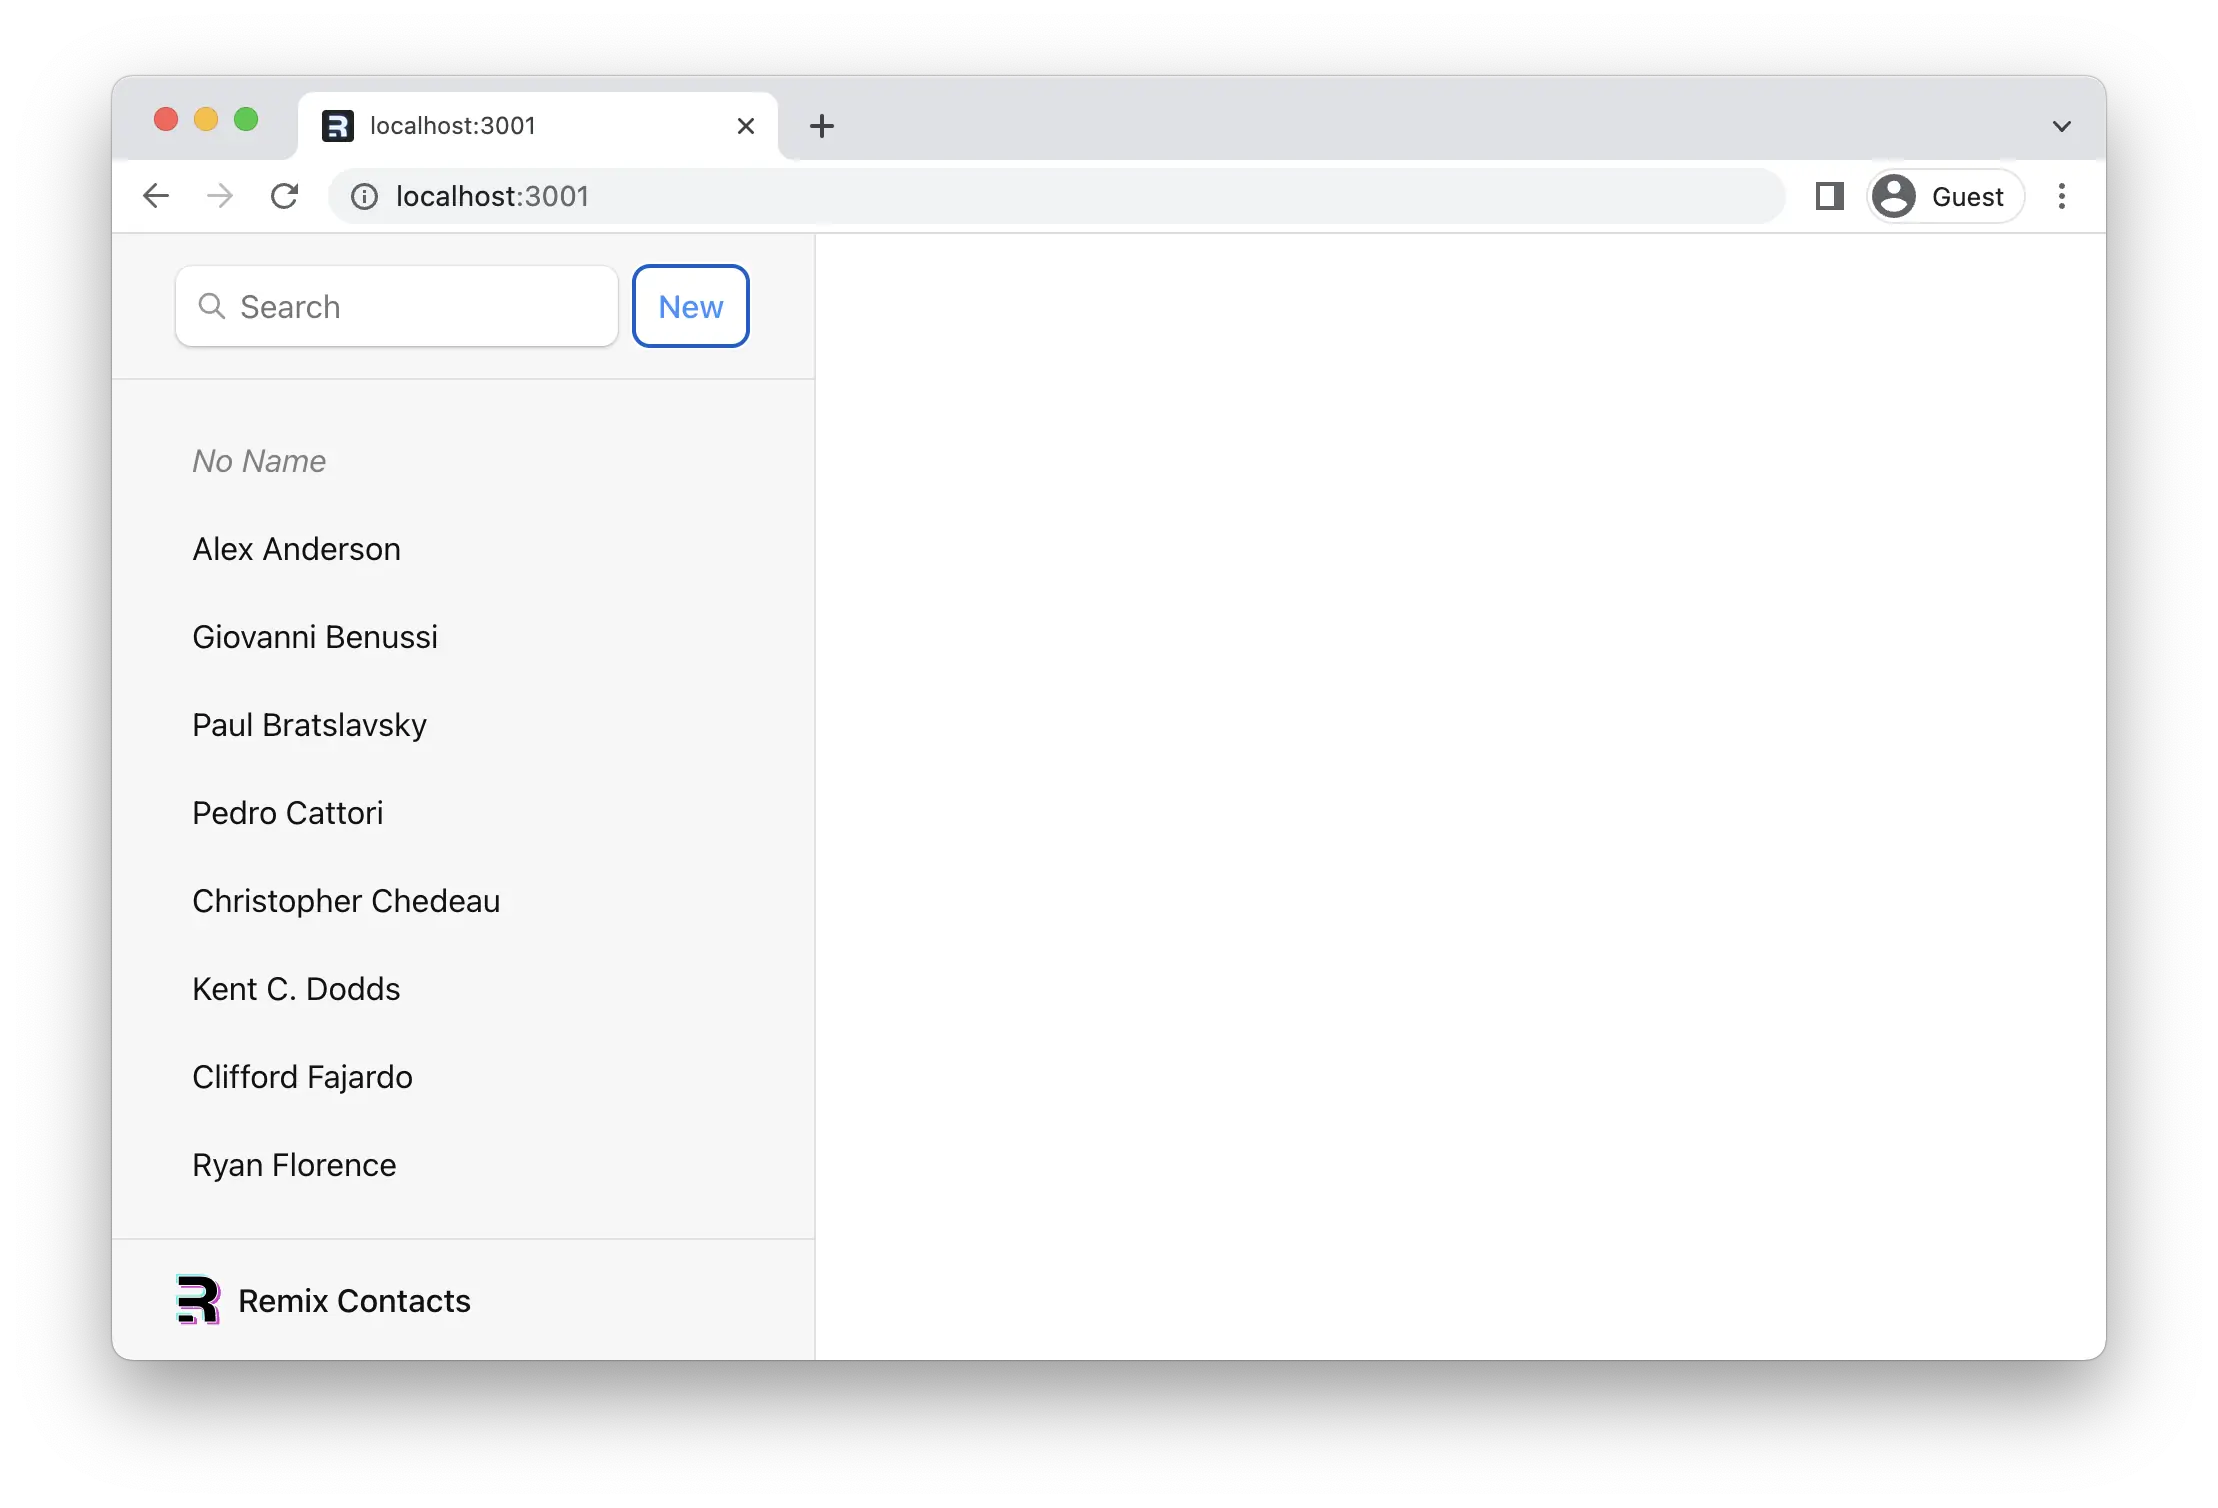
就是这样!Remix 现在将自动使该数据与你的 UI 保持同步。侧边栏现在应该如下所示:
¥That's it! Remix will now automatically keep that data in sync with your UI. The sidebar should now look like this:
类型推断
¥Type Inference
你可能已经注意到 TypeScript 对 map 中的 contact 类型有所抱怨。我们可以添加一个快速注释,使用 typeof loader 来获取数据的类型推断:
¥You may have noticed TypeScript complaining about the contact type inside the map. We can add a quick annotation to get type inference about our data with typeof loader:
// existing imports and exports

export default function App() {
  const { contacts } = useLoaderData<typeof loader>();

  // existing code
}
Loader 中的 URL 参数
¥URL Params in Loaders
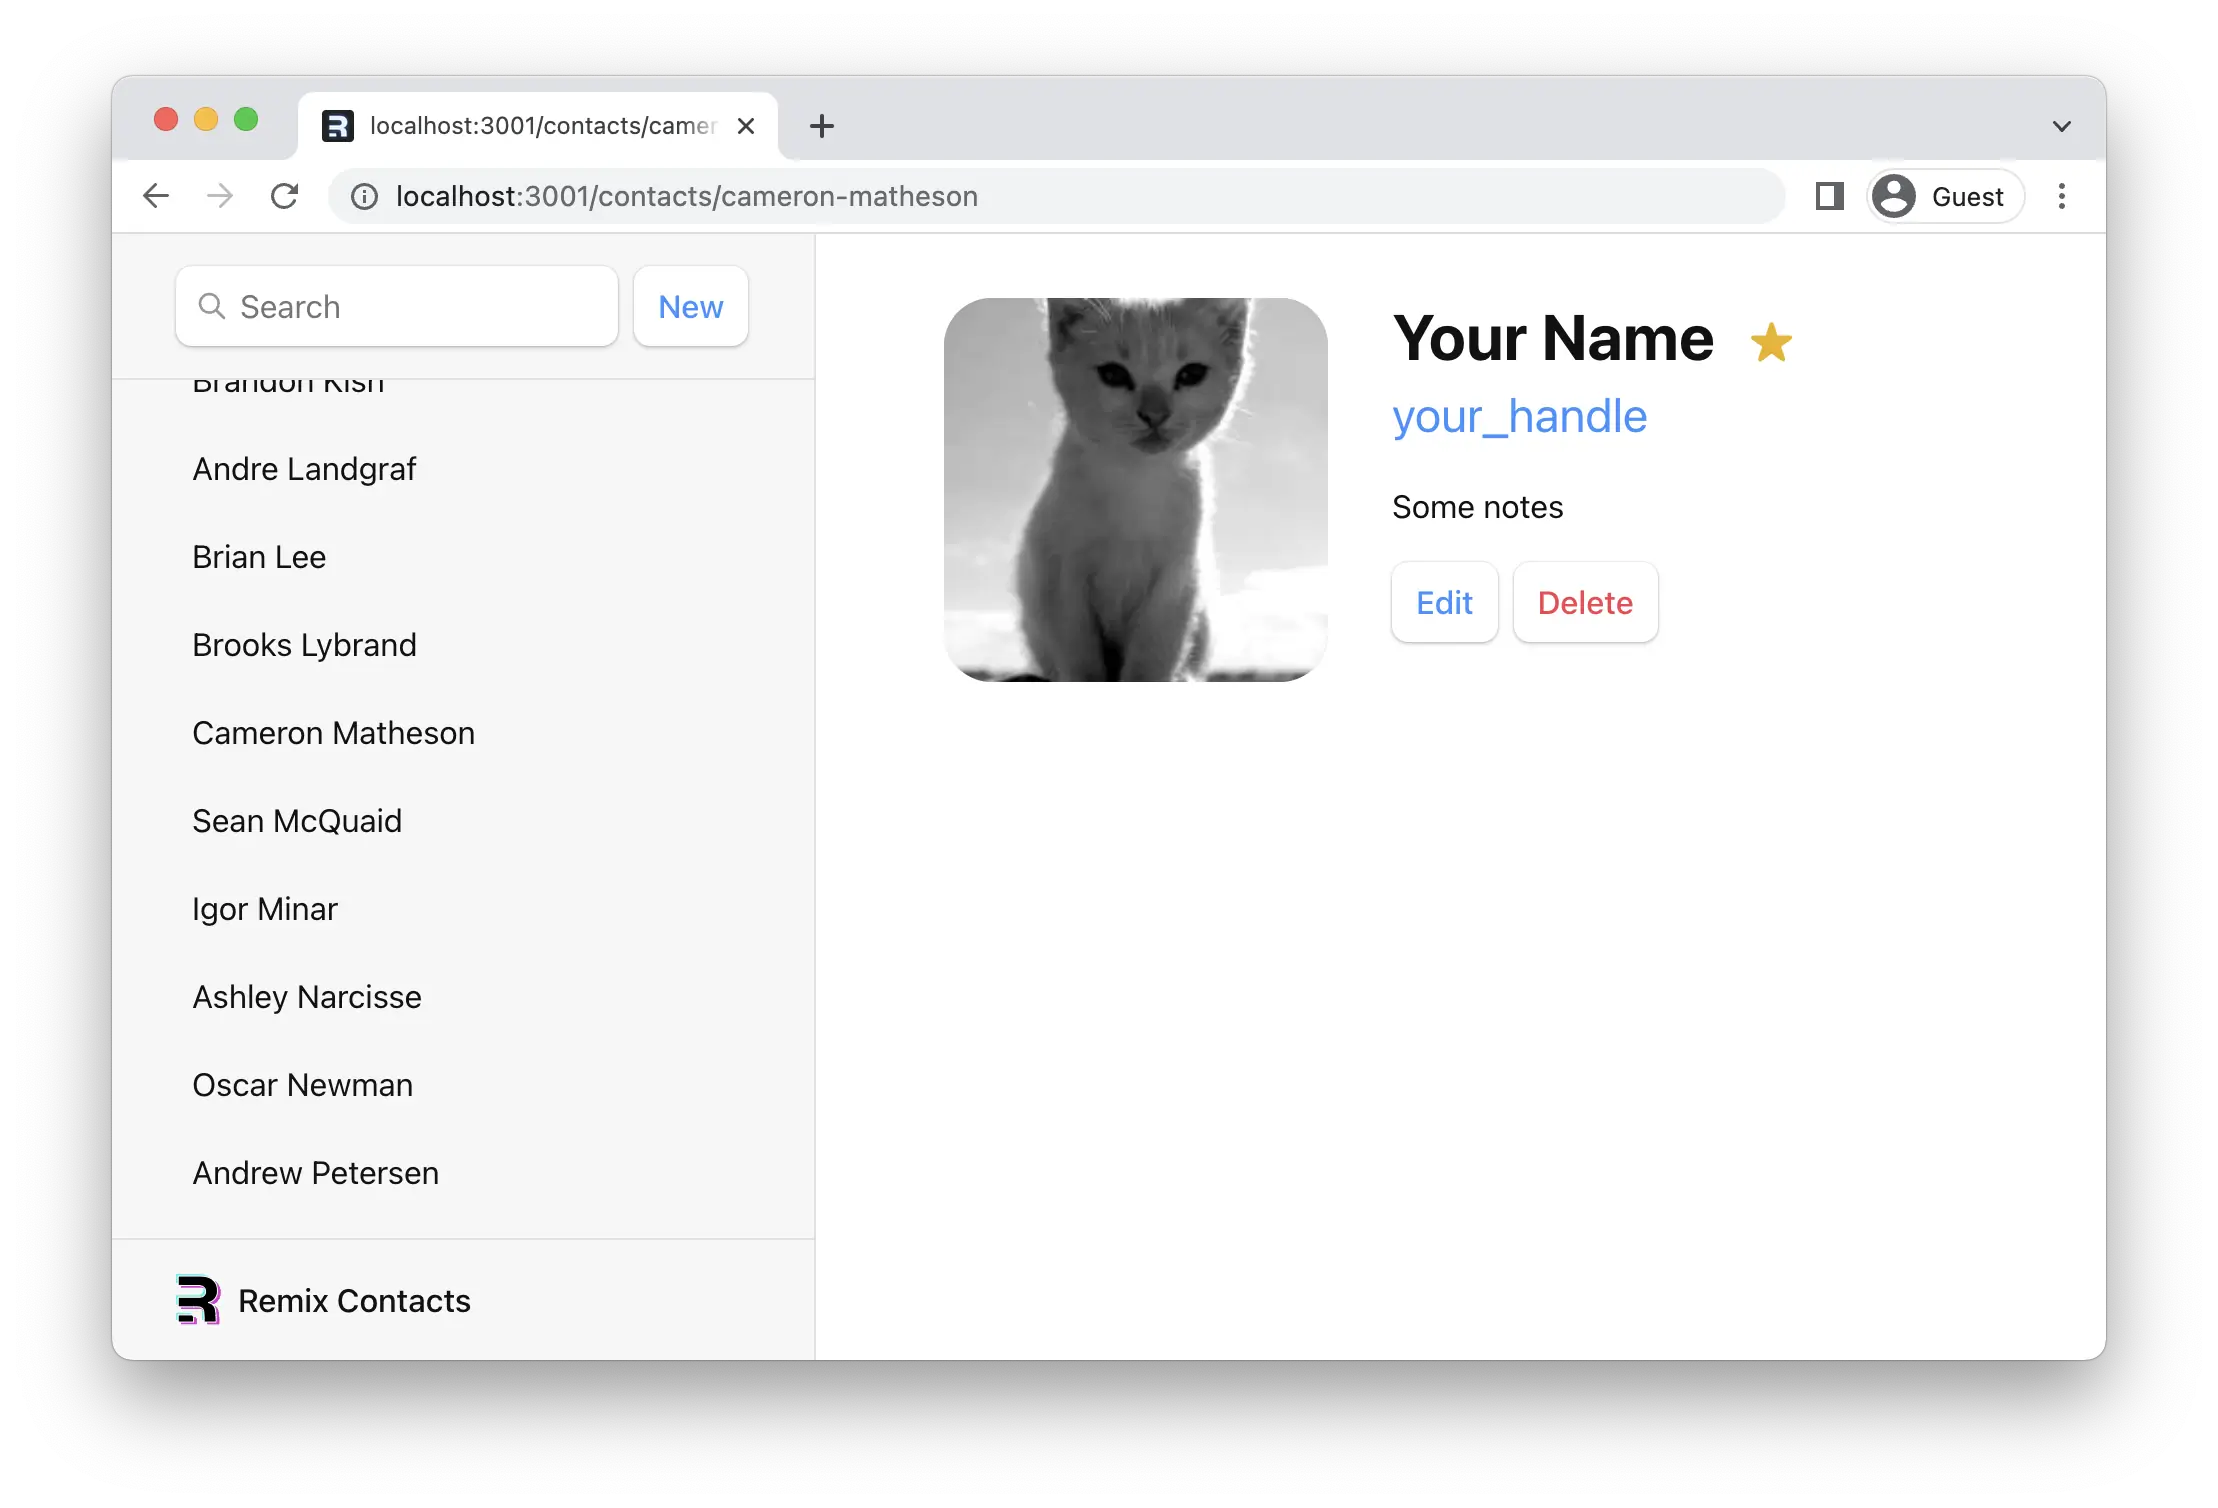
👉 点击侧边栏链接之一
¥👉 Click on one of the sidebar links
我们应该再次看到旧的静态联系人页面,但有一个区别:URL 现在有了记录的真实 ID。
¥We should be seeing our old static contact page again, with one difference: the URL now has a real ID for the record.
还记得 app/routes/contacts.$contactId.tsx 文件名中的 $contactId 部分吗?这些动态段将匹配 URL 中该位置的动态(变化)值。我们将 URL 中的这些值称为 "URL 参数",或者简称为 "params"。
¥Remember the $contactId part of the file name at app/routes/contacts.$contactId.tsx? These dynamic segments will match dynamic (changing) values in that position of the URL. We call these values in the URL "URL Params", or just "params" for short.
这些 params 将通过与动态段匹配的键传递给加载器。例如,我们的段名为 $contactId,因此值将作为 params.contactId 传递。
¥These params are passed to the loader with keys that match the dynamic segment. For example, our segment is named $contactId so the value will be passed as params.contactId.
这些参数最常用于通过 ID 查找记录。让我们尝试一下。
¥These params are most often used to find a record by ID. Let's try it out.
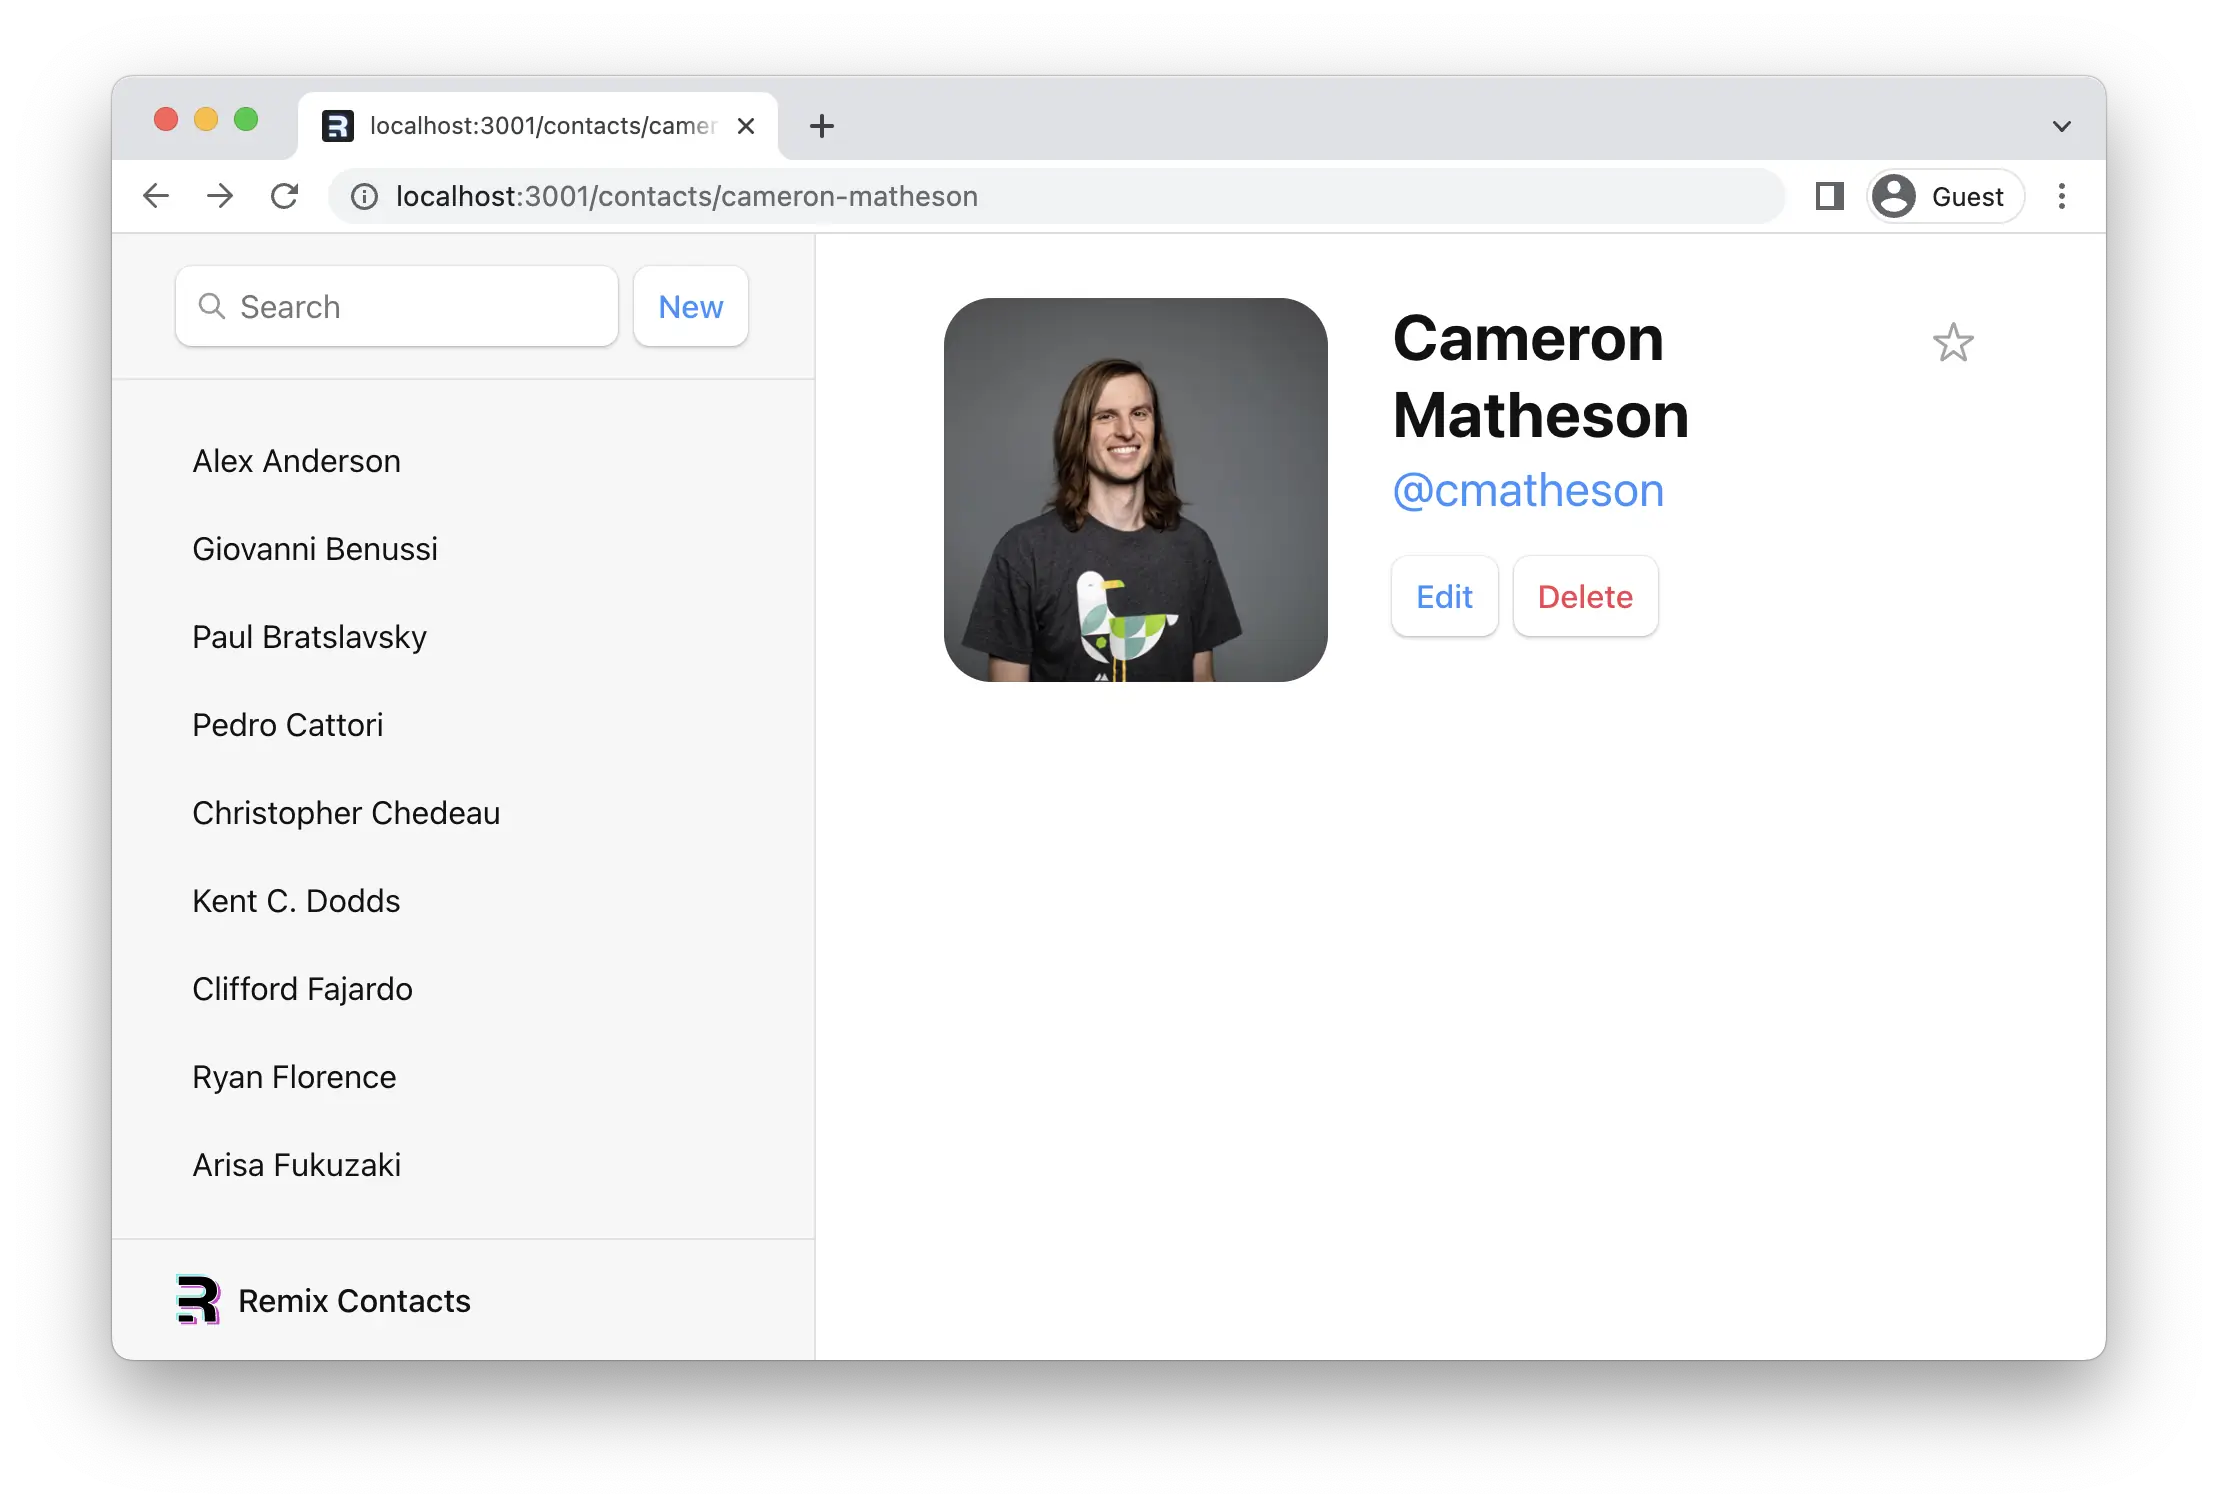
👉 在联系页面添加 loader 函数并使用 useLoaderData 访问数据
¥👉 Add a loader function to the contact page and access data with useLoaderData
import { Form, useLoaderData } from "@remix-run/react";
// existing imports

import { getContact } from "../data";

export const loader = async ({ params }) => {
  const contact = await getContact(params.contactId);
  return { contact };
};

export default function Contact() {
  const { contact } = useLoaderData<typeof loader>();

  // existing code
}

// existing code
验证参数和抛出响应
¥Validating Params and Throwing Responses
TypeScript 对我们很不满,让我们让它高兴起来,看看这会迫使我们考虑什么:
¥TypeScript is very upset with us, let's make it happy and see what that forces us to consider:
import type { LoaderFunctionArgs } from "@remix-run/node";
// existing imports
import invariant from "tiny-invariant";

// existing imports

export const loader = async ({
  params,
}: LoaderFunctionArgs) => {
  invariant(params.contactId, "Missing contactId param");
  const contact = await getContact(params.contactId);
  return { contact };
};

// existing code
这凸显的第一个问题是,我们可能在文件名和代码之间弄错了参数名称(也许你修改了文件名!)。Invariant 是一个方便的函数,当你预计代码可能存在问题时,它会抛出带有自定义消息的错误。
¥The first problem this highlights is we might have gotten the param's name wrong between the file name and the code (maybe you changed the name of the file!). Invariant is a handy function for throwing an error with a custom message when you anticipated a potential issue with your code.
接下来,useLoaderData<typeof loader>() 现在知道我们获得了一个联系人或 null(也许没有该 ID 的联系人)。这个潜在的 null 对我们的组件代码来说很麻烦,而且 TS 错误仍然四处乱飞。
¥Next, the useLoaderData<typeof loader>() now knows that we got a contact or null (maybe there is no contact with that ID). This potential null is cumbersome for our component code, and the TS errors are flying around still.
我们可以在组件代码中考虑到联系人找不到的可能性,但 Web 端的做法是发送一个正确的 404 错误。我们可以在加载器中执行此操作,一次性解决所有问题。
¥We could account for the possibility of the contact being not found in component code, but the webby thing to do is send a proper 404. We can do that in the loader and solve all of our problems at once.
// existing imports

export const loader = async ({
  params,
}: LoaderFunctionArgs) => {
  invariant(params.contactId, "Missing contactId param");
  const contact = await getContact(params.contactId);
  if (!contact) {
    throw new Response("Not Found", { status: 404 });
  }
  return { contact };
};

// existing code
现在,如果未找到用户,则沿此路径执行的代码将停止,Remix 将改为渲染错误路径。Remix 中的组件可以只关注快乐路径 😁
¥Now, if the user isn't found, code execution down this path stops and Remix renders the error path instead. Components in Remix can focus only on the happy path 😁
数据突变
¥Data Mutations
我们稍后会创建第一个联系人,但首先我们来谈谈 HTML。
¥We'll create our first contact in a second, but first let's talk about HTML.
Remix 将 HTML 表单导航模拟为数据变异原语,这在 JavaScript 寒武纪大爆发之前曾是唯一的方法。不要被它的简单性所迷惑!Remix 中的表单为你提供客户端渲染应用的用户体验 (UX) 功能,同时兼具 "老套路" Web 模型的简洁性。
¥Remix emulates HTML Form navigation as the data mutation primitive, which used to be the only way prior to the JavaScript cambrian explosion. Don't be fooled by the simplicity! Forms in Remix give you the UX capabilities of client-rendered apps with the simplicity of the "old school" web model.
虽然一些 Web 开发者不熟悉 HTML form,但它实际上会在浏览器中引发导航,就像点击链接一样。唯一的区别在于请求:链接只能更改 URL,而 form 还可以更改请求方法(GET 与 POST)和请求主体(POST 表单数据)。
¥While unfamiliar to some web developers, HTML forms actually cause a navigation in the browser, just like clicking a link. The only difference is in the request: links can only change the URL while forms can also change the request method (GET vs. POST) and the request body (POST form data).
如果没有客户端路由,浏览器将自动序列化 form 的数据,并将其作为 POST 的请求主体发送到服务器,作为 GET 的请求主体发送到服务器。Remix 做同样的事情,但它不是将请求发送到服务器,而是使用客户端路由并将其发送到路由的 action 函数。
¥Without client side routing, the browser will serialize the form's data automatically and send it to the server as the request body for POST, and as URLSearchParams for GET. Remix does the same thing, except instead of sending the request to the server, it uses client side routing and sends it to the route's action function.
我们可以通过点击应用中的 "新增" 按钮来测试它。
¥We can test this out by clicking the "New" button in our app.
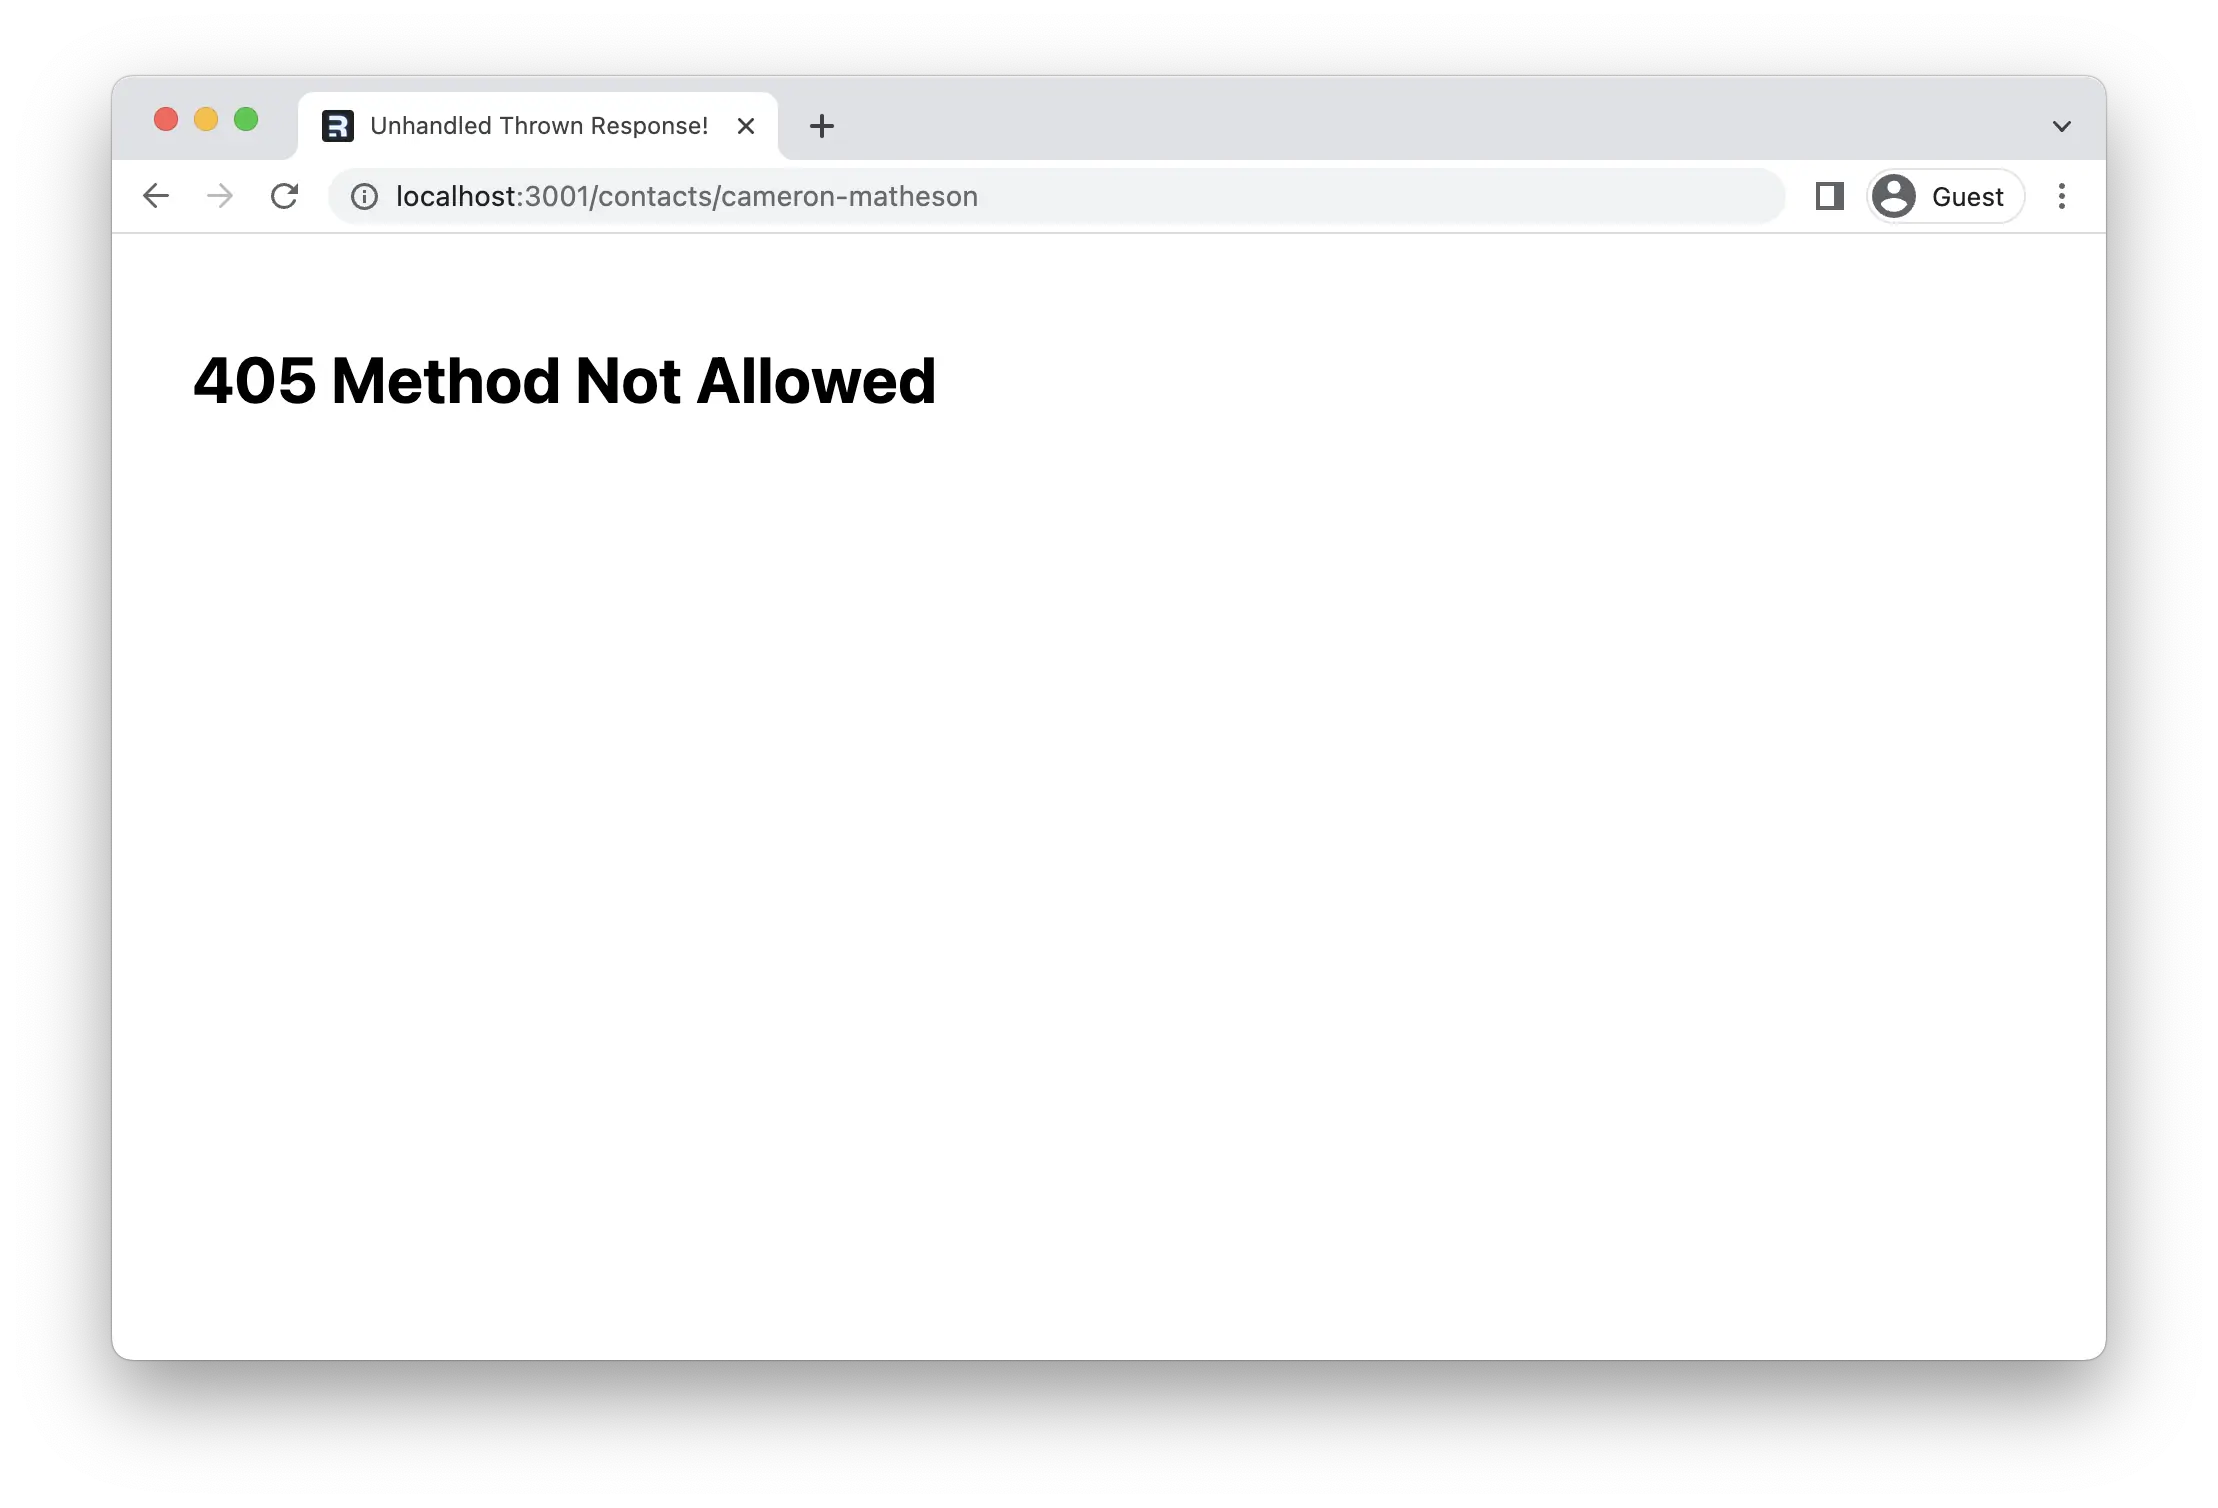
Remix 发送 405 错误,因为服务器上没有处理此表单导航的代码。
¥Remix sends a 405 because there is no code on the server to handle this form navigation.
创建联系人
¥Creating Contacts
我们将通过在根路由中导出 action 函数来创建新的联系人。当用户点击 "new" 按钮时,表单将 POST 到根路由操作。
¥We'll create new contacts by exporting an action function in our root route. When the user clicks the "new" button, the form will POST to the root route action.
👉 从 app/root.tsx 导出 action 函数
¥👉 Export an action function from app/root.tsx
// existing imports

import { createEmptyContact, getContacts } from "./data";

export const action = async () => {
  const contact = await createEmptyContact();
  return { contact };
};

// existing code
就是这样!继续,点击 "新增" 按钮,你应该会看到列表中弹出一条新记录。 🥳
¥That's it! Go ahead and click the "New" button, and you should see a new record pop into the list 🥳
createEmptyContact 方法只是创建一个空的联系人,其中没有任何名称、数据或任何内容。但它仍然会创建一条记录,我保证!
¥The createEmptyContact method just creates an empty contact with no name or data or anything. But it does still create a record, promise!
🧐 稍等片刻……侧边栏是如何更新的?我们在哪里调用了
action函数?重新获取数据的代码在哪里?useState、onSubmit和useEffect在哪里?!¥🧐 Wait a sec ... How did the sidebar update? Where did we call the
actionfunction? Where's the code to re-fetch the data? Where areuseState,onSubmitanduseEffect?!
这就是 "老套路网站" 编程模型的用武之地。<Form> 阻止浏览器将请求发送到服务器,而是使用 fetch 将其发送到路由的 action 函数。
¥This is where the "old school web" programming model shows up. <Form> prevents the browser from sending the request to the server and sends it to your route's action function instead with fetch.
在 Web 语义中,POST 通常表示某些数据正在更改。按照惯例,Remix 使用此提示在 action 完成后自动重新验证页面上的数据。
¥In web semantics, a POST usually means some data is changing. By convention, Remix uses this as a hint to automatically revalidate the data on the page after the action finishes.
事实上,由于它只是 HTML 和 HTTP,你可以禁用 JavaScript,整个系统仍然可以运行。Remix 不再序列化表单并向服务器发出 fetch 请求,而是浏览器序列化表单并发出文档请求。Remix 将从服务器端渲染页面并将其发送下去。无论哪种方式,最终的 UI 都是相同的。
¥In fact, since it's all just HTML and HTTP, you could disable JavaScript and the whole thing will still work. Instead of Remix serializing the form and making a fetch request to your server, the browser will serialize the form and make a document request. From there Remix will render the page server side and send it down. It's the same UI in the end either way.
不过,我们保留 JavaScript,因为我们要提供比旋转图标和静态文档更好的用户体验。
¥We'll keep JavaScript around, though, because we're going to make a better user experience than spinning favicons and static documents.
更新数据
¥Updating Data
让我们添加一种方法来填充新记录的信息。
¥Let's add a way to fill the information for our new record.
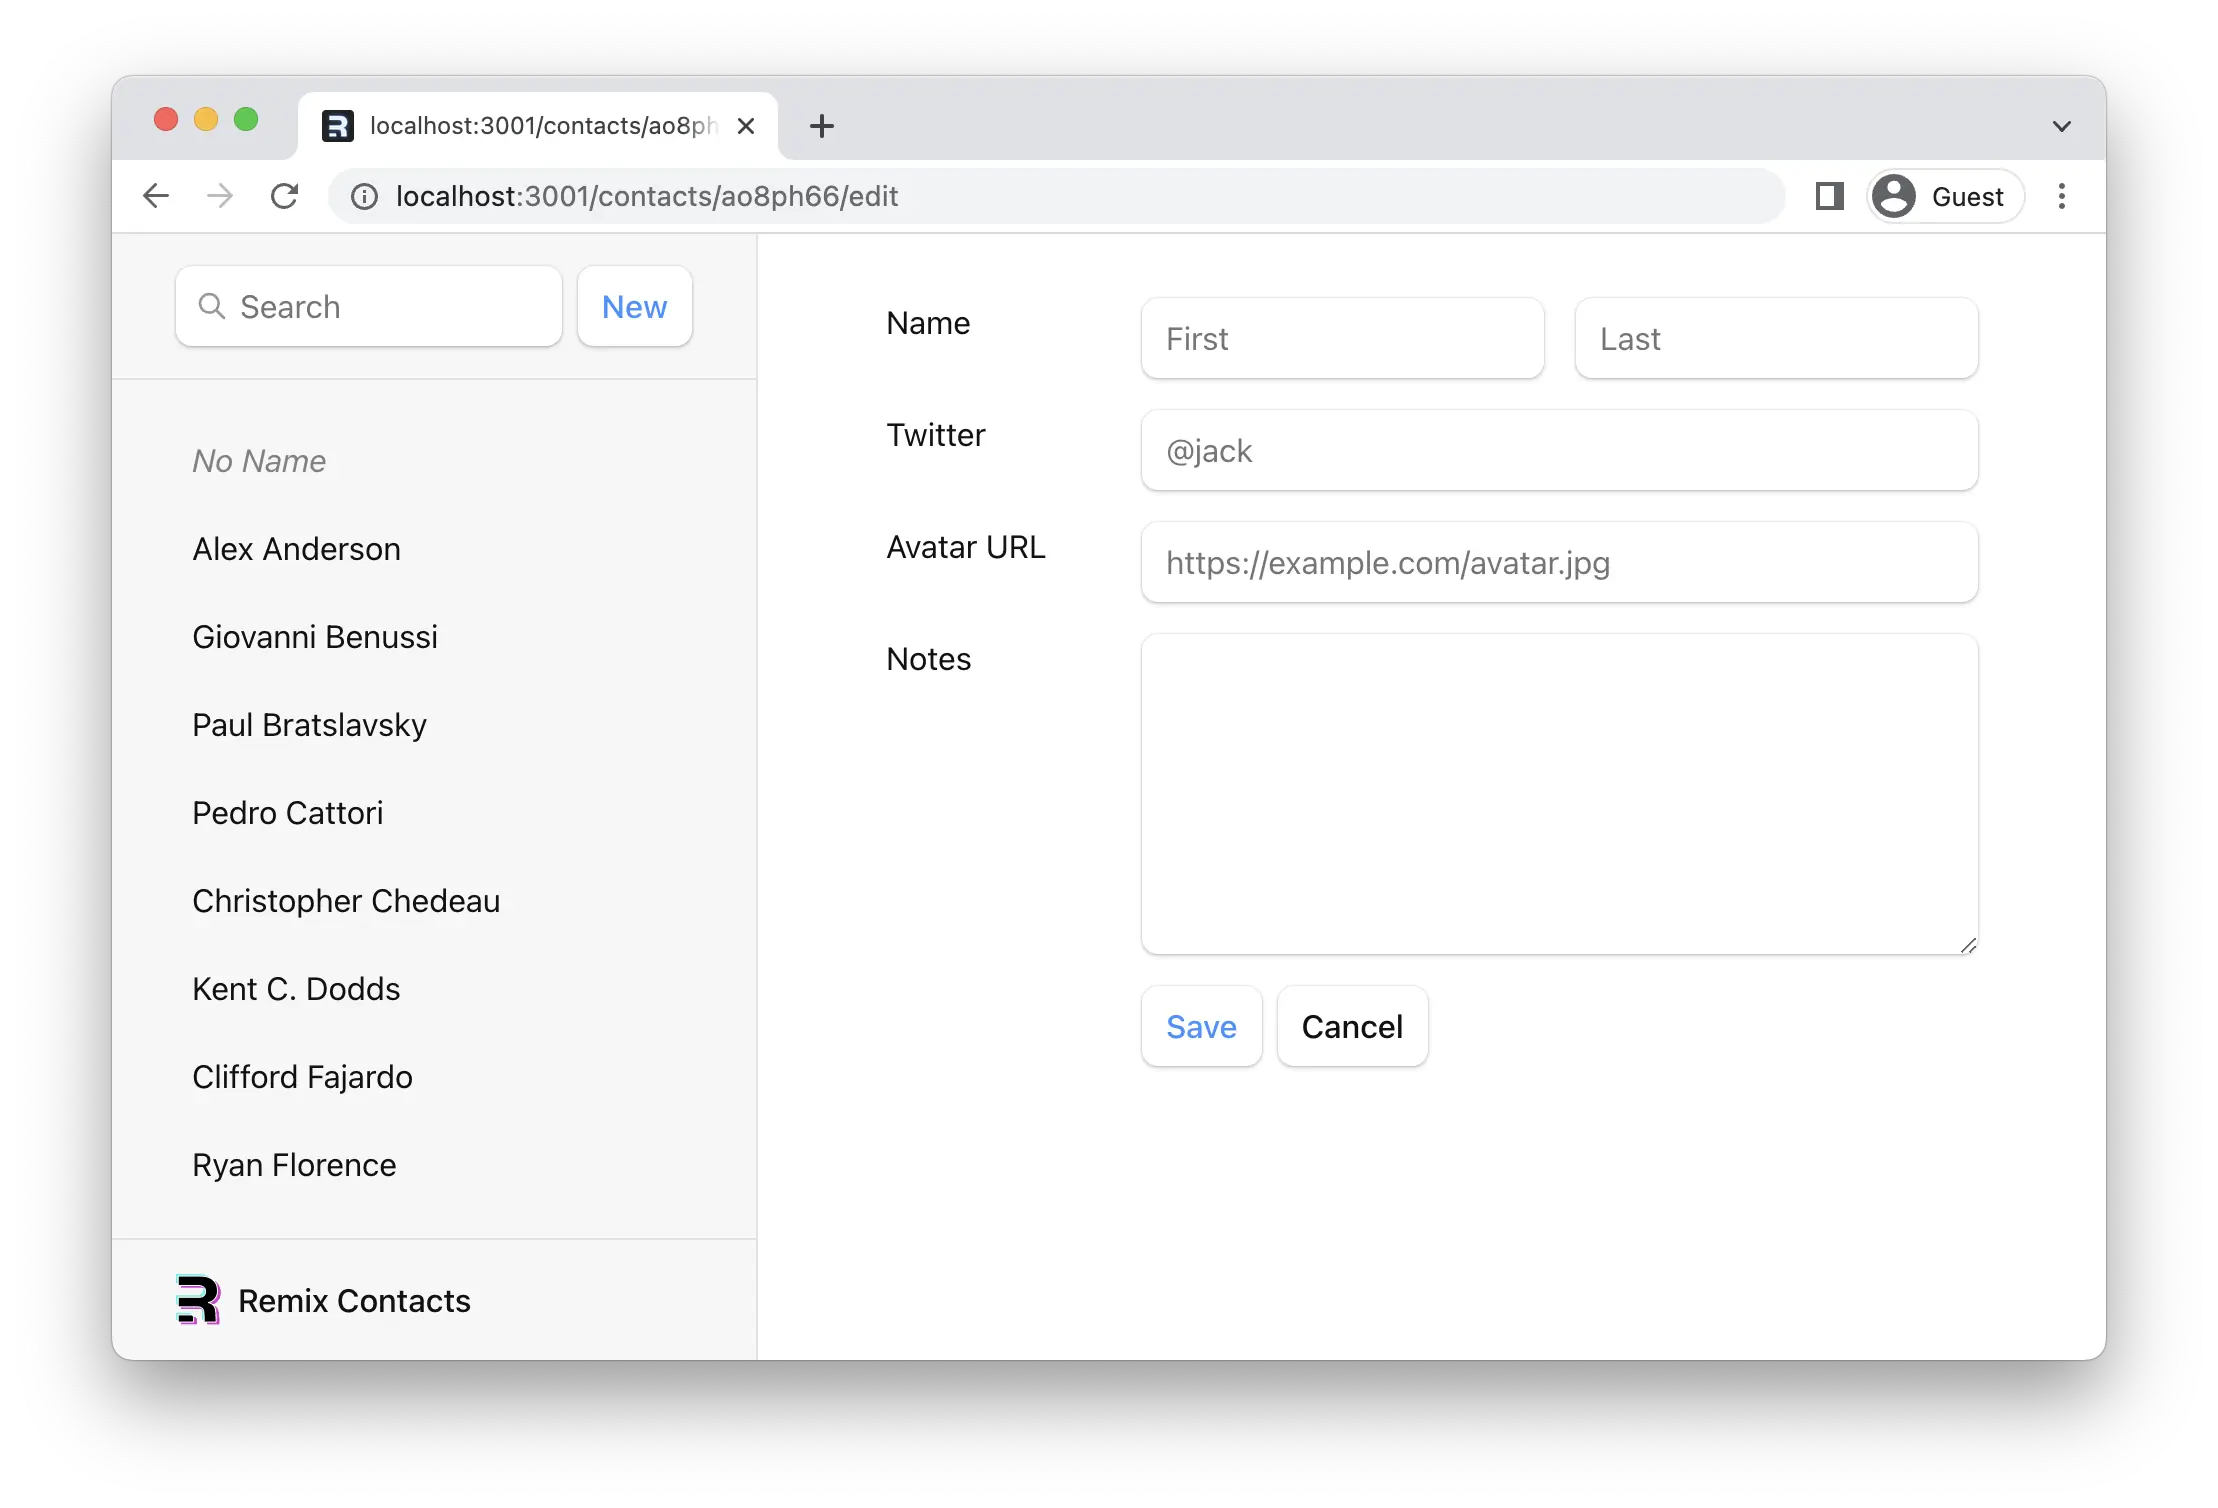
与 <Form> 类似,它接受状态码或 作为第二个参数:让我们在 app/routes/contacts.$contactId_.edit.tsx 处创建新的路由。
¥Just like creating data, you update data with <Form>. Let's make a new route at app/routes/contacts.$contactId_.edit.tsx.
👉 创建编辑组件
¥👉 Create the edit component
touch app/routes/contacts.\$contactId_.edit.tsx
请注意 $contactId_ 中奇怪的 _。默认情况下,路由会自动嵌套在具有相同前缀名称的路由中。在路由末尾添加 _ 是指示路由不要嵌套在 app/routes/contacts.$contactId.tsx 中。在 路由文件命名 指南中阅读更多内容。
¥Note the weird _ in $contactId_. By default, routes will automatically nest inside routes with the same prefixed name. Adding a trailing _ tells the route to not nest inside app/routes/contacts.$contactId.tsx. Read more in the Route File Naming guide.
👉 添加编辑页面 UI。
¥👉 Add the edit page UI
以上内容我们之前都见过,欢迎随意复制/粘贴:
¥Nothing we haven't seen before, feel free to copy/paste:
import type { LoaderFunctionArgs } from "@remix-run/node";
import { Form, useLoaderData } from "@remix-run/react";
import invariant from "tiny-invariant";

import { getContact } from "../data";

export const loader = async ({
  params,
}: LoaderFunctionArgs) => {
  invariant(params.contactId, "Missing contactId param");
  const contact = await getContact(params.contactId);
  if (!contact) {
    throw new Response("Not Found", { status: 404 });
  }
  return { contact };
};

export default function EditContact() {
  const { contact } = useLoaderData<typeof loader>();

  return (
    <Form key={contact.id} id="contact-form" method="post">
      <p>
        <span>Name</span>
        <input
          aria-label="First name"
          defaultValue={contact.first}
          name="first"
          placeholder="First"
          type="text"
        />
        <input
          aria-label="Last name"
          defaultValue={contact.last}
          name="last"
          placeholder="Last"
          type="text"
        />
      </p>
      <label>
        <span>Twitter</span>
        <input
          defaultValue={contact.twitter}
          name="twitter"
          placeholder="@jack"
          type="text"
        />
      </label>
      <label>
        <span>Avatar URL</span>
        <input
          aria-label="Avatar URL"
          defaultValue={contact.avatar}
          name="avatar"
          placeholder="https://example.com/avatar.jpg"
          type="text"
        />
      </label>
      <label>
        <span>Notes</span>
        <textarea
          defaultValue={contact.notes}
          name="notes"
          rows={6}
        />
      </label>
      <p>
        <button type="submit">Save</button>
        <button type="button">Cancel</button>
      </p>
    </Form>
  );
}
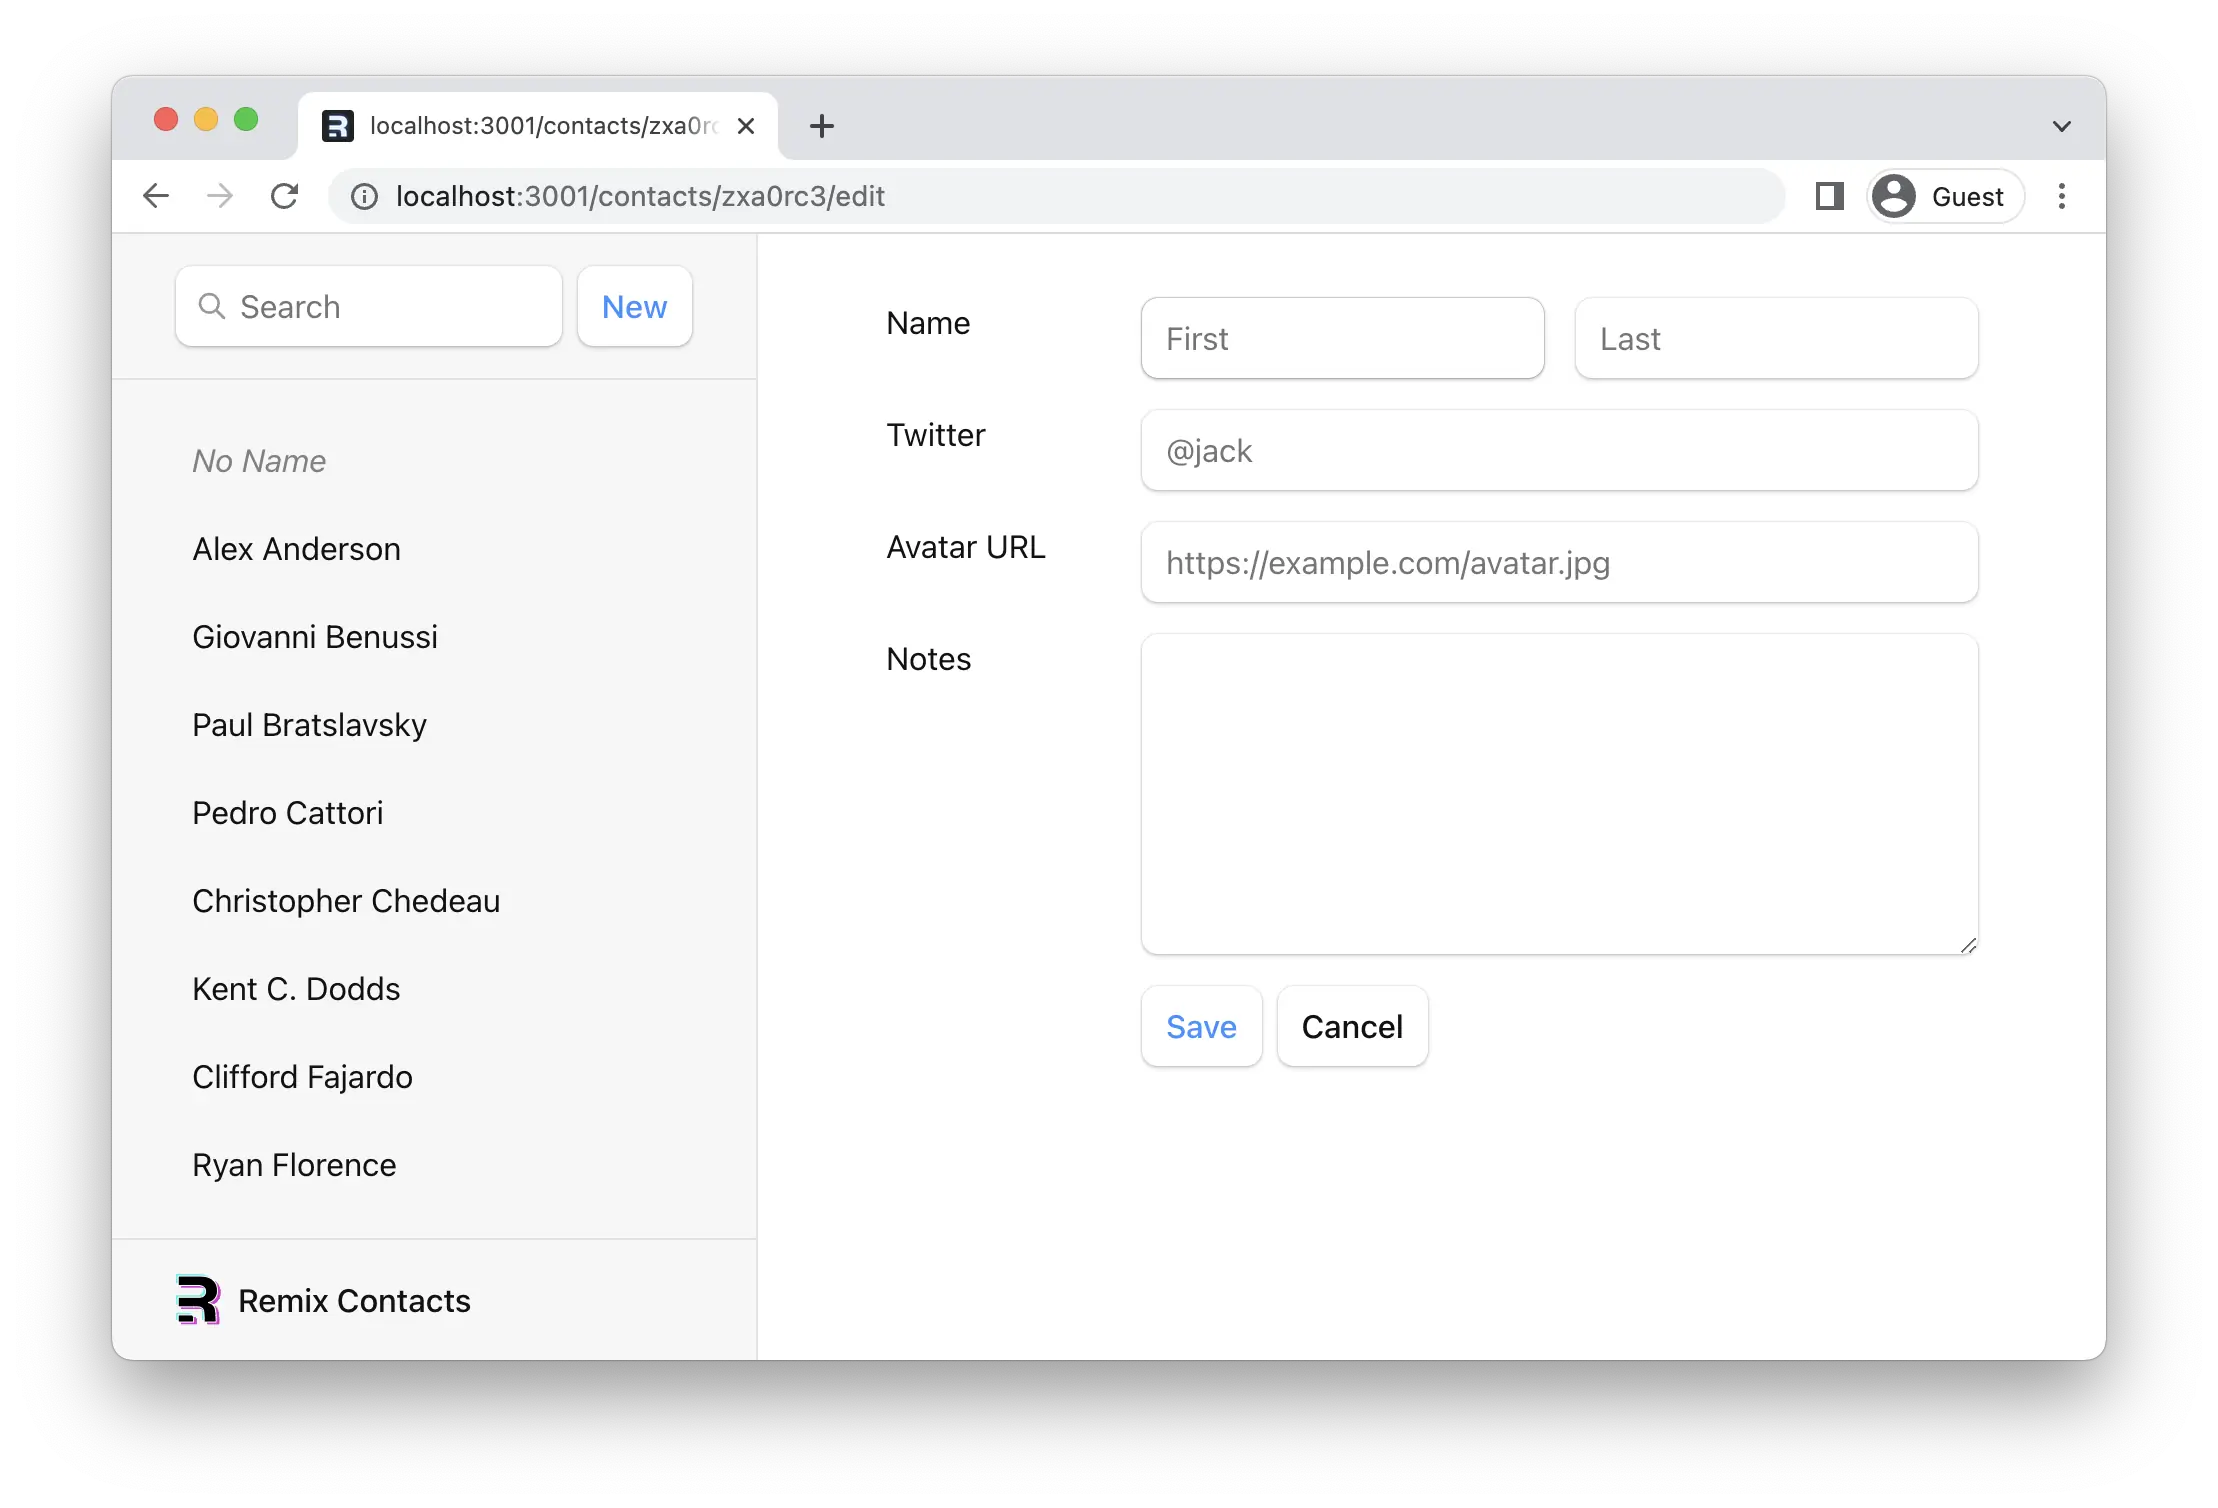
现在点击你的新记录,然后点击 "编辑" 按钮。我们应该看到新的路由。
¥Now click on your new record, then click the "Edit" button. We should see the new route.
使用 FormData 更新联系人
¥Updating Contacts with FormData
我们刚刚创建的编辑路由已经渲染了一个 form。我们需要做的就是添加 action 函数。Remix 会序列化 form,使用 fetch 进行 POST 处理,并自动重新验证所有数据。
¥The edit route we just created already renders a form. All we need to do is add the action function. Remix will serialize the form, POST it with fetch, and automatically revalidate all the data.
👉 在编辑路由中添加 action 函数
¥👉 Add an action function to the edit route
import type {
  ActionFunctionArgs,
  LoaderFunctionArgs,
} from "@remix-run/node";
import { redirect } from "@remix-run/node";
// existing imports

import { getContact, updateContact } from "../data";

export const action = async ({
  params,
  request,
}: ActionFunctionArgs) => {
  invariant(params.contactId, "Missing contactId param");
  const formData = await request.formData();
  const updates = Object.fromEntries(formData);
  await updateContact(params.contactId, updates);
  return redirect(`/contacts/${params.contactId}`);
};

// existing code
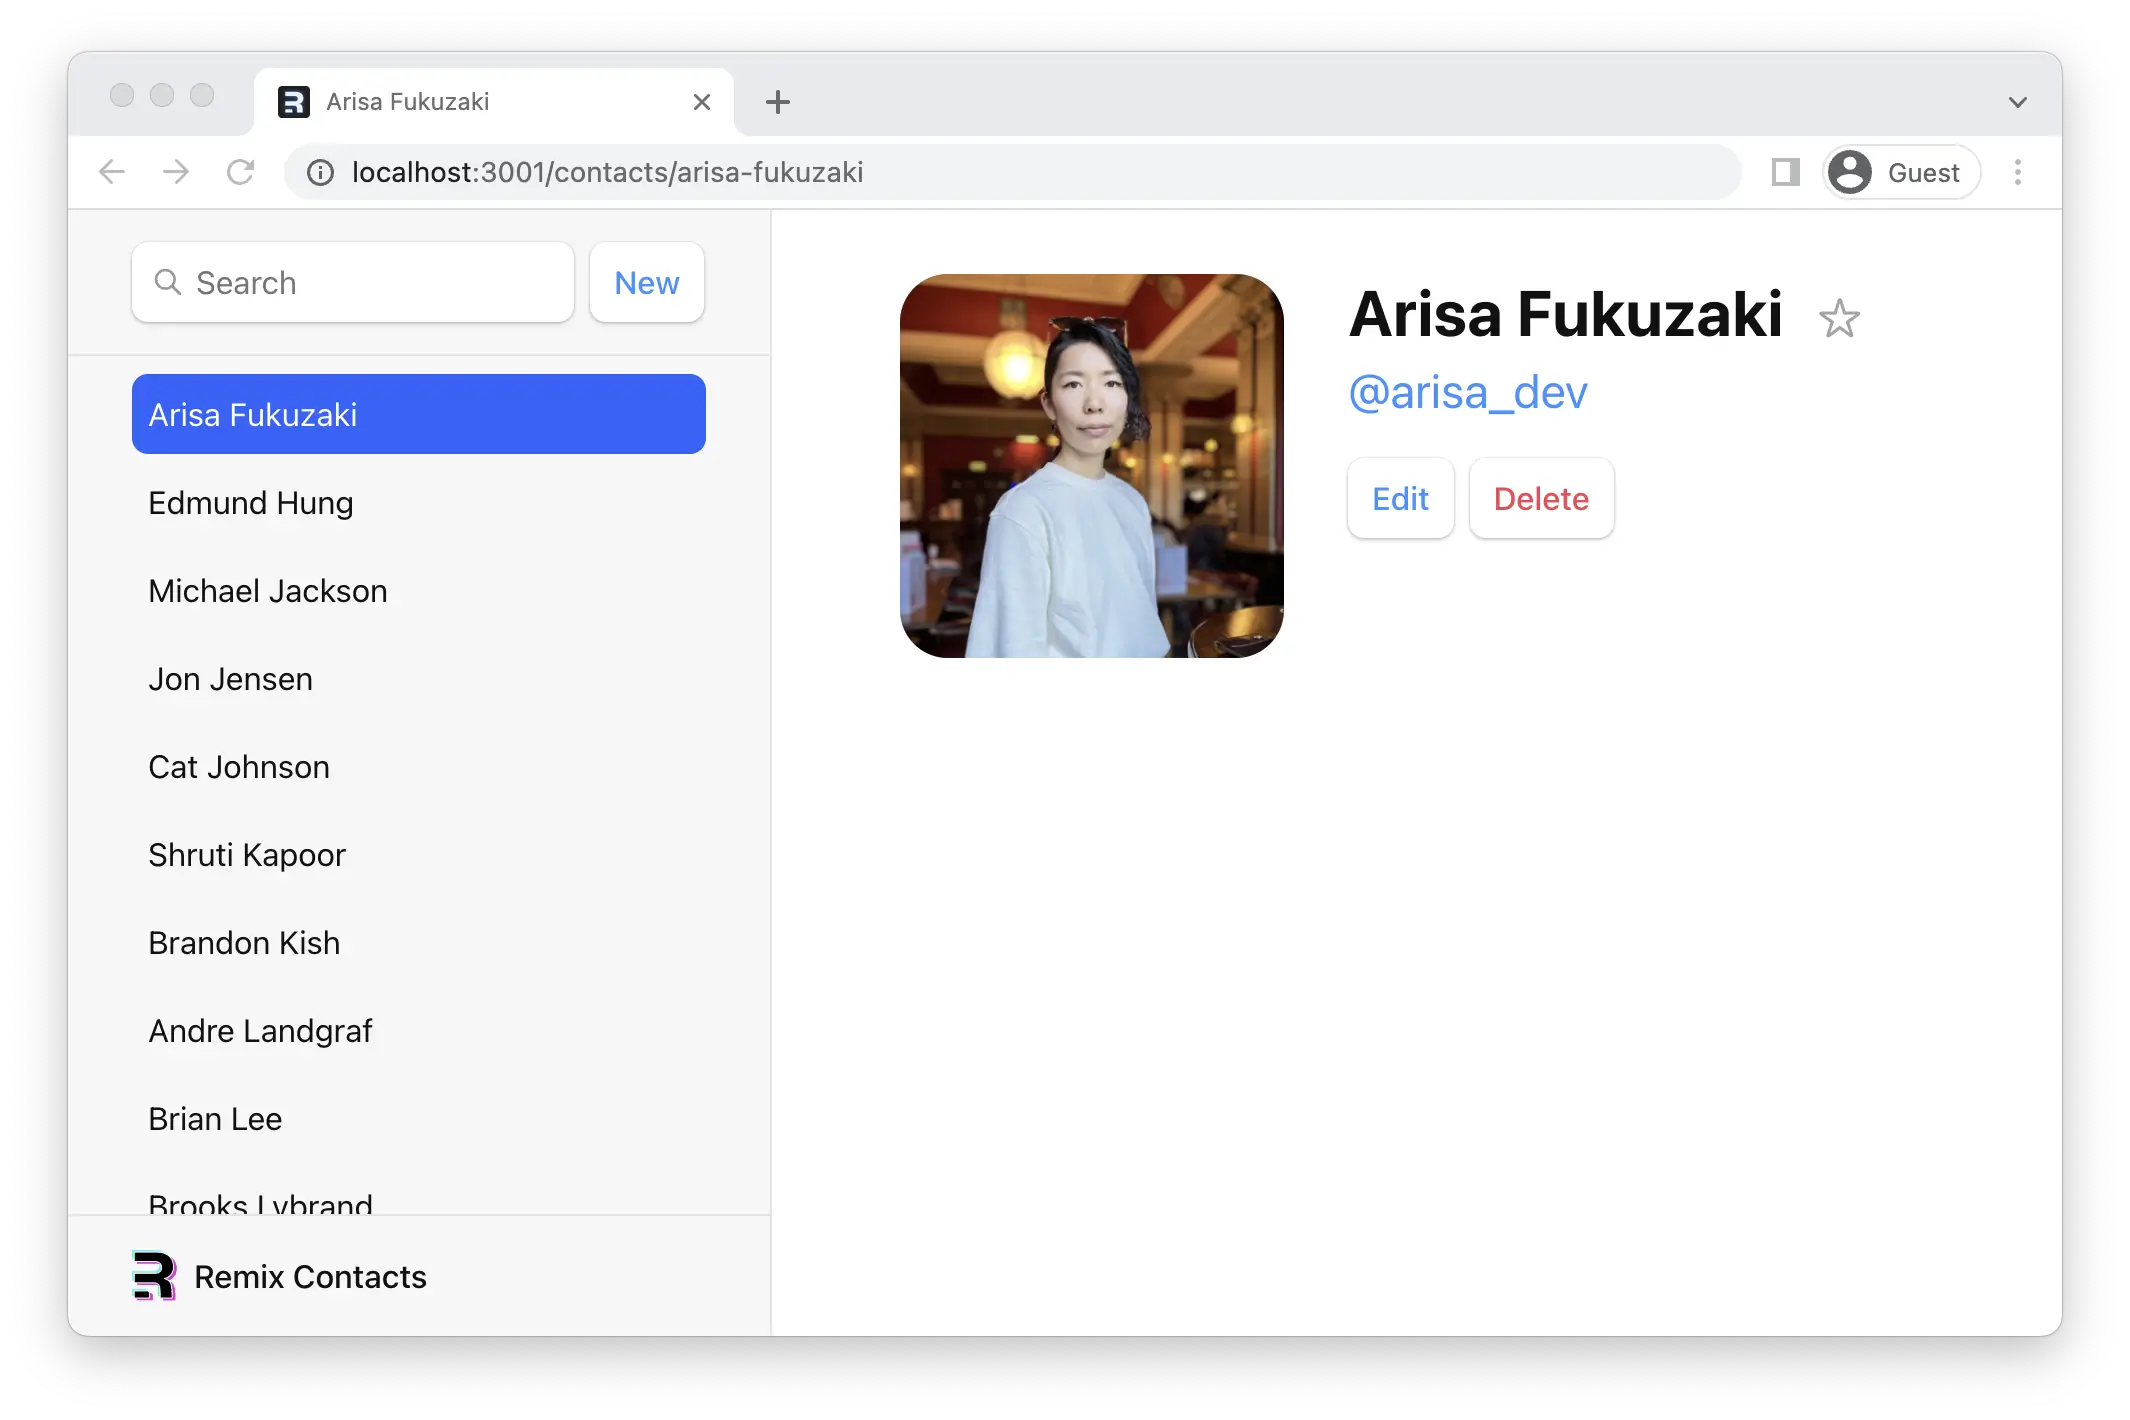
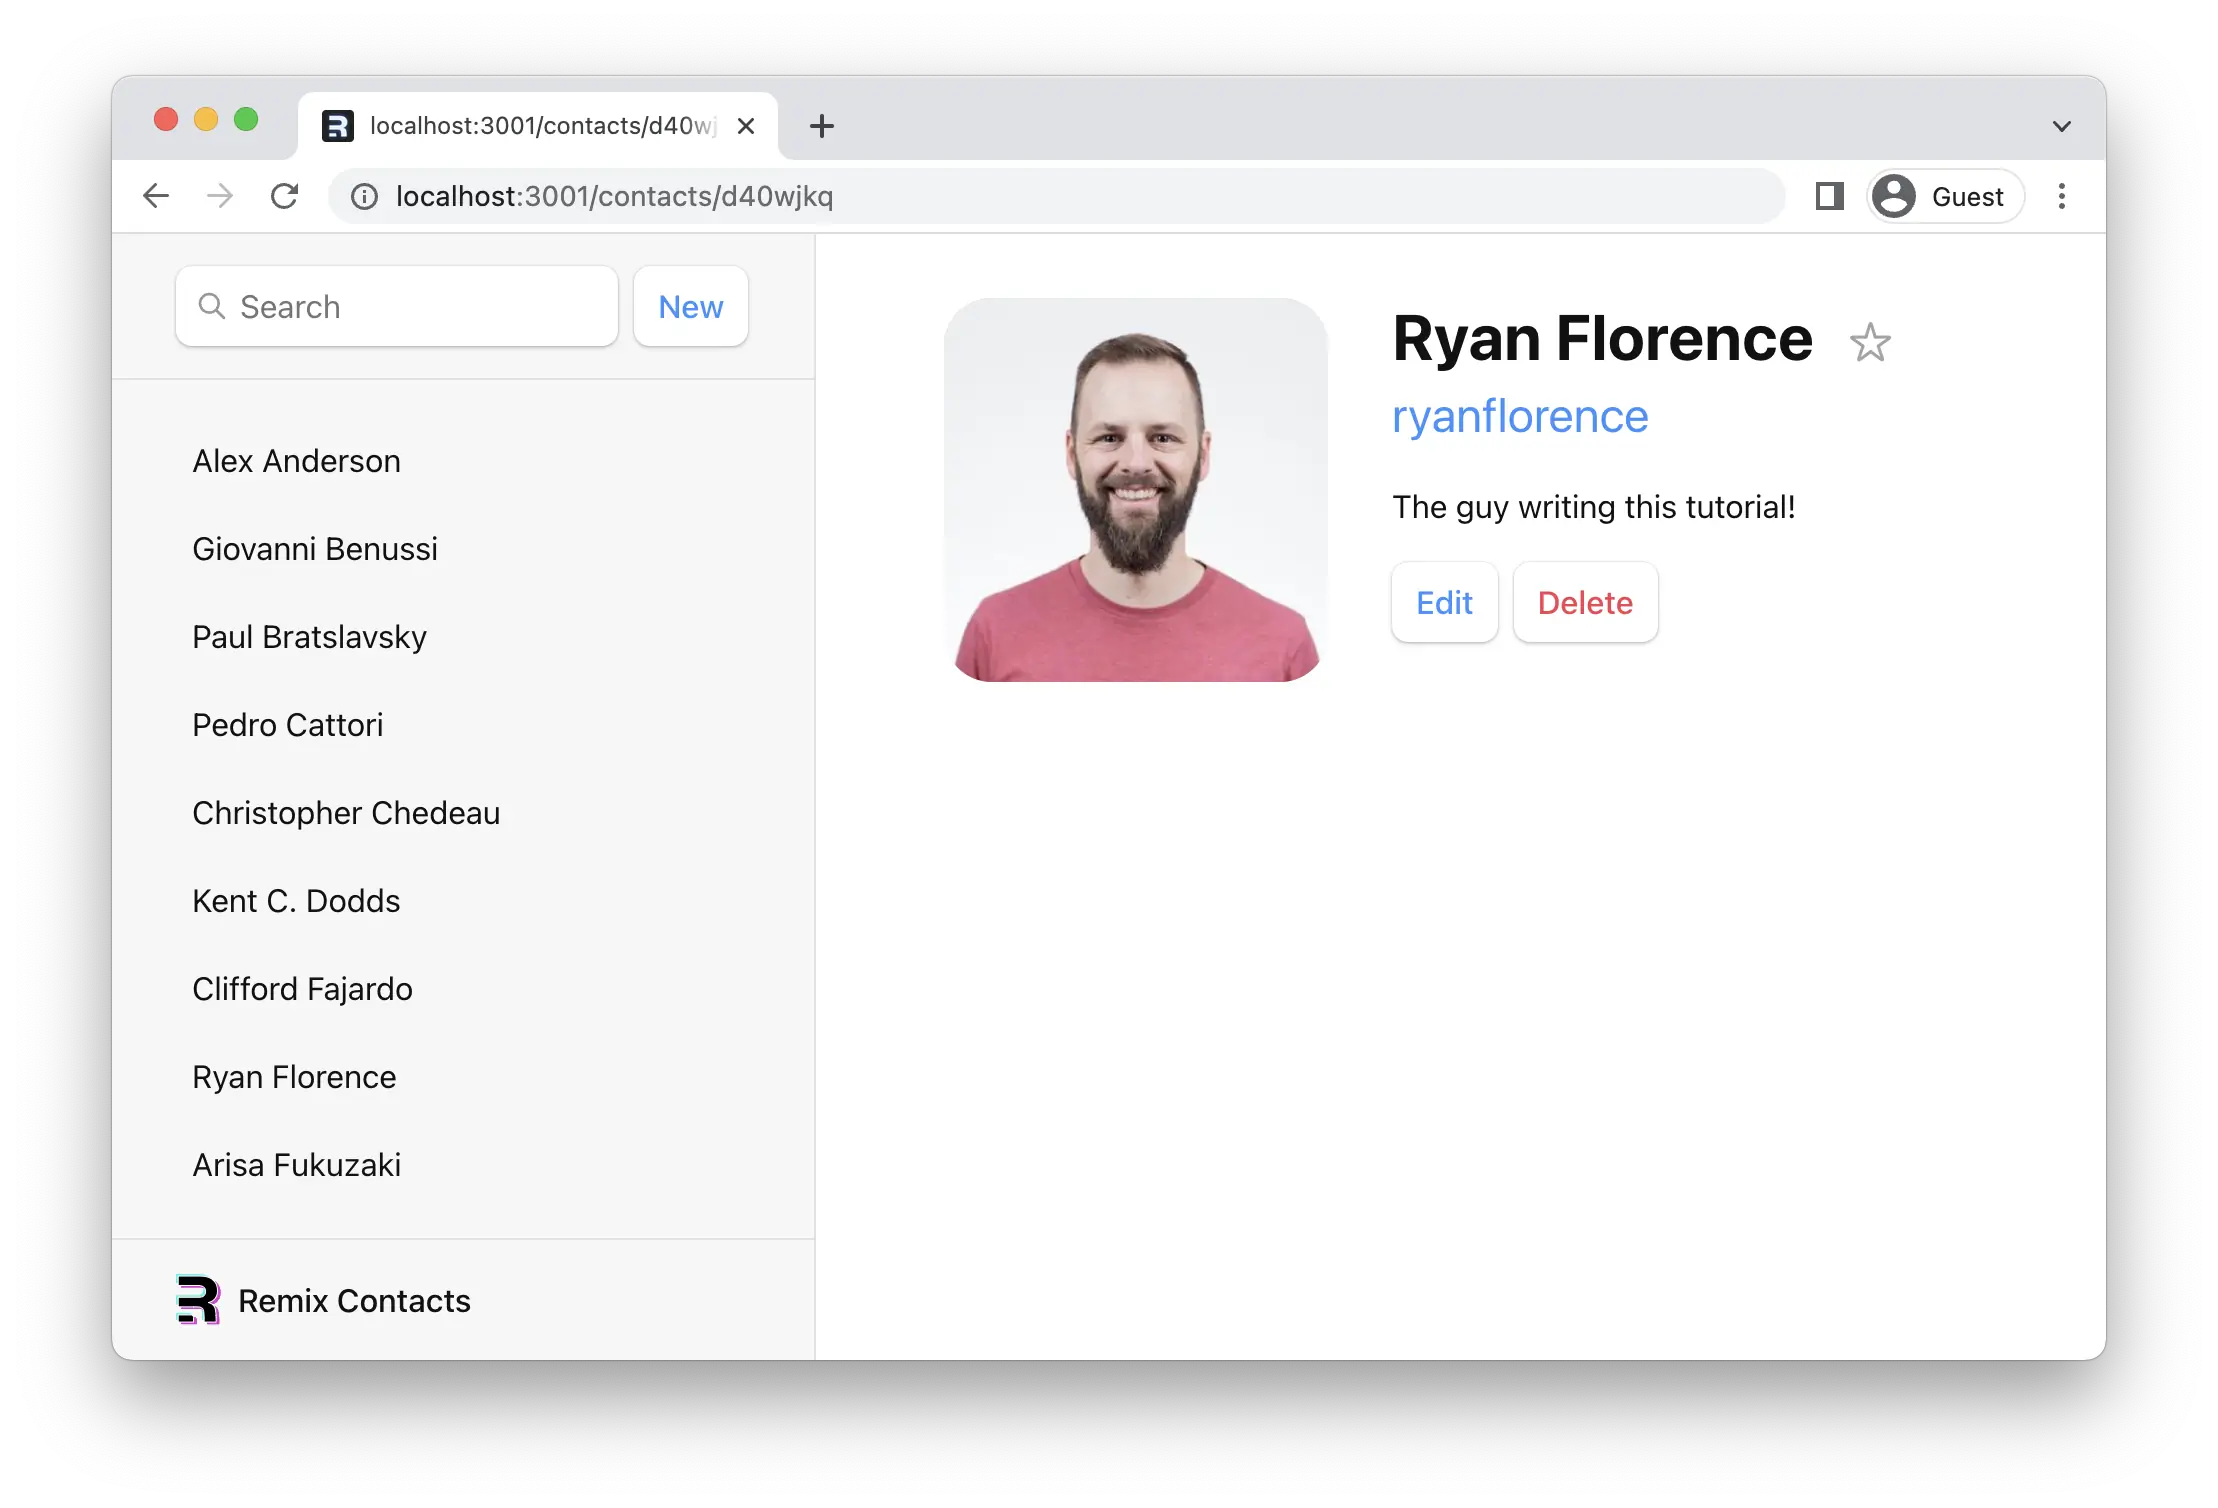
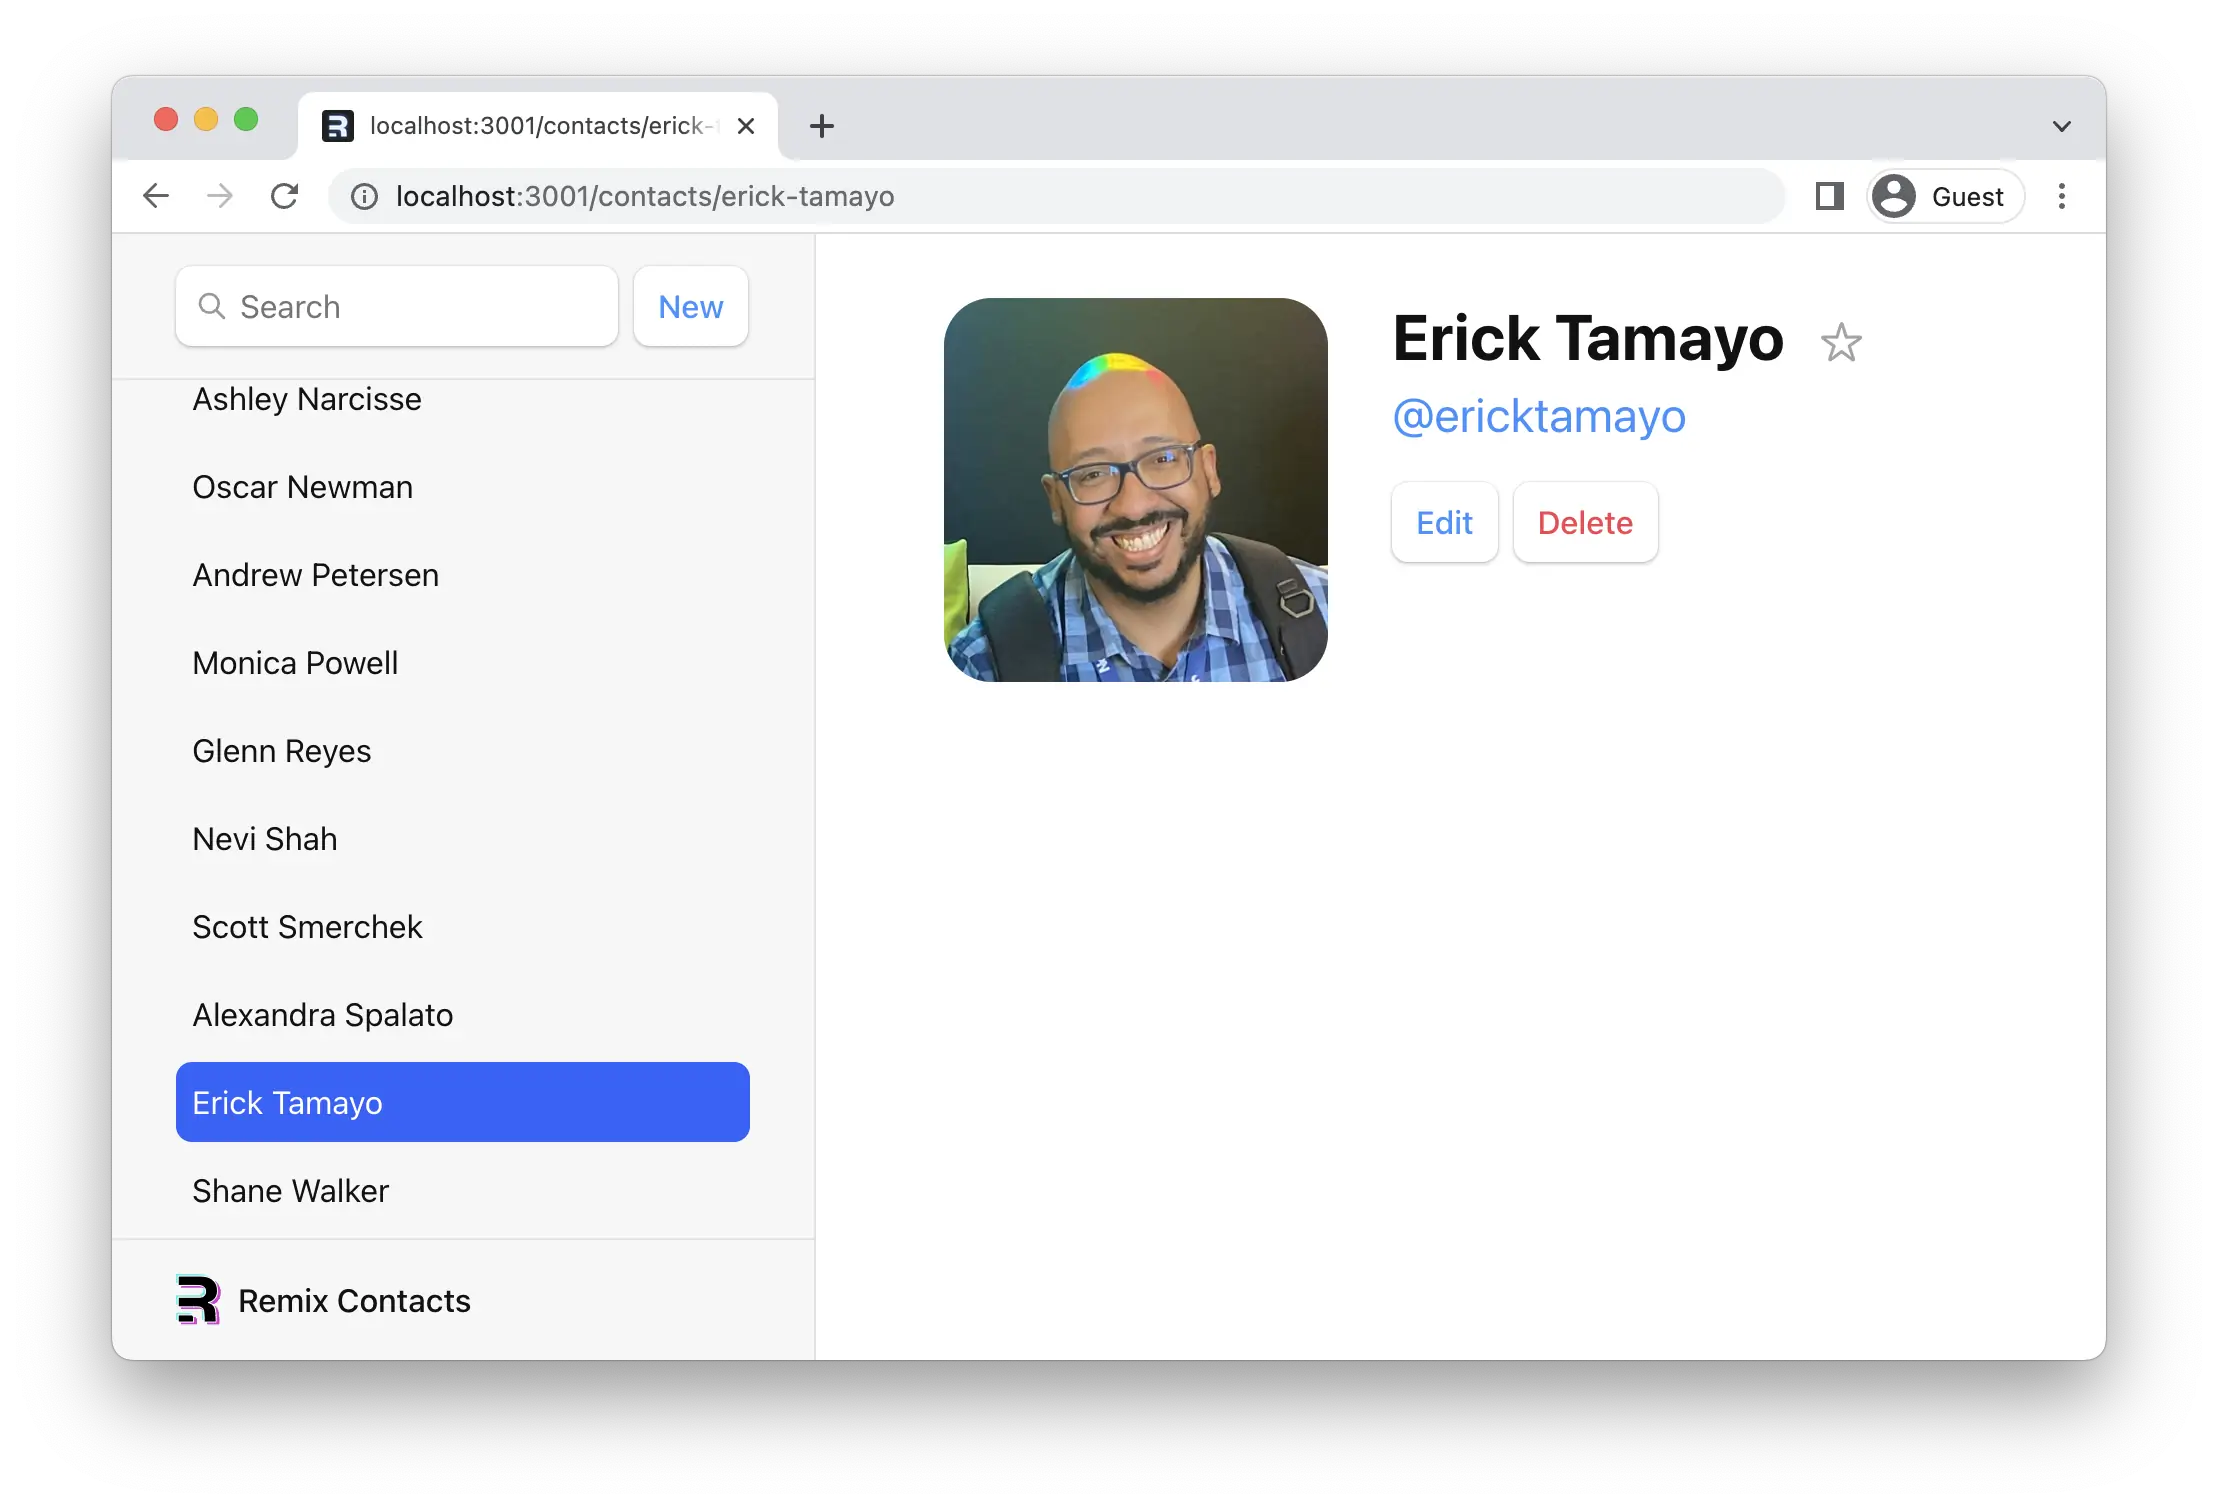
填写表单,点击保存,你应该会看到类似这样的内容!(除了看起来更舒服,而且可能更简洁。)
¥Fill out the form, hit save, and you should see something like this! (Except easier on the eyes and maybe less hairy.)
修改讨论
¥Mutation Discussion
😑 它起作用了,但我不知道这里发生了什么……
¥😑 It worked, but I have no idea what is going on here...
让我们深入研究一下……
¥Let's dig in a bit...
打开 contacts.$contactId_.edit.tsx 并查看 form 元素。注意它们各自都有名称:
¥Open up contacts.$contactId_.edit.tsx and look at the form elements. Notice how they each have a name:
<input
  aria-label="First name"
  defaultValue={contact.first}
  name="first"
  placeholder="First"
  type="text"
/>
如果没有 JavaScript,提交表单时,浏览器将创建 FormData,并在将表单发送到服务器时将其设置为请求主体。如前所述,Remix 可以避免这种情况,并通过将请求发送到你的 action 函数(包括 FormData)来模拟浏览器。
¥Without JavaScript, when a form is submitted, the browser will create FormData and set it as the body of the request when it sends it to the server. As mentioned before, Remix prevents that and emulates the browser by sending the request to your action function with fetch instead, including the FormData.
form 中的每个字段都可以通过 formData.get(name) 访问。例如,给定上面的输入字段,你可以像这样访问名字和姓氏:
¥Each field in the form is accessible with formData.get(name). For example, given the input field from above, you could access the first and last names like this:
export const action = async ({
  params,
  request,
}: ActionFunctionArgs) => {
  const formData = await request.formData();
  const firstName = formData.get("first");
  const lastName = formData.get("last");
  // ...
};
由于我们有很多表单字段,我们使用 Object.fromEntries 将它们全部收集到一个对象中,这正是我们的 updateContact 函数所需要的。
¥Since we have a handful of form fields, we used Object.fromEntries to collect them all into an object, which is exactly what our updateContact function wants.
const updates = Object.fromEntries(formData);
updates.first; // "Some"
updates.last; // "Name"
除了 action 函数之外,Remix 不提供我们正在讨论的任何 API:request、request.formData、Object.fromEntries 均由 Web 平台提供。
¥Aside from the action function, Remix provides none of these APIs we're discussing: request, request.formData, Object.fromEntries are all provided by the web platform.
完成 action 后,请注意末尾的 redirect:
¥After we finished the action, note the redirect at the end:
export const action = async ({
  params,
  request,
}: ActionFunctionArgs) => {
  invariant(params.contactId, "Missing contactId param");
  const formData = await request.formData();
  const updates = Object.fromEntries(formData);
  await updateContact(params.contactId, updates);
  return redirect(`/contacts/${params.contactId}`);
};
action 和 loader 函数都可以支持 返回 Response(这很合理,因为它们支持 Request!)。redirect 辅助函数只是使返回一个指示应用更改位置的 Response 对象变得更容易。
¥action and loader functions can both return a Response (makes sense, since they received a Request!). The redirect helper just makes it easier to return a Response that tells the app to change locations.
如果没有客户端路由,如果服务器在 POST 请求后重定向,新页面将获取最新数据并渲染。正如我们之前所了解的,Remix 模拟了这种模型,并在 action 调用后自动重新验证页面上的数据。这就是为什么我们保存表单时侧边栏会自动更新。如果没有客户端路由,额外的重新验证代码就不存在,因此在 Remix 中,如果使用客户端路由,它也不需要存在!
¥Without client side routing, if a server redirected after a POST request, the new page would fetch the latest data and render. As we learned before, Remix emulates this model and automatically revalidates the data on the page after the action call. That's why the sidebar automatically updates when we save the form. The extra revalidation code doesn't exist without client side routing, so it doesn't need to exist with client side routing in Remix either!
最后一件事。如果没有 JavaScript,redirect 将会是一个普通的重定向。不过,使用 JavaScript 时,它是一个客户端重定向,因此用户不会丢失客户端状态,例如滚动位置或组件状态。
¥One last thing. Without JavaScript, the redirect would be a normal redirect. However, with JavaScript it's a client-side redirect, so the user doesn't lose client state like scroll positions or component state.
将新记录重定向到编辑页面
¥Redirecting new records to the edit page
现在我们知道了如何重定向,让我们更新创建新联系人的操作,使其重定向到编辑页面:
¥Now that we know how to redirect, let's update the action that creates new contacts to redirect to the edit page:
👉 重定向到新记录的编辑页面
¥👉 Redirect to the new record's edit page
// existing imports
import { redirect } from "@remix-run/node";
// existing imports

export const action = async () => {
  const contact = await createEmptyContact();
  return redirect(`/contacts/${contact.id}/edit`);
};

// existing code
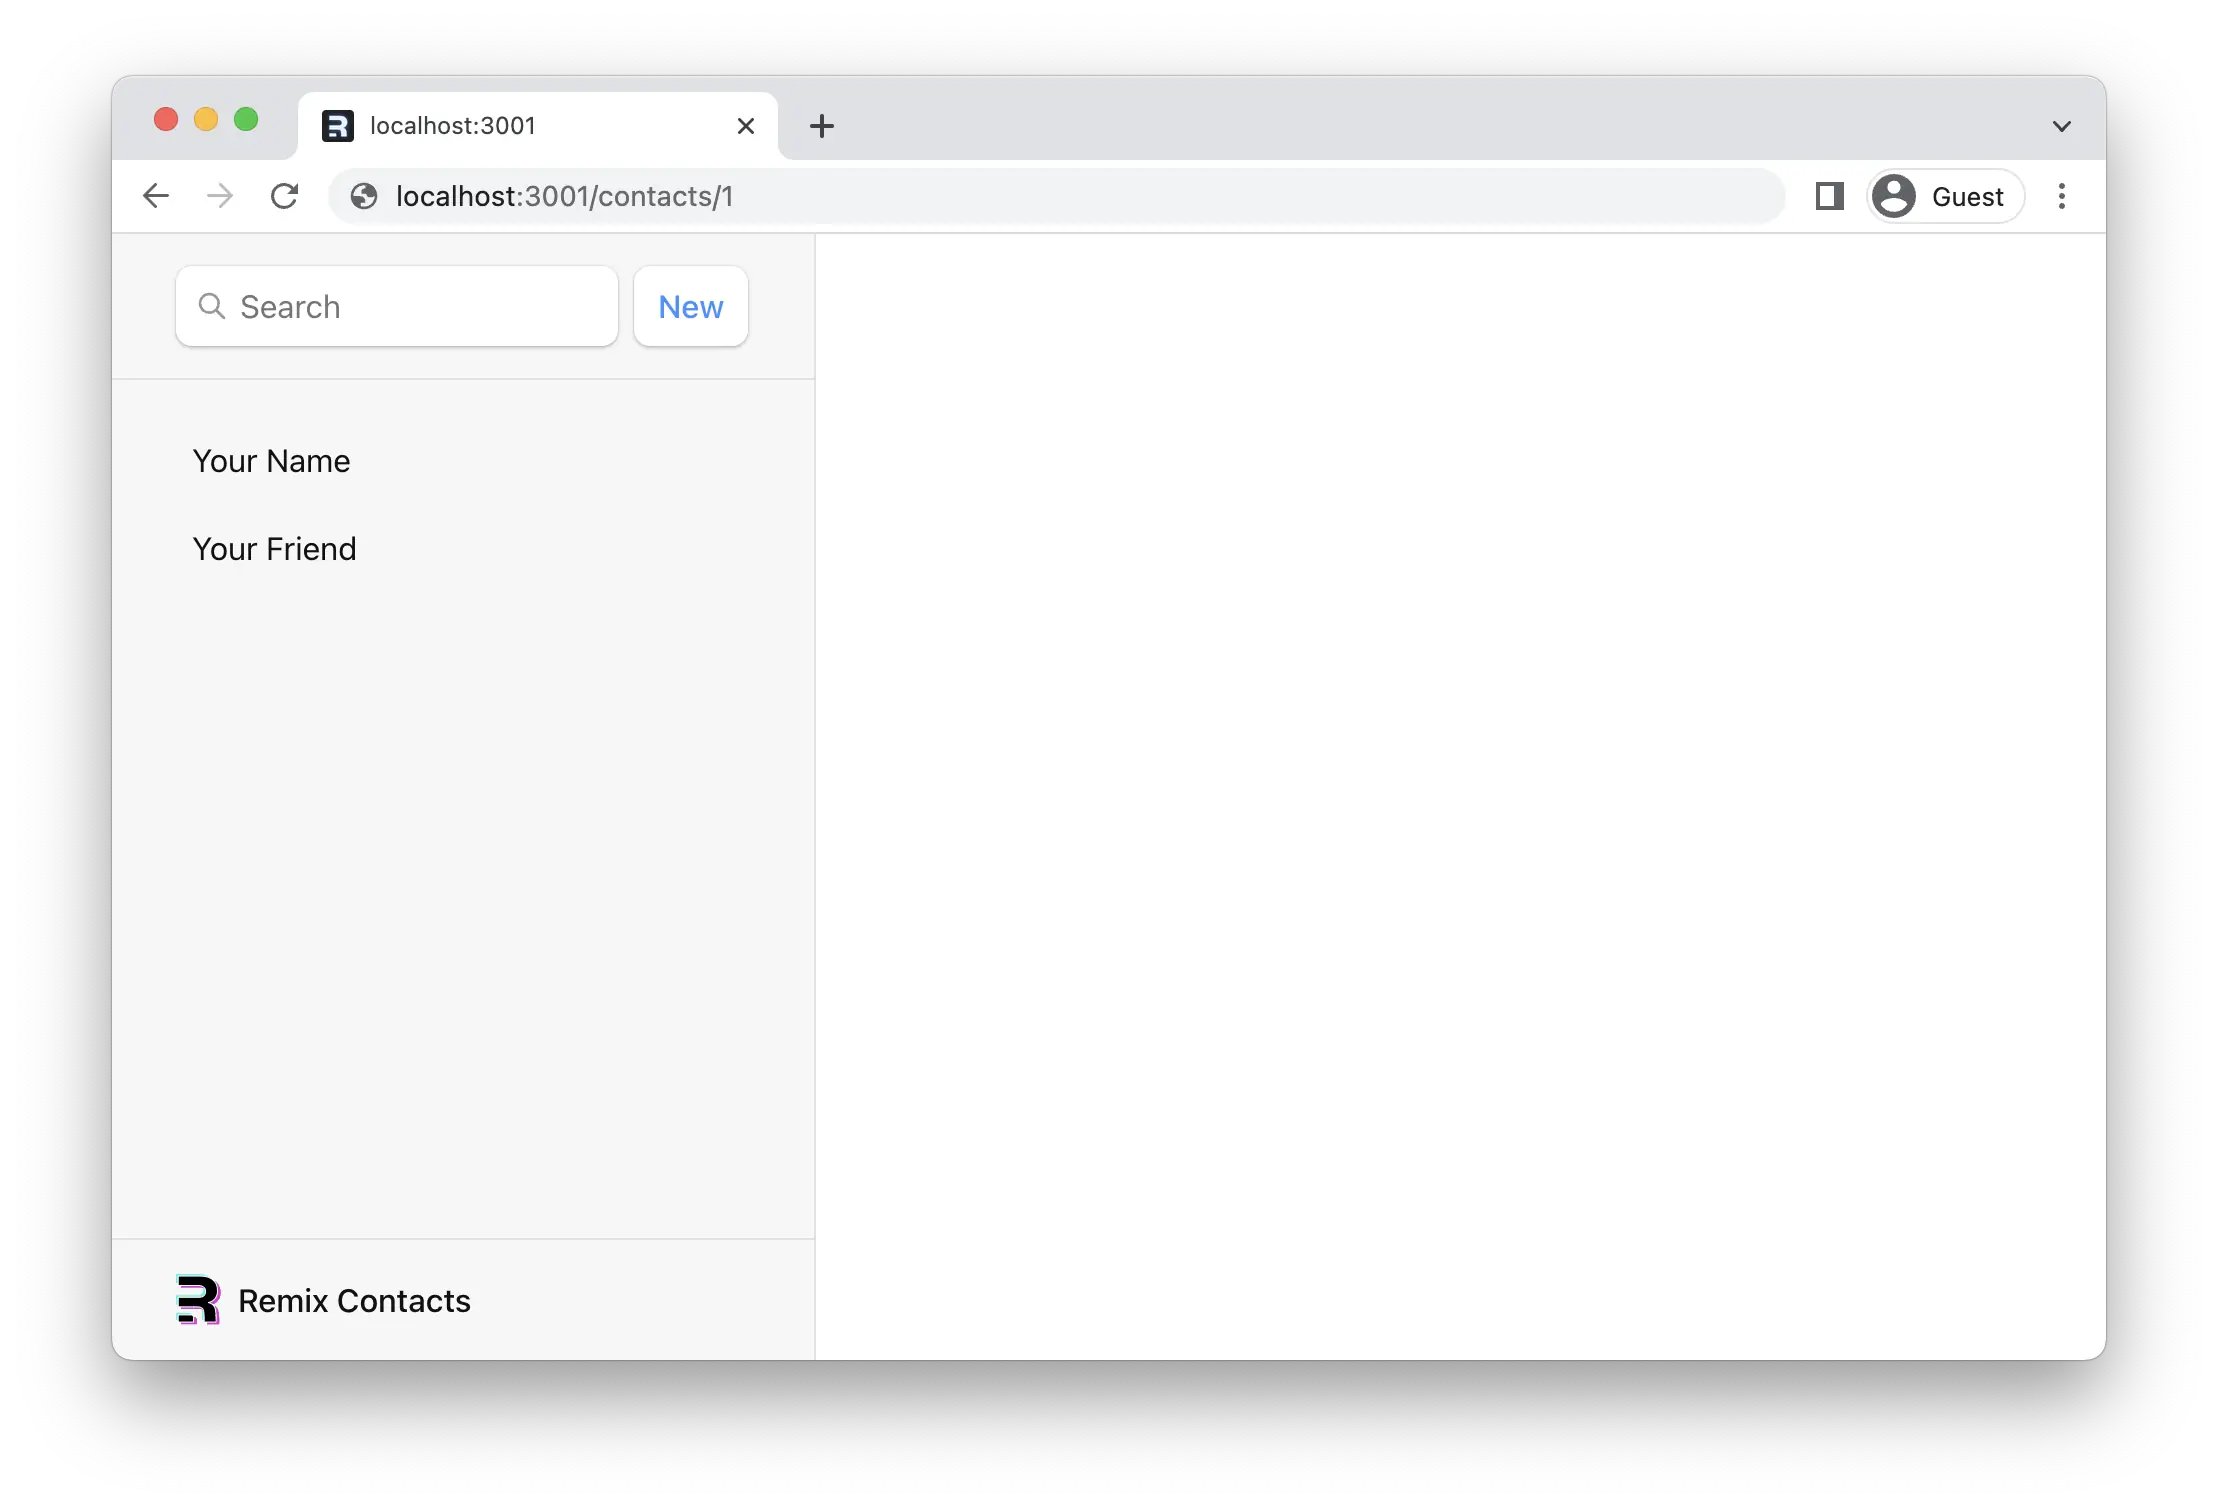
现在,当我们点击 "新增" 时,我们应该会进入编辑页面:
¥Now when we click "New", we should end up on the edit page:
活动链接样式
¥Active Link Styling
现在我们有了一堆记录,但我们在侧边栏中查看的是哪一条记录并不明确。我们可以使用 NavLink 来修复这个问题。
¥Now that we have a bunch of records, it's not clear which one we're looking at in the sidebar. We can use NavLink to fix this.
👉 将侧边栏中的 <Link> 替换为 <NavLink>
¥👉 Replace <Link> with <NavLink> in the sidebar
// existing imports
import {
  Form,
  Links,
  Meta,
  NavLink,
  Outlet,
  Scripts,
  ScrollRestoration,
  useLoaderData,
} from "@remix-run/react";

// existing imports and exports

export default function App() {
  const { contacts } = useLoaderData<typeof loader>();

  return (
    <html lang="en">
      {/* existing elements */}
      <body>
        <div id="sidebar">
          {/* existing elements */}
          <ul>
            {contacts.map((contact) => (
              <li key={contact.id}>
                <NavLink
                  className={({ isActive, isPending }) =>
                    isActive
                      ? "active"
                      : isPending
                      ? "pending"
                      : ""
                  }
                  to={`contacts/${contact.id}`}
                >
                  {/* existing elements */}
                </NavLink>
              </li>
            ))}
          </ul>
          {/* existing elements */}
        </div>
        {/* existing elements */}
      </body>
    </html>
  );
}
请注意,我们将一个函数传递给 className。当用户访问与 <NavLink to> 匹配的 URL 时,isActive 将为 true。当它即将激活(数据仍在加载)时,isPending 将为 true。这使我们能够轻松地指示用户当前位置,并在用户点击链接但数据需要加载时提供即时反馈。
¥Note that we are passing a function to className. When the user is at the URL that matches <NavLink to>, then isActive will be true. When it's about to be active (the data is still loading) then isPending will be true. This allows us to easily indicate where the user is and also provide immediate feedback when links are clicked, but data needs to be loaded.
全局待处理 UI
¥Global Pending UI
当用户浏览应用时,Remix 会在加载下一页数据时保留旧页面。你可能已经注意到,当你在列表之间点击时,应用感觉有点无响应。让我们向用户提供一些反馈,这样应用就不会感觉反应迟钝。
¥As the user navigates the app, Remix will leave the old page up as data is loading for the next page. You may have noticed the app feels a little unresponsive as you click between the list. Let's provide the user with some feedback so the app doesn't feel unresponsive.
Remix 管理着后台的所有状态,并揭示了构建动态 Web 应用所需的所有组件。在这种情况下,我们将使用 useNavigation 钩子。
¥Remix is managing all the states behind the scenes and reveals the pieces you need to build dynamic web apps. In this case, we'll use the useNavigation hook.
👉 使用 useNavigation 添加全局待处理 UI
¥👉 Use useNavigation to add global pending UI
// existing imports
import {
  Form,
  Links,
  Meta,
  NavLink,
  Outlet,
  Scripts,
  ScrollRestoration,
  useLoaderData,
  useNavigation,
} from "@remix-run/react";

// existing imports and exports

export default function App() {
  const { contacts } = useLoaderData<typeof loader>();
  const navigation = useNavigation();

  return (
    <html lang="en">
      {/* existing elements */}
      <body>
        {/* existing elements */}
        <div
          className={
            navigation.state === "loading" ? "loading" : ""
          }
          id="detail"
        >
          <Outlet />
        </div>
        {/* existing elements */}
      </body>
    </html>
  );
}
useNavigation 返回当前导航状态:它可以是 "idle"、"loading" 或 "submitting"。
¥useNavigation returns the current navigation state: it can be one of "idle", "loading" or "submitting".
在我们的例子中,如果我们不处于空闲状态,我们会在应用的主体部分添加一个 "loading" 类。CSS 会在短暂延迟后添加一个漂亮的淡入淡出效果(以避免快速加载时 UI 闪烁)。不过,你可以做任何你想做的事情,比如在顶部显示一个旋转按钮或加载栏。
¥In our case, we add a "loading" class to the main part of the app if we're not idle. The CSS then adds a nice fade after a short delay (to avoid flickering the UI for fast loads). You could do anything you want, though, like show a spinner or loading bar across the top.
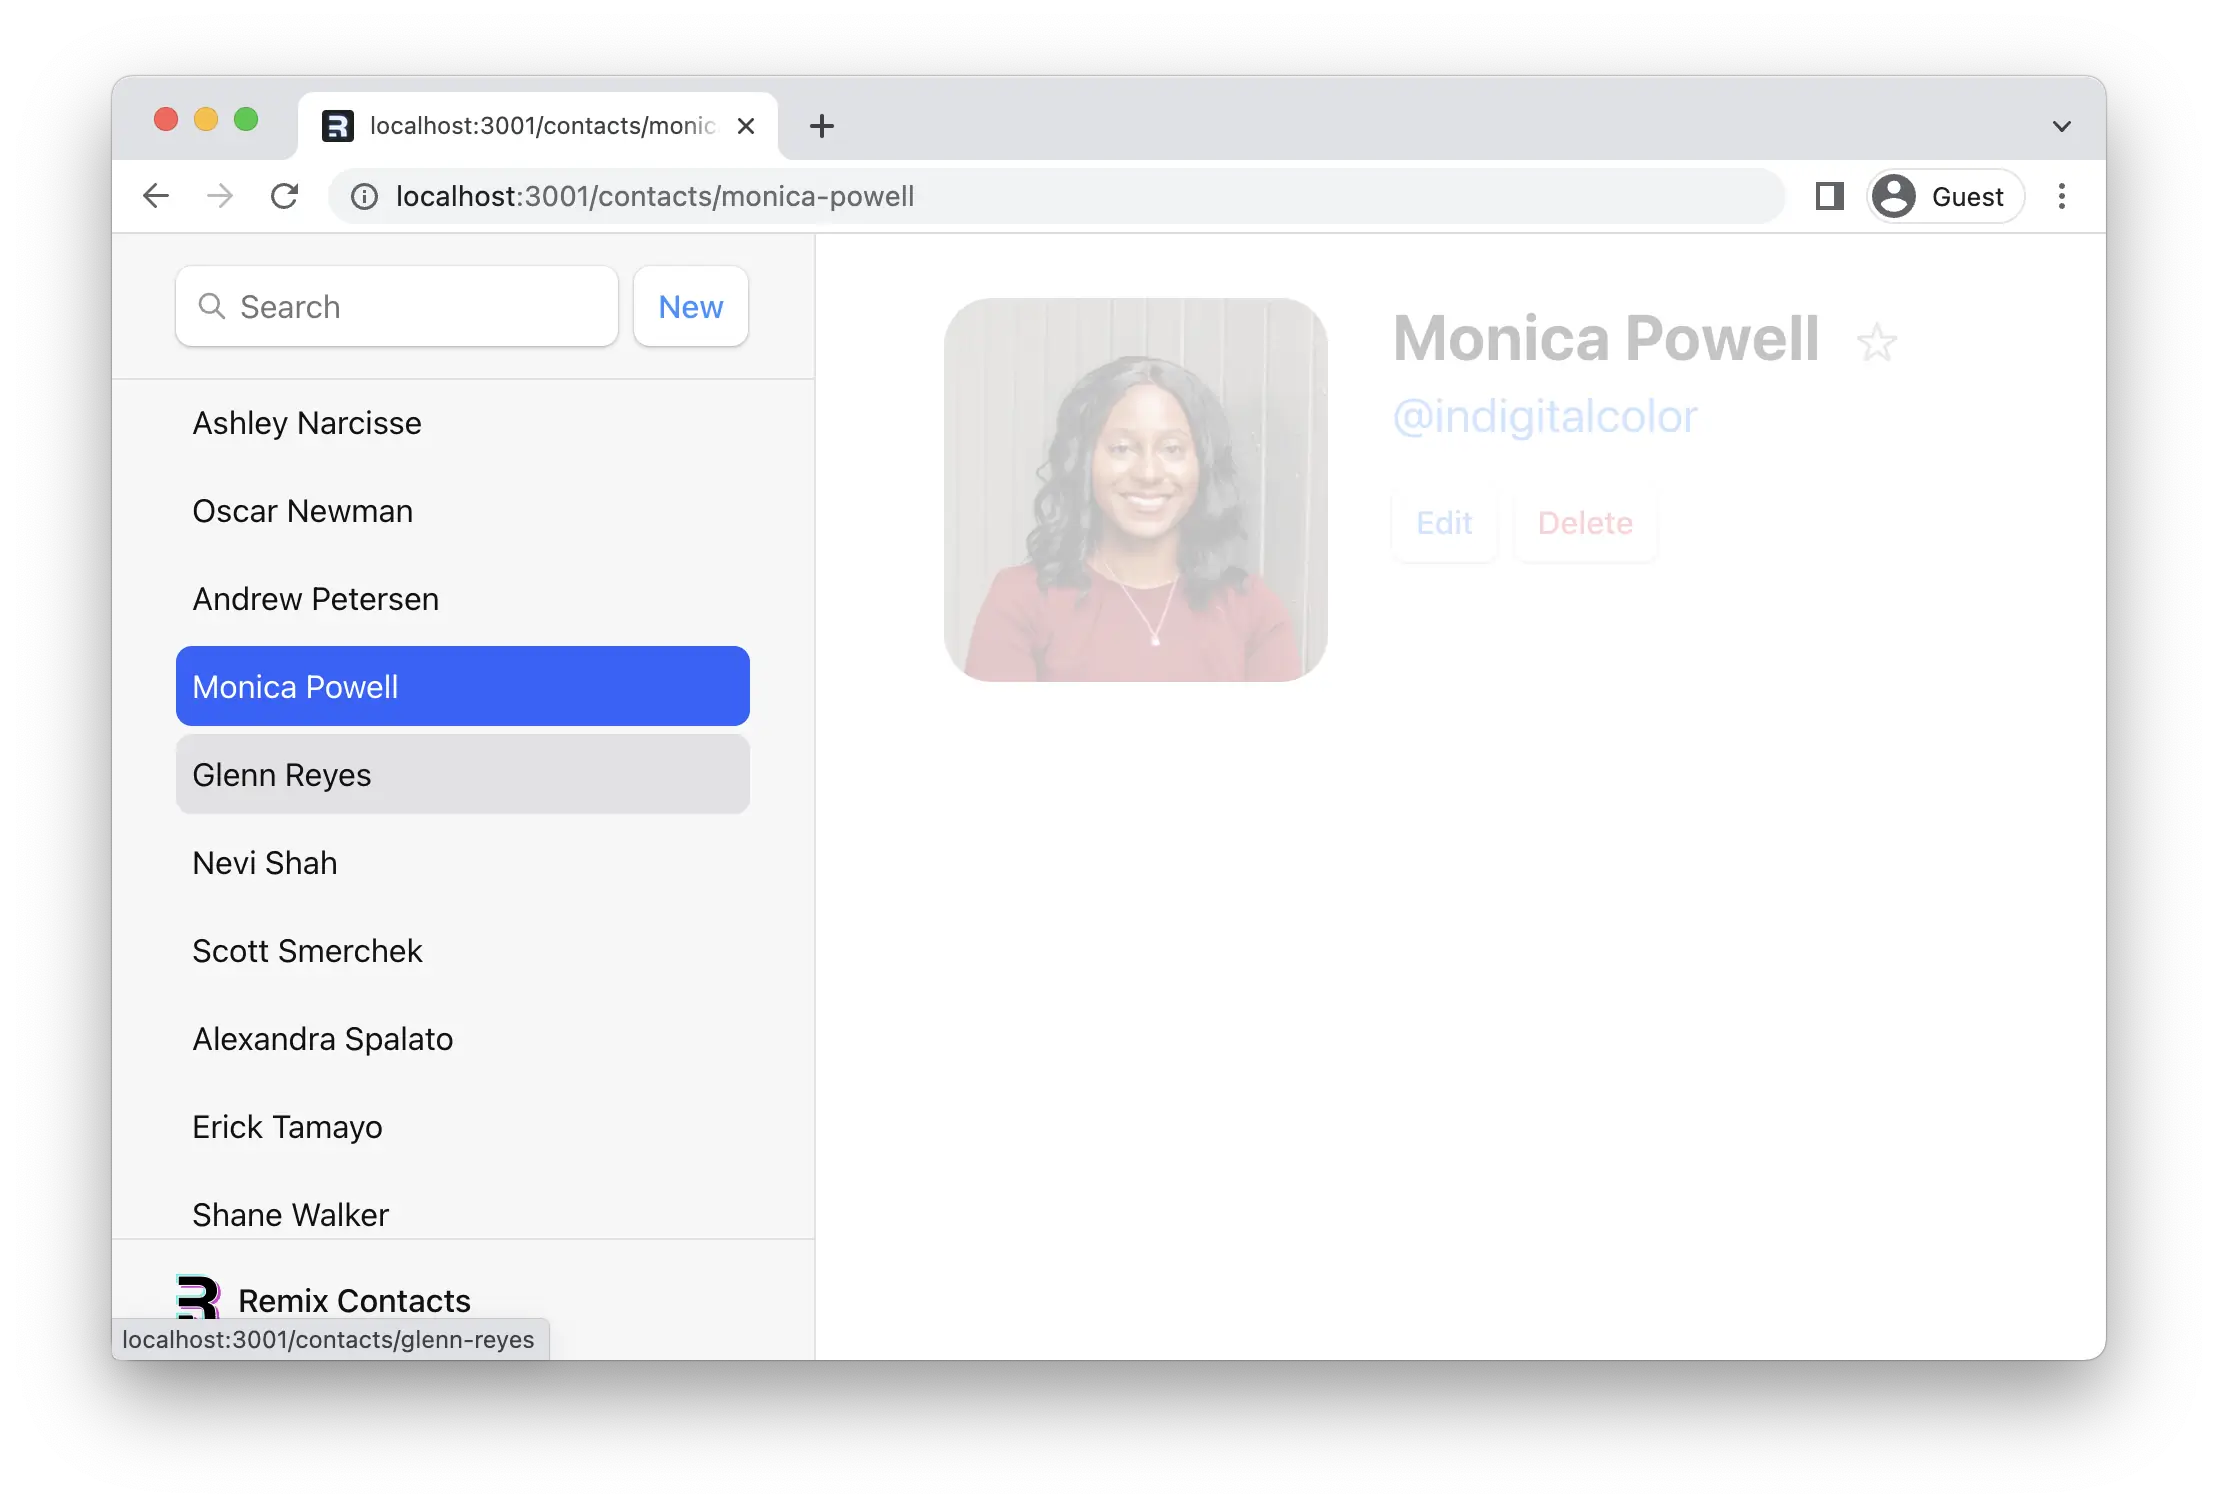
删除记录
¥Deleting Records
如果我们查看联系人路由中的代码,我们会发现删除按钮如下所示:
¥If we review code in the contact route, we can find the delete button looks like this:
<Form
  action="destroy"
  method="post"
  onSubmit={(event) => {
    const response = confirm(
      "Please confirm you want to delete this record."
    );
    if (!response) {
      event.preventDefault();
    }
  }}
>
  <button type="submit">Delete</button>
</Form>
请注意,action 指向 "destroy"。与 <Link to> 类似,<Form action> 可以采用相对值。由于表单是在 contacts.$contactId.tsx 中渲染的,因此与 destroy 相关的操作会在点击时将表单提交到 contacts.$contactId.destroy。
¥Note the action points to "destroy". Like <Link to>, <Form action> can take a relative value. Since the form is rendered in contacts.$contactId.tsx, then a relative action with destroy will submit the form to contacts.$contactId.destroy when clicked.
此时,你应该已经了解了使删除按钮正常工作所需的所有知识。或许在继续下一步之前先尝试一下?你需要:
¥At this point you should know everything you need to know to make the delete button work. Maybe give it a try before moving on? You'll need:
-
新路由
¥A new route
-
该路由上的
action¥An
actionat that route -
deleteContact从app/data.ts¥
deleteContactfromapp/data.ts -
redirect到之后的某个位置¥
redirectto somewhere after
👉 创建 "destroy" 路由模块
¥👉 Create the "destroy" route module
touch app/routes/contacts.\$contactId_.destroy.tsx
👉 添加 destroy 操作
¥👉 Add the destroy action
import type { ActionFunctionArgs } from "@remix-run/node";
import { redirect } from "@remix-run/node";
import invariant from "tiny-invariant";

import { deleteContact } from "../data";

export const action = async ({
  params,
}: ActionFunctionArgs) => {
  invariant(params.contactId, "Missing contactId param");
  await deleteContact(params.contactId);
  return redirect("/");
};
好的,导航到一条记录并点击 "删除" 按钮。有效!
¥Alright, navigate to a record and click the "Delete" button. It works!
😅 我仍然不明白这一切为什么有效。
¥😅 I'm still confused why this all works
当用户点击提交按钮时:
¥When the user clicks the submit button:
-
<Form>会阻止浏览器默认向服务器发送新的文档POST请求,而是通过创建带有客户端路由和fetch的POST请求来模拟浏览器。¥
<Form>prevents the default browser behavior of sending a new documentPOSTrequest to the server, but instead emulates the browser by creating aPOSTrequest with client side routing andfetch -
<Form action="destroy">匹配contacts.$contactId_.destroy.tsx的新路由并向其发送请求。¥The
<Form action="destroy">matches the new route atcontacts.$contactId_.destroy.tsxand sends it the request -
action重定向后,Remix 会调用页面上的所有loader以获取最新数据(这是 "revalidation")。useLoaderData返回新值并导致组件更新!¥After the
actionredirects, Remix calls all theloaders for the data on the page to get the latest values (this is "revalidation").useLoaderDatareturns new values and causes the components to update!
添加 Form,添加 action,剩下的交给 Remix 处理。
¥Add a Form, add an action, Remix does the rest.
索引路由
¥Index Routes
加载应用时,你会注意到列表右侧有一个很大的空白页。
¥When we load up the app, you'll notice a big blank page on the right side of our list.
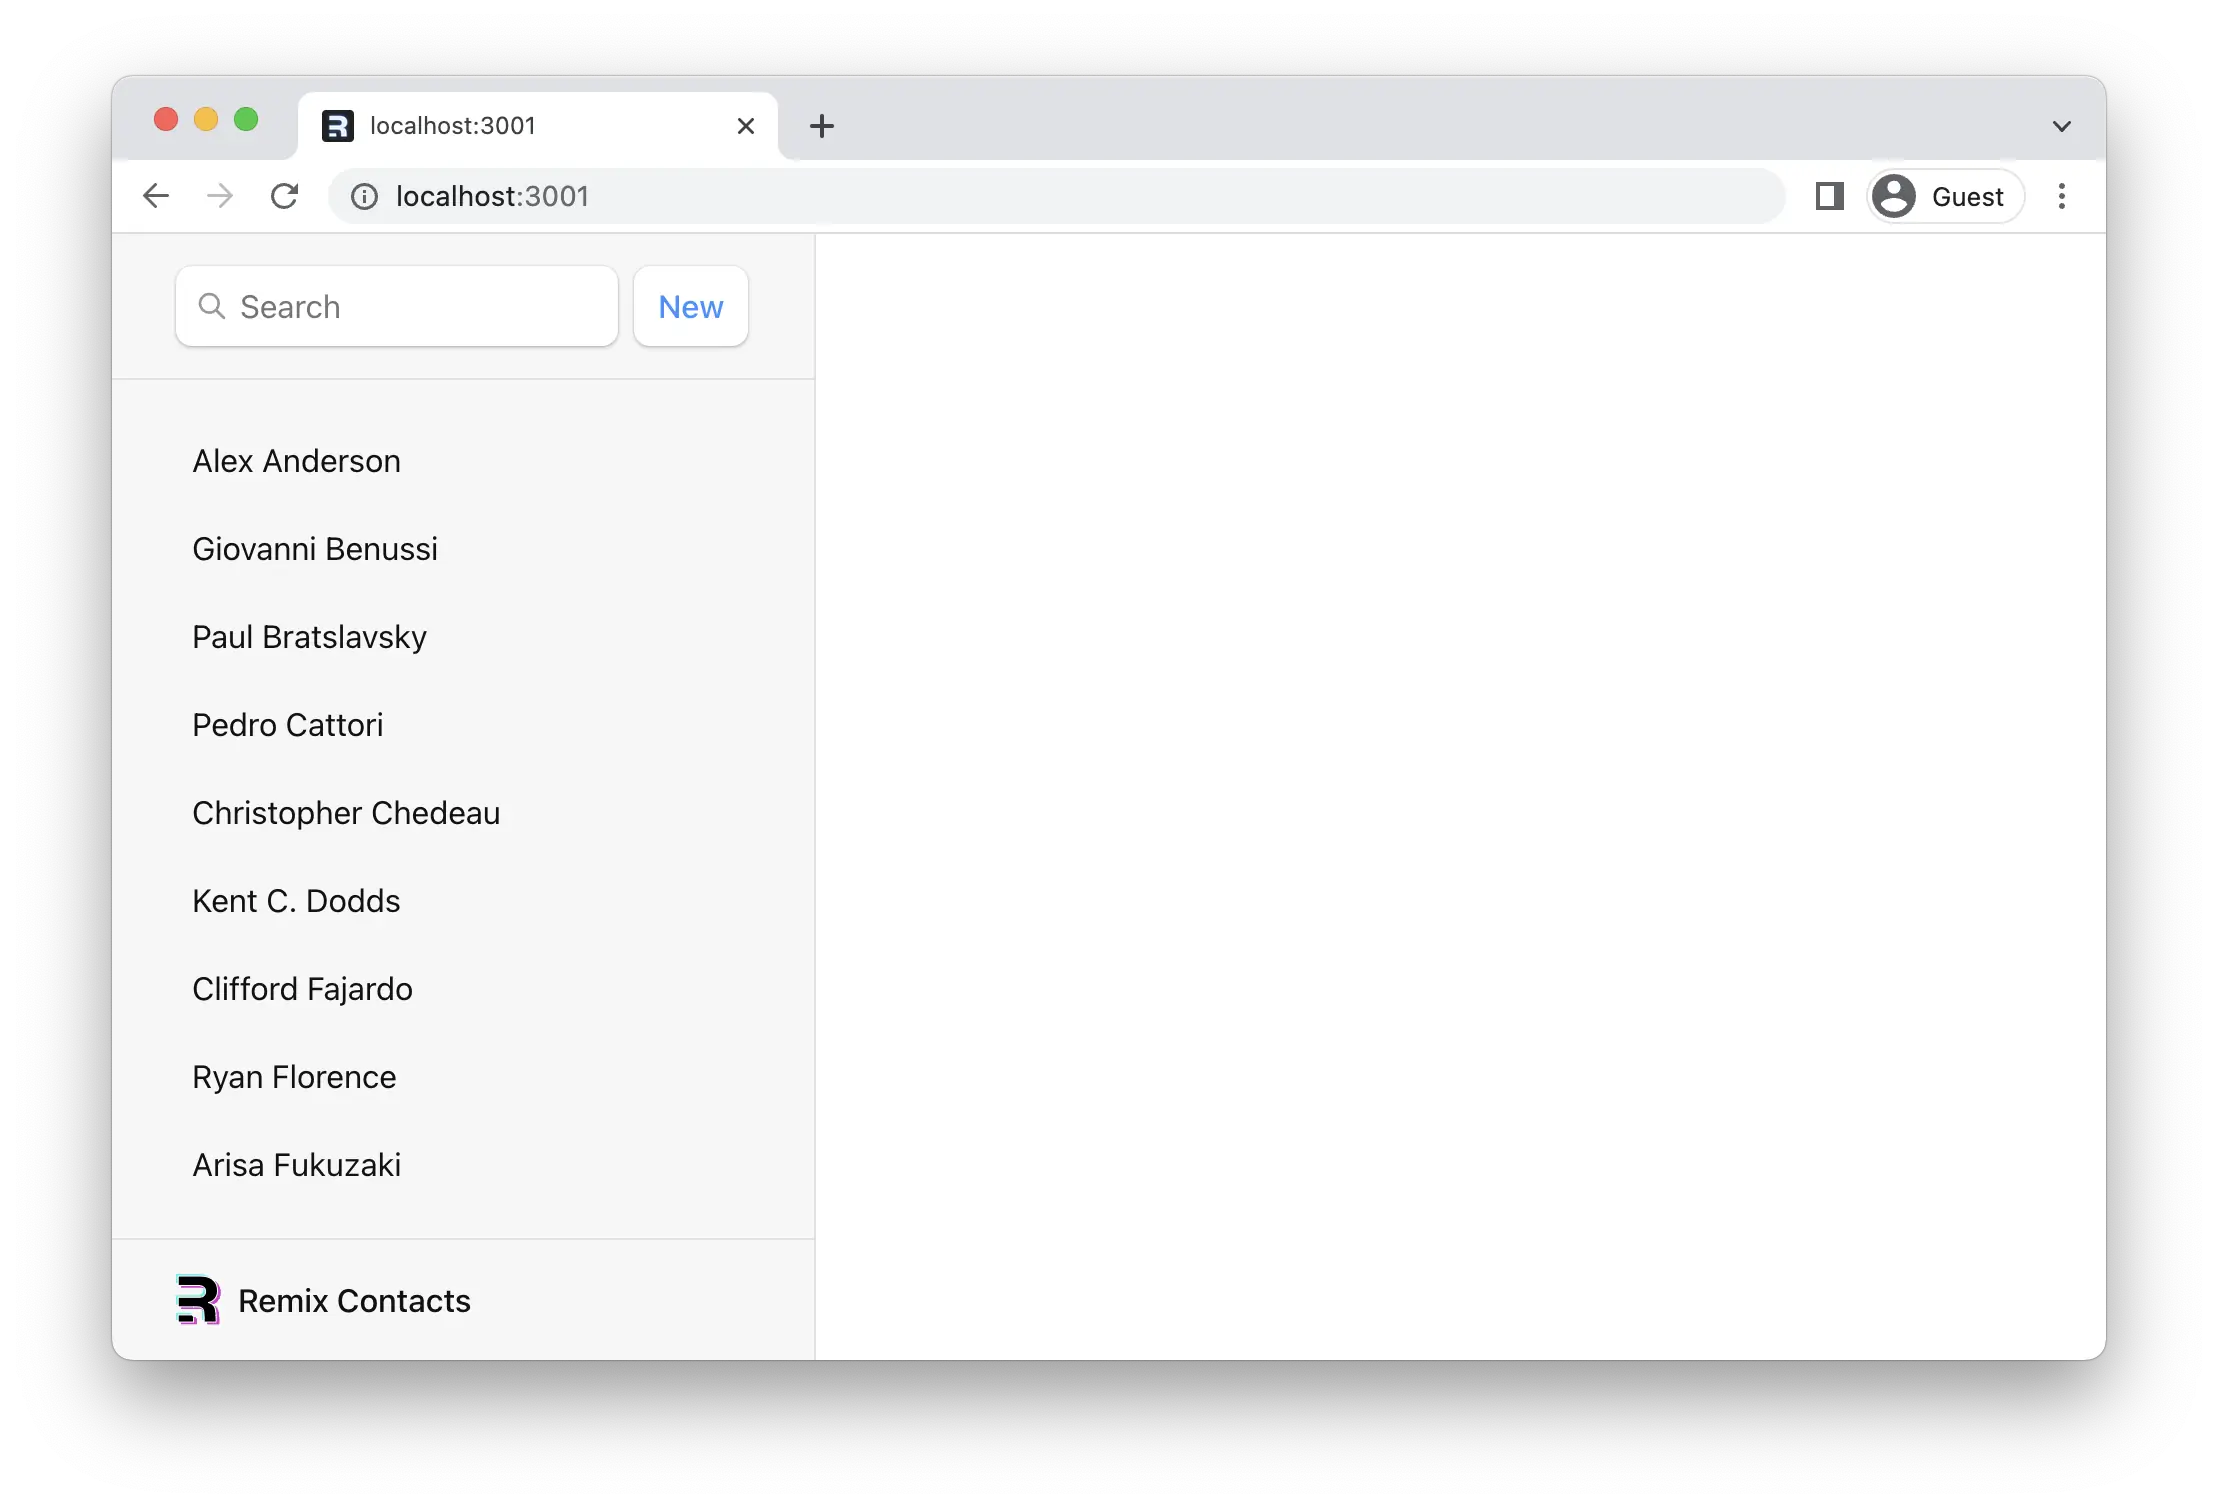
当路由有子路由,并且你位于父路由的路径时,<Outlet> 错误没有任何可渲染的内容,因为没有匹配的子路由。你可以将索引路由视为填充该空间的默认子路由。
¥When a route has children, and you're at the parent route's path, the <Outlet> has nothing to render because no children match. You can think of index routes as the default child route to fill in that space.
👉 为根路由创建一个索引路由
¥👉 Create an index route for the root route
touch app/routes/_index.tsx
👉 填写索引组件的元素
¥👉 Fill in the index component's elements
请随意复制/粘贴,这里没有什么特别的。
¥Feel free to copy/paste, nothing special here.
export default function Index() {
  return (
    <p id="index-page">
      This is a demo for Remix.
      <br />
      Check out{" "}
      <a href="https://remix.nodejs.cn">the docs at remix.run</a>.
    </p>
  );
}
路由名称 _index 比较特殊。它告诉 Remix,当用户位于父路由的精确路径时,匹配并渲染此路由,因此 <Outlet /> 中没有其他子路由需要渲染。
¥The route name _index is special. It tells Remix to match and render this route when the user is at the parent route's exact path, so there are no other child routes to render in the <Outlet />.

瞧!不再有空格。通常会将仪表板、统计数据、Feed 等放在索引路由中。它们也可以参与数据加载。
¥Voilà! No more blank space. It's common to put dashboards, stats, feeds, etc. at index routes. They can participate in data loading as well.
取消按钮
¥Cancel Button
在编辑页面上,我们有一个取消按钮,但它目前还没有任何作用。我们希望它能像浏览器的后退按钮一样工作。
¥On the edit page we've got a cancel button that doesn't do anything yet. We'd like it to do the same thing as the browser's back button.
除了 useNavigate 之外,我们还需要按钮上的点击处理程序。
¥We'll need a click handler on the button as well as useNavigate.
👉 使用 useNavigate 添加取消按钮点击处理程序。
¥👉 Add the cancel button click handler with useNavigate
// existing imports
import {
  Form,
  useLoaderData,
  useNavigate,
} from "@remix-run/react";
// existing imports and exports

export default function EditContact() {
  const { contact } = useLoaderData<typeof loader>();
  const navigate = useNavigate();

  return (
    <Form key={contact.id} id="contact-form" method="post">
      {/* existing elements */}
      <p>
        <button type="submit">Save</button>
        <button onClick={() => navigate(-1)} type="button">
          Cancel
        </button>
      </p>
    </Form>
  );
}
现在,当用户点击 "取消" 时,浏览器历史记录中会返回一条记录。
¥Now when the user clicks "Cancel", they'll be sent back one entry in the browser's history.
🧐 为什么按钮上没有
event.preventDefault()?¥🧐 Why is there no
event.preventDefault()on the button?
<button type="button"> 看似多余,但它是 HTML 中阻止按钮提交表单的方式。
¥A <button type="button">, while seemingly redundant, is the HTML way of preventing a button from submitting its form.
还有两个功能需要添加。我们快要冲刺了!
¥Two more features to go. We're on the home stretch!
URLSearchParams 和 GET 提交
¥URLSearchParams and GET Submissions
到目前为止,我们所有的交互式 UI 要么是更改 URL 的链接,要么是将数据发布到 action 函数的 form。搜索字段很有趣,因为它是两者的混合:它是一个 form,但它只会更改 URL,而不会更改数据。
¥All of our interactive UI so far have been either links that change the URL or forms that post data to action functions. The search field is interesting because it's a mix of both: it's a form, but it only changes the URL, it doesn't change data.
让我们看看提交搜索表单时会发生什么:
¥Let's see what happens when we submit the search form:
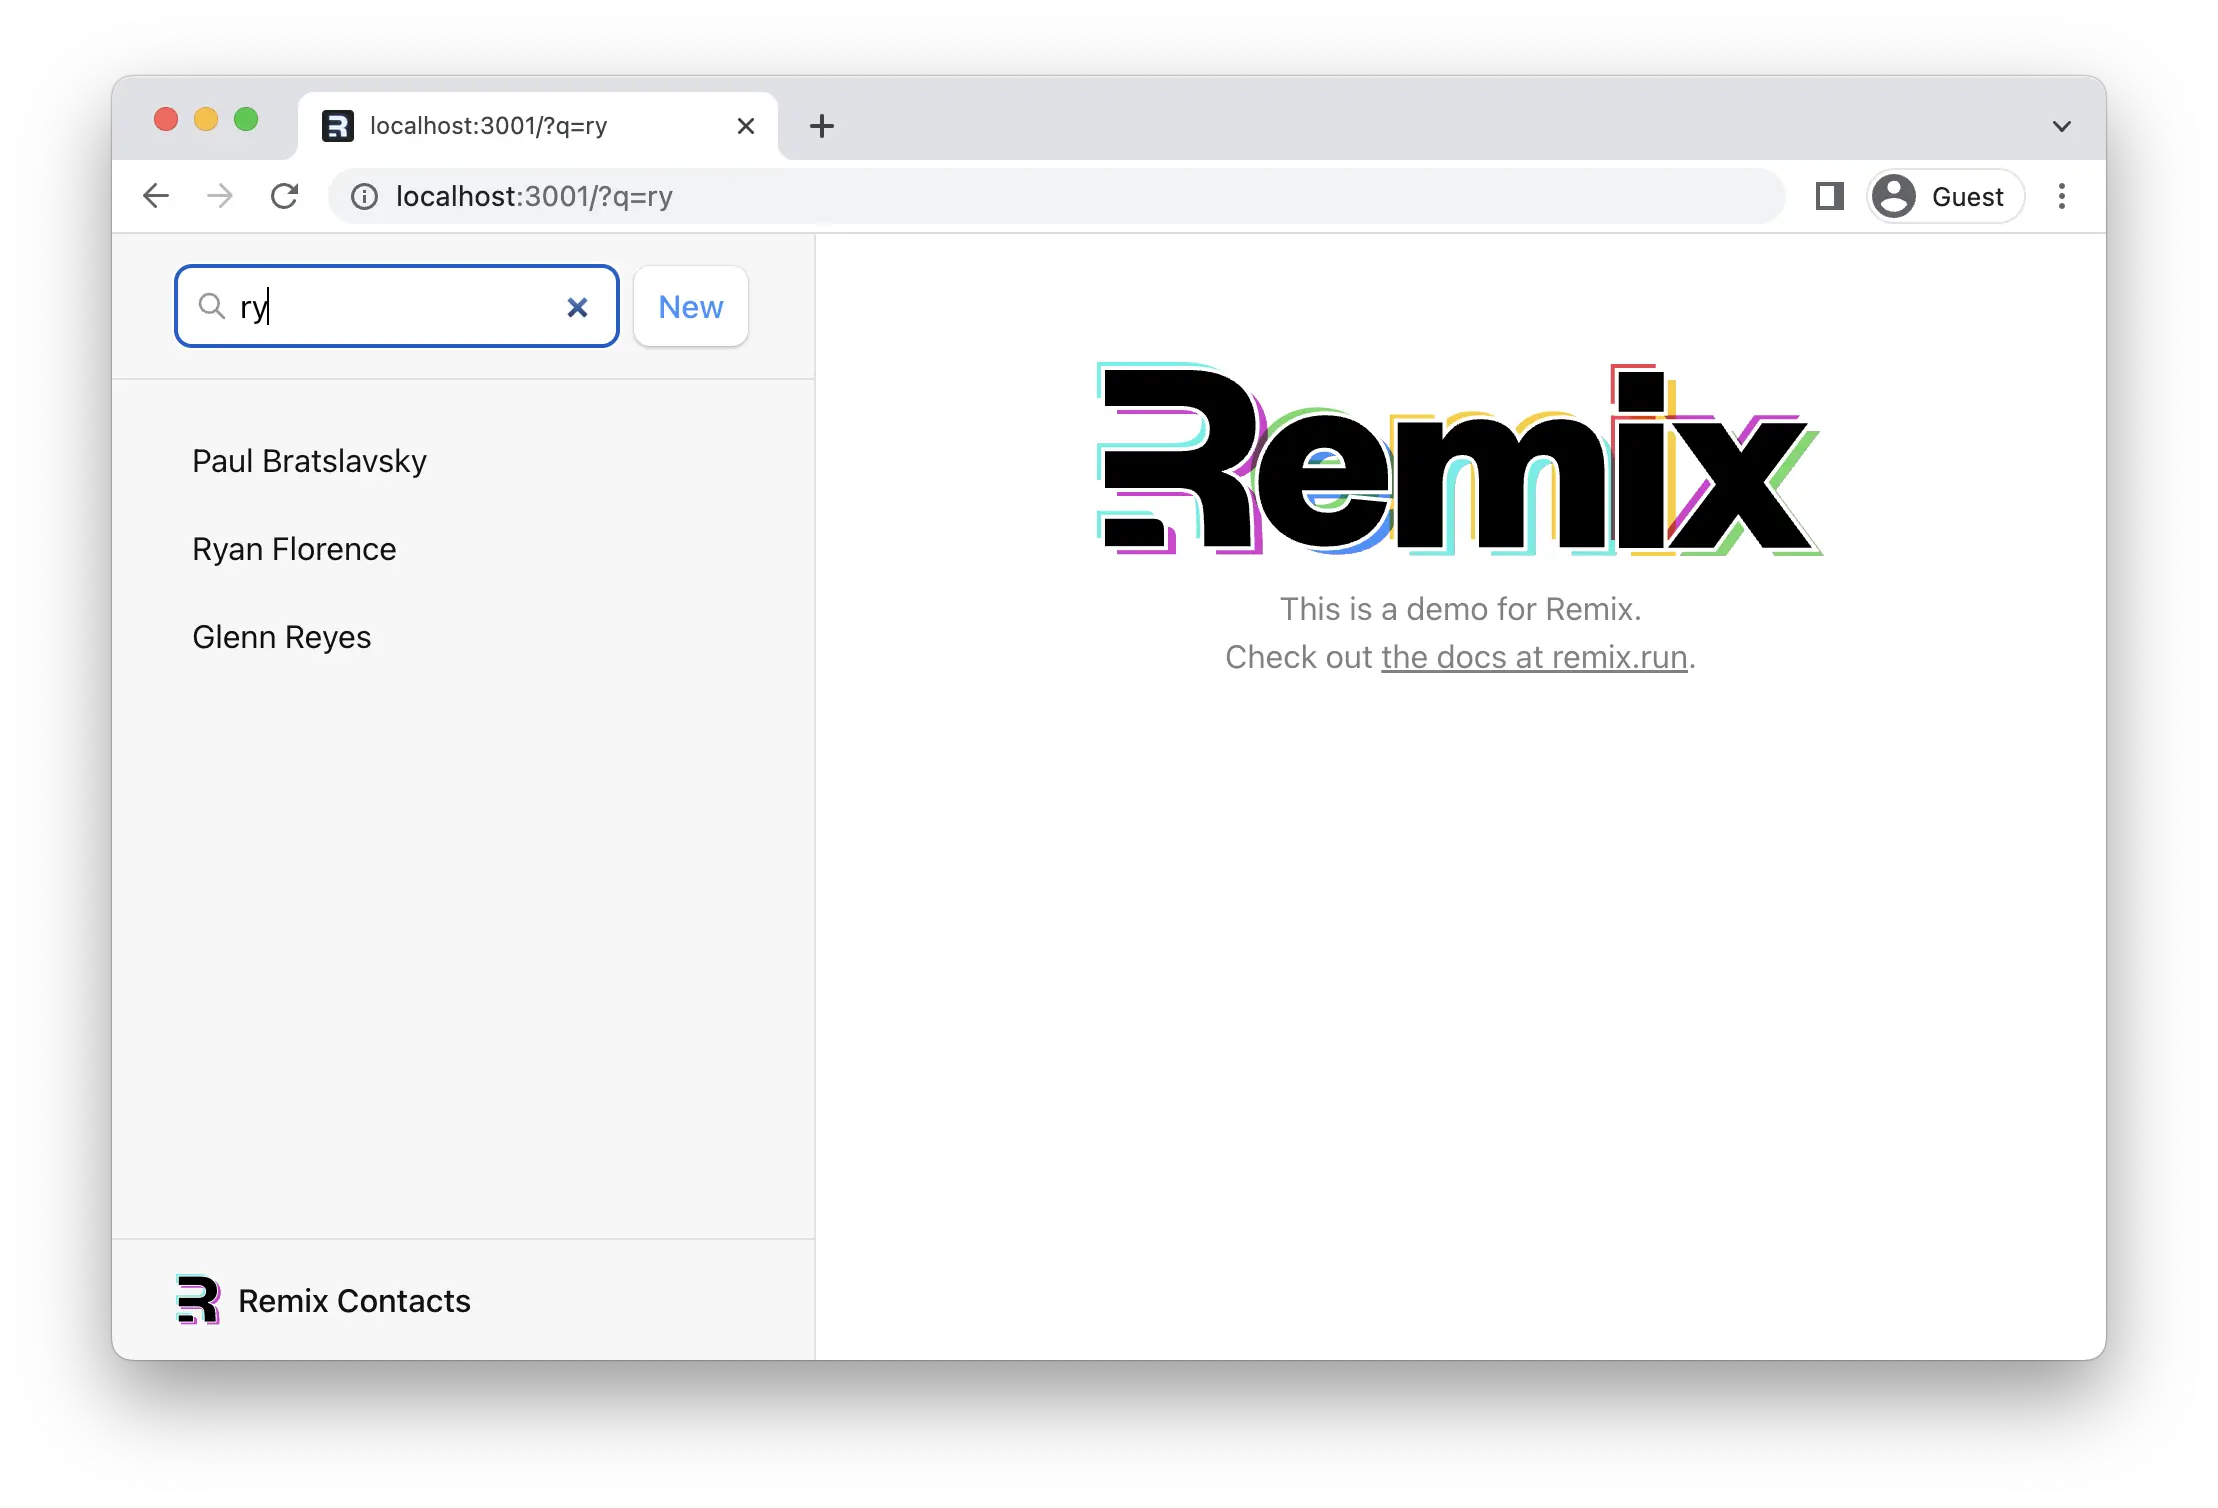
👉 在搜索栏中输入名称并按回车键
¥👉 Type a name into the search field and hit the enter key
请注意,浏览器的 URL 现在包含你的查询,即 URLSearchParams:
¥Note the browser's URL now contains your query in the URL as URLSearchParams:
http://localhost:5173/?q=ryan
由于 Remix 并非 <Form method="post">,因此它通过将 FormData 序列化到 URLSearchParams 而不是请求正文中来模拟浏览器。
¥Since it's not <Form method="post">, Remix emulates the browser by serializing the FormData into the URLSearchParams instead of the request body.
loader 函数可以访问来自 request 的搜索参数。我们用它来过滤列表:
¥loader functions have access to the search params from the request. Let's use it to filter the list:
👉 如果列表包含 URLSearchParams,则进行过滤
¥👉 Filter the list if there are URLSearchParams
import type {
  LinksFunction,
  LoaderFunctionArgs,
} from "@remix-run/node";

// existing imports and exports

export const loader = async ({
  request,
}: LoaderFunctionArgs) => {
  const url = new URL(request.url);
  const q = url.searchParams.get("q");
  const contacts = await getContacts(q);
  return { contacts };
};

// existing code
因为这是一个 GET,而不是 POST,所以 Remix 不会调用 action 函数。提交 GET form 与点击链接相同:只有 URL 会改变。
¥Because this is a GET, not a POST, Remix does not call the action function. Submitting a GET form is the same as clicking a link: only the URL changes.
这也意味着它是一个正常的页面导航。你可以点击“返回”按钮返回到之前的页面。
¥This also means it's a normal page navigation. You can click the back button to get back to where you were.
将 URL 同步到表单状态
¥Synchronizing URLs to Form State
这里有几个用户体验问题,我们可以快速解决。
¥There are a couple of UX issues here that we can take care of quickly.
-
如果你在搜索后点击返回,即使列表不再被过滤,表单字段仍然会保留你输入的值。
¥If you click back after a search, the form field still has the value you entered even though the list is no longer filtered.
-
如果你在搜索后刷新页面,即使列表已过滤,表单字段中的值也将消失。
¥If you refresh the page after searching, the form field no longer has the value in it, even though the list is filtered
换句话说,URL 和我们输入的状态不同步。
¥In other words, the URL and our input's state are out of sync.
让我们先解决 (2),并使用 URL 中的值开始输入。
¥Let's solve (2) first and start the input with the value from the URL.
👉 从 loader 返回 q,并将其设置为输入的默认值。
¥👉 Return q from your loader, set it as the input's default value
// existing imports and exports

export const loader = async ({
  request,
}: LoaderFunctionArgs) => {
  const url = new URL(request.url);
  const q = url.searchParams.get("q");
  const contacts = await getContacts(q);
  return { contacts, q };
};

export default function App() {
  const { contacts, q } = useLoaderData<typeof loader>();
  const navigation = useNavigation();

  return (
    <html lang="en">
      {/* existing elements */}
      <body>
        <div id="sidebar">
          {/* existing elements */}
          <div>
            <Form id="search-form" role="search">
              <input
                aria-label="Search contacts"
                defaultValue={q || ""}
                id="q"
                name="q"
                placeholder="Search"
                type="search"
              />
              {/* existing elements */}
            </Form>
            {/* existing elements */}
          </div>
          {/* existing elements */}
        </div>
        {/* existing elements */}
      </body>
    </html>
  );
}
搜索后刷新页面,输入字段将显示查询结果。
¥The input field will show the query if you refresh the page after a search now.
现在针对问题 (1),点击后退按钮并更新输入。我们可以从 React 中引入 useEffect 来直接操作 DOM 中的输入值。
¥Now for problem (1), clicking the back button and updating the input. We can bring in useEffect from React to manipulate the input's value in the DOM directly.
👉 使用 URLSearchParams 同步输入值
¥👉 Synchronize input value with the URLSearchParams
// existing imports
import { useEffect } from "react";

// existing imports and exports

export default function App() {
  const { contacts, q } = useLoaderData<typeof loader>();
  const navigation = useNavigation();

  useEffect(() => {
    const searchField = document.getElementById("q");
    if (searchField instanceof HTMLInputElement) {
      searchField.value = q || "";
    }
  }, [q]);

  // existing code
}
🤔 难道不应该使用受控组件和 React State 来实现吗?
¥🤔 Shouldn't you use a controlled component and React State for this?
你当然可以将其作为受控组件来执行。你将拥有更多同步点,但这取决于你。
¥You could certainly do this as a controlled component. You will have more synchronization points, but it's up to you.
Expand this to see what it would look like
// We no longer need useEffect
import { useState } from "react";

// existing imports and exports

export default function App() {
  const { contacts, q } = useLoaderData<typeof loader>();
  const navigation = useNavigation();
  // the query now needs to be kept in state
  const [prevQ, setPrevQ] = useState(q);
  const [query, setQuery] = useState(q || "");

  // We can avoid using `useEffect` to synchronize the query
  // by using a separate piece of state to store the previous
  // value
  if (q !== prevQ) {
    setPrevQ(q);
    setQuery(q || "");
  }

  return (
    <html lang="en">
      {/* existing elements */}
      <body>
        <div id="sidebar">
          {/* existing elements */}
          <div>
            <Form id="search-form" role="search">
              <input
                aria-label="Search contacts"
                id="q"
                name="q"
                // synchronize user's input to component state
                onChange={(event) =>
                  setQuery(event.currentTarget.value)
                }
                placeholder="Search"
                type="search"
                // switched to `value` from `defaultValue`
                value={query}
              />
              {/* existing elements */}
            </Form>
            {/* existing elements */}
          </div>
          {/* existing elements */}
        </div>
        {/* existing elements */}
      </body>
    </html>
  );
}
好的,你现在应该可以点击后退/前进/刷新按钮了,并且输入的值应该与 URL 和结果同步。
¥Alright, you should now be able to click the back/forward/refresh buttons, and the input's value should be in sync with the URL and results.
提交 Form 的 onChange
¥Submitting Form's onChange
我们需要做出一个产品决策。有时你希望用户提交 form 来过滤部分结果,有时你希望在用户输入时进行过滤。我们已经实现了第一个,所以让我们看看第二个是什么样的。
¥We've got a product decision to make here. Sometimes you want the user to submit the form to filter some results, other times you want to filter as the user types. We've already implemented the first, so let's see what it's like for the second.
我们已经见过 useNavigate 了,我们将使用它的近亲 useSubmit 来实现。
¥We've seen useNavigate already, we'll use its cousin, useSubmit, for this.
// existing imports
import {
  Form,
  Links,
  Meta,
  NavLink,
  Outlet,
  Scripts,
  ScrollRestoration,
  useLoaderData,
  useNavigation,
  useSubmit,
} from "@remix-run/react";
// existing imports and exports

export default function App() {
  const { contacts, q } = useLoaderData<typeof loader>();
  const navigation = useNavigation();
  const submit = useSubmit();

  // existing code

  return (
    <html lang="en">
      {/* existing elements */}
      <body>
        <div id="sidebar">
          {/* existing elements */}
          <div>
            <Form
              id="search-form"
              onChange={(event) =>
                submit(event.currentTarget)
              }
              role="search"
            >
              {/* existing elements */}
            </Form>
            {/* existing elements */}
          </div>
          {/* existing elements */}
        </div>
        {/* existing elements */}
      </body>
    </html>
  );
}
现在,当你输入内容时,form 会自动提交!
¥As you type, the form is automatically submitted now!
请注意 submit 的参数。submit 函数将序列化并提交你传递给它的任何表单。我们传入 event.currentTarget。currentTarget 是事件所附加到的 DOM 节点(form)。
¥Note the argument to submit. The submit function will serialize and submit any form you pass to it. We're passing in event.currentTarget. The currentTarget is the DOM node the event is attached to (the form).
添加搜索加载控件
¥Adding Search Spinner
在生产应用中,此搜索很可能是在数据库中查找记录,而该数据库太大,无法一次性发送所有记录并在客户端进行过滤。这就是为什么这个演示有一些伪造的网络延迟。
¥In a production app, it's likely this search will be looking for records in a database that is too large to send all at once and filter client side. That's why this demo has some faked network latency.
没有任何加载指示器,搜索会感觉有点迟缓。即使我们可以提高数据库的速度,用户的网络延迟也始终是我们无法控制的。
¥Without any loading indicator, the search feels kinda sluggish. Even if we could make our database faster, we'll always have the user's network latency in the way and out of our control.
为了获得更好的用户体验,我们为搜索添加一些即时的 UI 反馈。我们会再次使用 useNavigation。
¥For a better user experience, let's add some immediate UI feedback for the search. We'll use useNavigation again.
👉 添加一个变量来判断我们是否正在搜索
¥👉 Add a variable to know if we're searching
// existing imports and exports

export default function App() {
  const { contacts, q } = useLoaderData<typeof loader>();
  const navigation = useNavigation();
  const submit = useSubmit();
  const searching =
    navigation.location &&
    new URLSearchParams(navigation.location.search).has(
      "q"
    );

  // existing code
}
当没有任何操作时,navigation.location 将为 undefined,但当用户导航时,它将在数据加载期间填充下一个位置。然后,我们检查它们是否正在使用 location.search 进行搜索。
¥When nothing is happening, navigation.location will be undefined, but when the user navigates it will be populated with the next location while data loads. Then we check if they're searching with location.search.
👉 使用新的 searching 状态为搜索表单元素添加类
¥👉 Add classes to search form elements using the new searching state
// existing imports and exports

export default function App() {
  // existing code

  return (
    <html lang="en">
      {/* existing elements */}
      <body>
        <div id="sidebar">
          {/* existing elements */}
          <div>
            <Form
              id="search-form"
              onChange={(event) =>
                submit(event.currentTarget)
              }
              role="search"
            >
              <input
                aria-label="Search contacts"
                className={searching ? "loading" : ""}
                defaultValue={q || ""}
                id="q"
                name="q"
                placeholder="Search"
                type="search"
              />
              <div
                aria-hidden
                hidden={!searching}
                id="search-spinner"
              />
            </Form>
            {/* existing elements */}
          </div>
          {/* existing elements */}
        </div>
        {/* existing elements */}
      </body>
    </html>
  );
}
额外提示:搜索时避免主屏幕淡出:
¥Bonus points, avoid fading out the main screen when searching:
// existing imports and exports

export default function App() {
  // existing code

  return (
    <html lang="en">
      {/* existing elements */}
      <body>
        {/* existing elements */}
        <div
          className={
            navigation.state === "loading" && !searching
              ? "loading"
              : ""
          }
          id="detail"
        >
          <Outlet />
        </div>
        {/* existing elements */}
      </body>
    </html>
  );
}
现在你应该在搜索输入的左侧看到一个漂亮的微调框。
¥You should now have a nice spinner on the left side of the search input.

管理历史记录堆栈
¥Managing the History Stack
由于每次按键都会提交表单,因此输入字符 "alex" 然后用退格键删除它们会导致巨大的历史记录堆栈😂。我们绝对不希望出现这种情况:
¥Since the form is submitted for every keystroke, typing the characters "alex" and then deleting them with backspace results in a huge history stack 😂. We definitely don't want this:
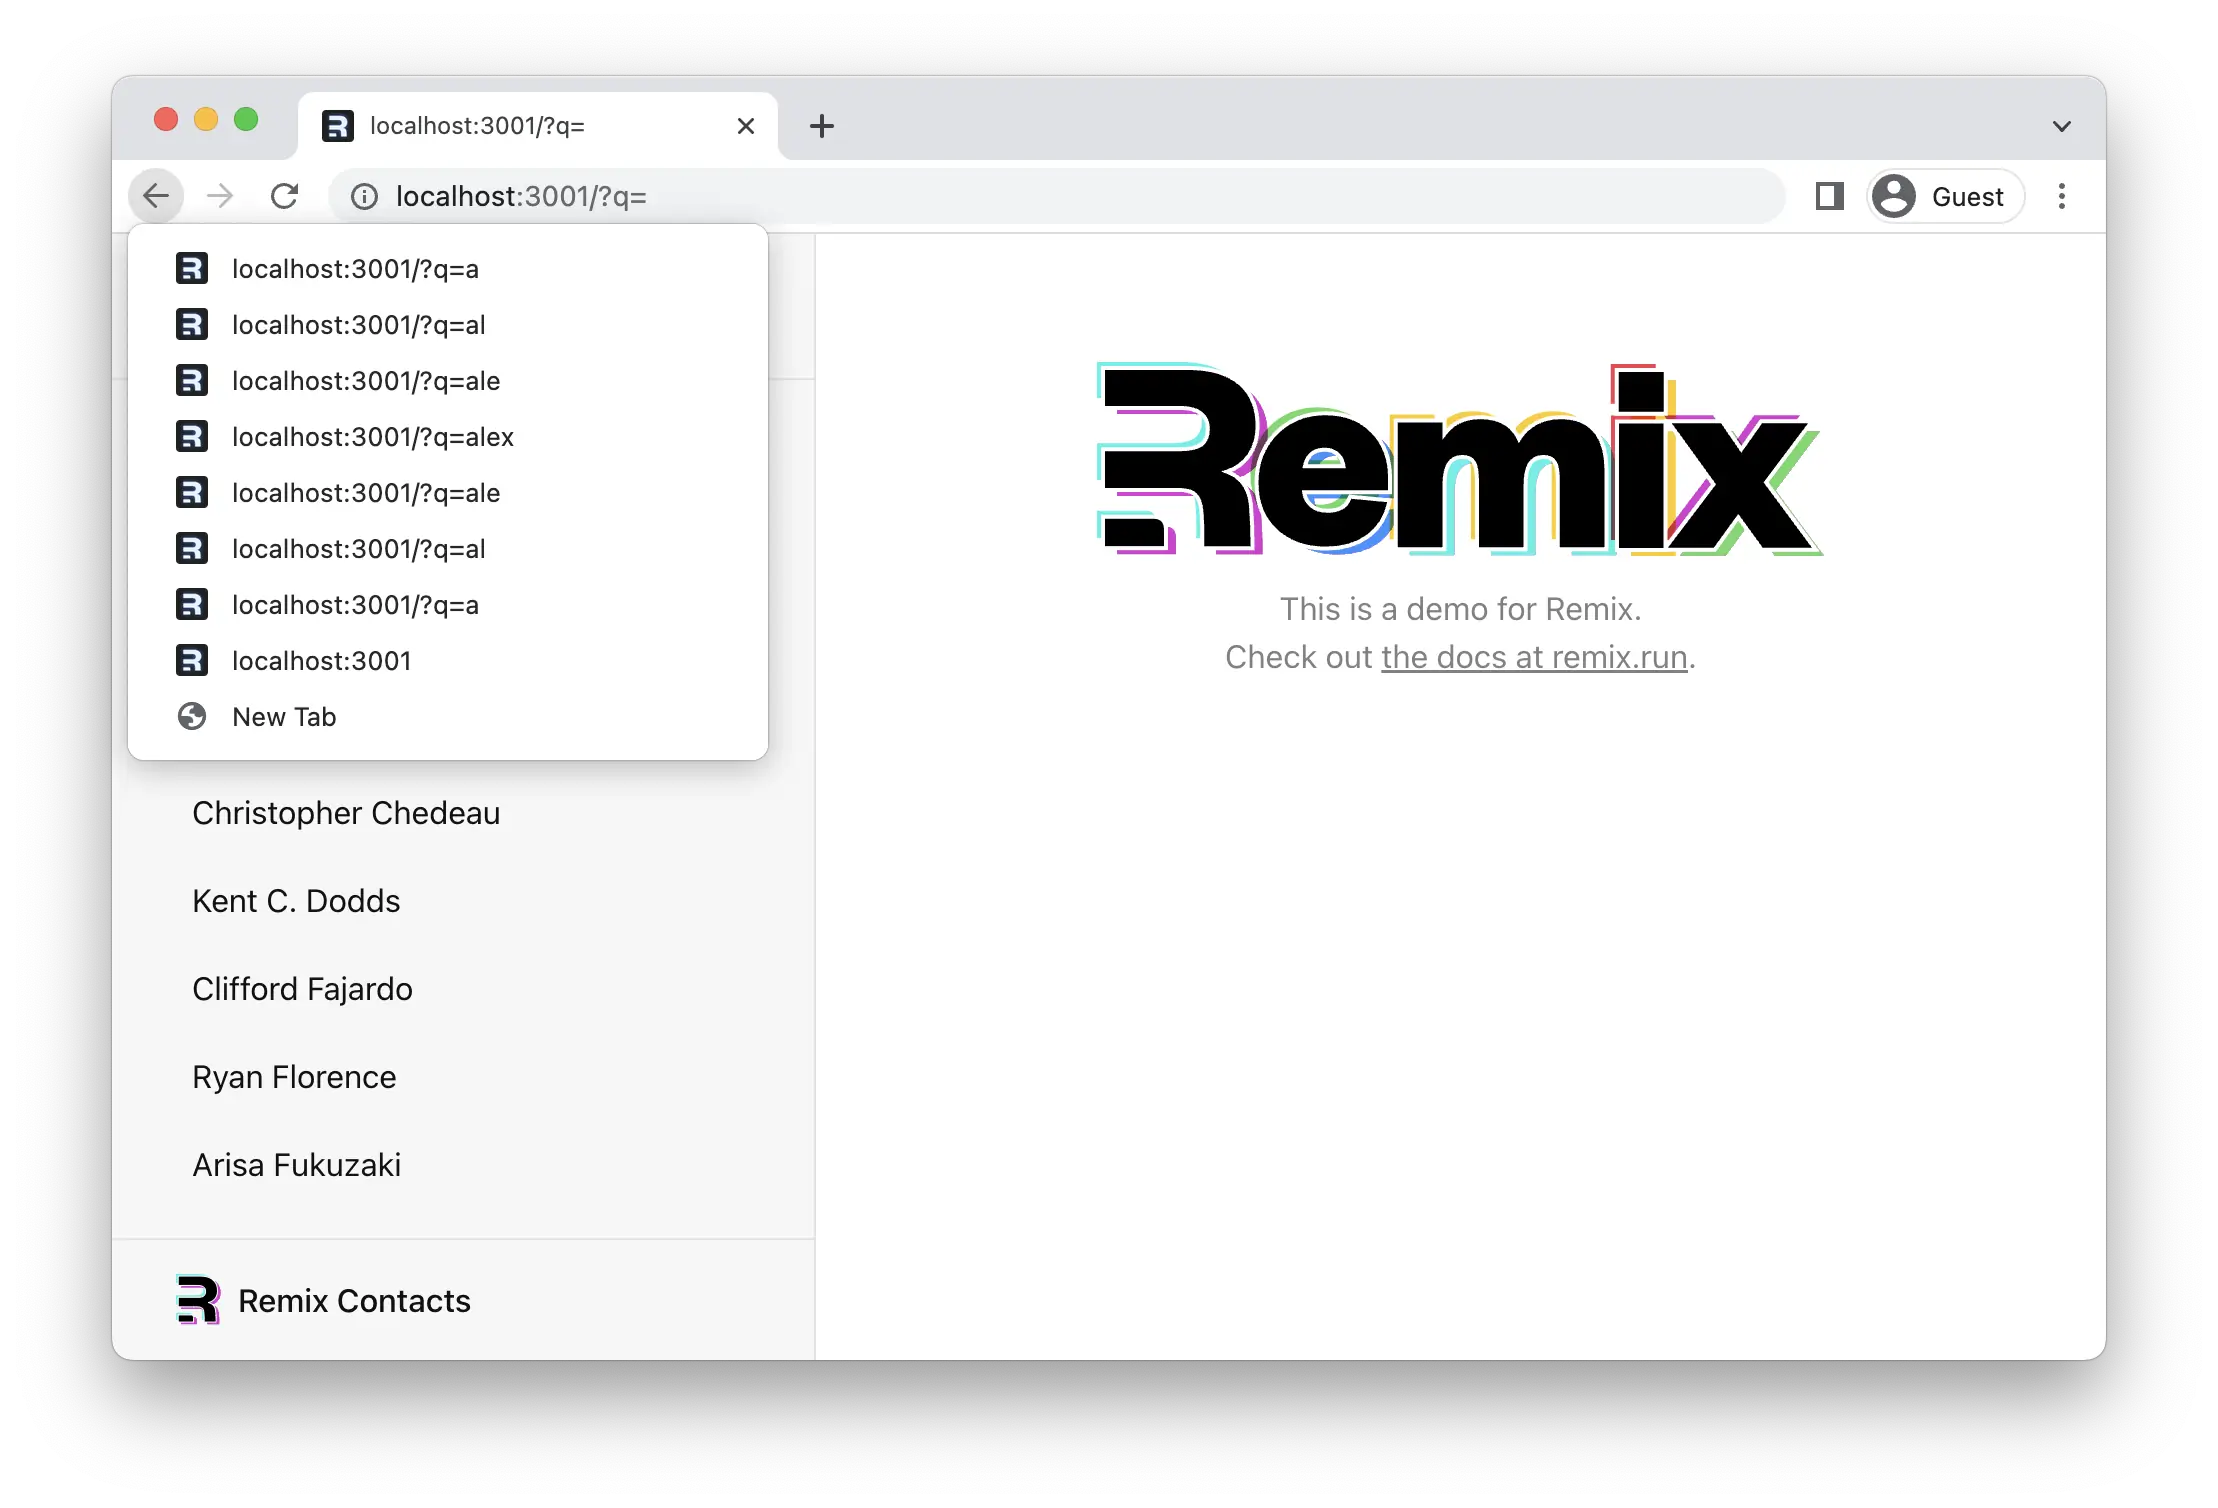
我们可以通过将历史记录堆栈中的当前条目替换为下一页而不是将其推送到下一页来避免这种情况。
¥We can avoid this by replacing the current entry in the history stack with the next page instead of pushing into it.
👉 在 submit 中使用 replace
¥👉 Use replace in submit
// existing imports and exports

export default function App() {
  // existing code

  return (
    <html lang="en">
      {/* existing elements */}
      <body>
        <div id="sidebar">
          {/* existing elements */}
          <div>
            <Form
              id="search-form"
              onChange={(event) => {
                const isFirstSearch = q === null;
                submit(event.currentTarget, {
                  replace: !isFirstSearch,
                });
              }}
              role="search"
            >
              {/* existing elements */}
            </Form>
            {/* existing elements */}
          </div>
          {/* existing elements */}
        </div>
        {/* existing elements */}
      </body>
    </html>
  );
}
快速检查这是否是首次搜索后,我们决定将其替换。现在第一次搜索会添加一个新条目,但之后的每次按键都会替换当前条目。用户无需点击七次“返回”即可移除搜索,只需点击一次即可。
¥After a quick check if this is the first search or not, we decide to replace it. Now the first search will add a new entry, but every keystroke after that will replace the current entry. Instead of clicking back seven times to remove the search, users only have to click back once.
Form 不使用导航
¥Forms Without Navigation
到目前为止,我们所有的表单都更改了 URL。虽然这些用户流程很常见,但希望提交表单而不触发导航也同样常见。
¥So far all of our forms have changed the URL. While these user flows are common, it's equally common to want to submit a form without causing a navigation.
对于这些情况,我们可以使用 useFetcher。它使我们能够与 action 和 loader 进行通信,而无需进行导航。
¥For these cases, we have useFetcher. It allows us to communicate with actions and loaders without causing a navigation.
联系页面上的 ★ 按钮对此很有意义。我们不会创建或删除新记录,也不想切换页面。我们只是想更改我们正在查看的页面上的数据。
¥The ★ button on the contact page makes sense for this. We aren't creating or deleting a new record, and we don't want to change pages. We simply want to change the data on the page we're looking at.
👉 将 <Favorite> 表单更改为 fetcher 表单
¥👉 Change the <Favorite> form to a fetcher form
// existing imports
import {
  Form,
  useFetcher,
  useLoaderData,
} from "@remix-run/react";
// existing imports and exports

// existing code

const Favorite: FunctionComponent<{
  contact: Pick<ContactRecord, "favorite">;
}> = ({ contact }) => {
  const fetcher = useFetcher();
  const favorite = contact.favorite;

  return (
    <fetcher.Form method="post">
      <button
        aria-label={
          favorite
            ? "Remove from favorites"
            : "Add to favorites"
        }
        name="favorite"
        value={favorite ? "false" : "true"}
      >
        {favorite ? "★" : "☆"}
      </button>
    </fetcher.Form>
  );
};
此表单将不再触发导航,而只是简单地获取到 action 状态。说到这……在我们创建 action 之前,此功能不起作用。
¥This form will no longer cause a navigation, but simply fetch to the action. Speaking of which ... this won't work until we create the action.
👉 创建 action
¥👉 Create the action
import type {
  ActionFunctionArgs,
  LoaderFunctionArgs,
} from "@remix-run/node";
// existing imports

import { getContact, updateContact } from "../data";
// existing imports

export const action = async ({
  params,
  request,
}: ActionFunctionArgs) => {
  invariant(params.contactId, "Missing contactId param");
  const formData = await request.formData();
  return updateContact(params.contactId, {
    favorite: formData.get("favorite") === "true",
  });
};

// existing code
好的,我们准备好点击用户名称旁边的星号了!
¥Alright, we're ready to click the star next to the user's name!
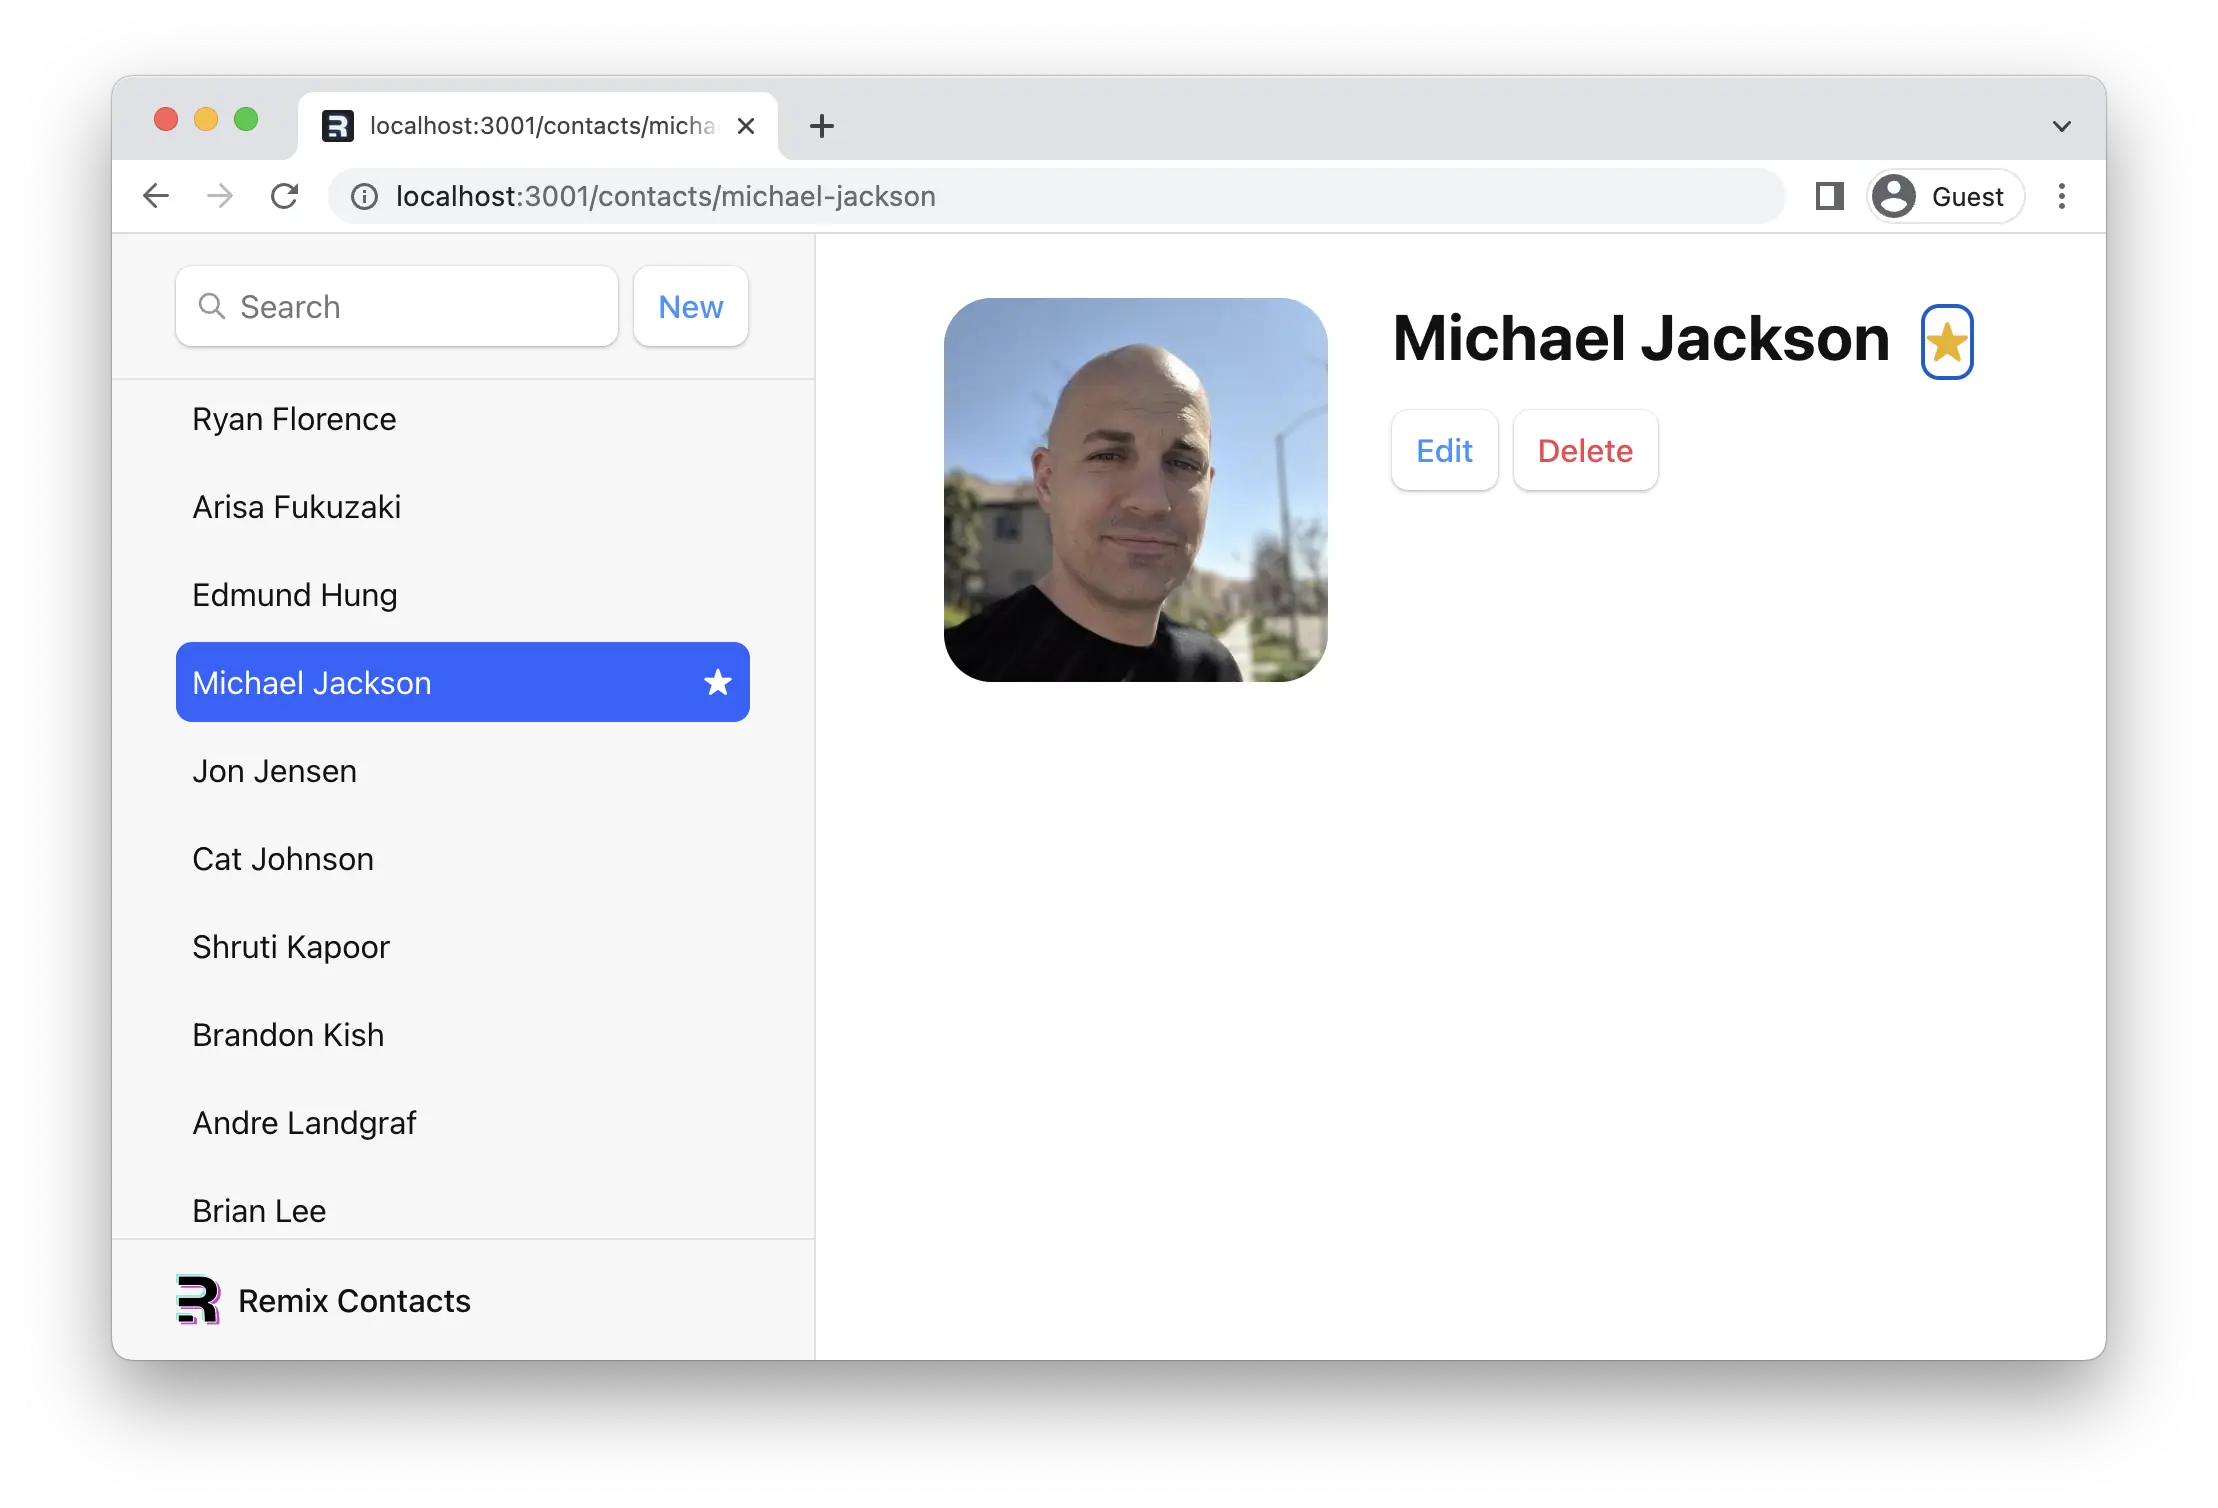
查看它,两个星星都会自动更新。我们新的 <fetcher.Form method="post"> 的工作原理与我们一直在使用的 <Form> 几乎完全相同:它会调用操作,然后自动重新验证所有数据 - 即使是错误也会以相同的方式被捕获。
¥Check that out, both stars automatically update. Our new <fetcher.Form method="post"> works almost exactly like the <Form> we've been using: it calls the action and then all data is revalidated automatically — even your errors will be caught the same way.
不过,有一个关键区别:它不是导航,因此 URL 不会改变,历史记录堆栈也不会受到影响。
¥There is one key difference, though, it's not a navigation, so the URL doesn't change, and the history stack is unaffected.
乐观 UI
¥Optimistic UI
你可能注意到,当我们点击上一节中的“收藏”按钮时,应用感觉有点迟钝。再次强调,我们增加了一些网络延迟,因为在现实世界中你肯定会遇到这种情况。
¥You probably noticed the app felt kind of unresponsive when we clicked the favorite button from the last section. Once again, we added some network latency because you're going to have it in the real world.
为了给用户一些反馈,我们可以使用 fetcher.state 将星星置于加载状态(很像之前的 navigation.state),但这次我们可以做得更好。我们可以使用一种名为 "乐观 UI" 的策略。
¥To give the user some feedback, we could put the star into a loading state with fetcher.state (a lot like navigation.state from before), but we can do something even better this time. We can use a strategy called "Optimistic UI".
fetcher 知道 FormData 被提交到 action,因此你可以在 fetcher.formData 上使用。我们将使用它来立即更新星星的状态,即使网络尚未完成。如果更新最终失败,UI 将恢复为实际数据。
¥The fetcher knows the FormData being submitted to the action, so it's available to you on fetcher.formData. We'll use that to immediately update the star's state, even though the network hasn't finished. If the update eventually fails, the UI will revert to the real data.
👉 阅读 fetcher.formData 中的乐观值
¥👉 Read the optimistic value from fetcher.formData
// existing code

const Favorite: FunctionComponent<{
  contact: Pick<ContactRecord, "favorite">;
}> = ({ contact }) => {
  const fetcher = useFetcher();
  const favorite = fetcher.formData
    ? fetcher.formData.get("favorite") === "true"
    : contact.favorite;

  return (
    <fetcher.Form method="post">
      <button
        aria-label={
          favorite
            ? "Remove from favorites"
            : "Add to favorites"
        }
        name="favorite"
        value={favorite ? "false" : "true"}
      >
        {favorite ? "★" : "☆"}
      </button>
    </fetcher.Form>
  );
};
现在,当你点击星星时,它会立即切换到新的状态。
¥Now the star immediately changes to the new state when you click it.
就是这样!感谢你试用 Remix。我们希望本教程能为你构建出色的用户体验打下良好的基础。你可以做更多事情,所以请务必查看所有 API。 😀
¥That's it! Thanks for giving Remix a try. We hope this tutorial gives you a solid start to build great user experiences. There's a lot more you can do, so make sure to check out all the APIs 😀